4 Years of Halloween DIY Star Wars Cosplay for My Son
Every parent knows the October scramble: browsing picked-over costume aisles, dodging overpriced polyester jumpsuits. A few years ago, we decided to trade the store-bought route for the (Star Wars) workshop.
What started with fabric-and-foam evolved into an annual tradition, and a crash course in maker techniques. Over four Halloweens, our builds tracked a journey from fabric, thread and simple LED lights to full-scale 3D-printed armor and paint finishing. I went out and bought a cheap used sewing machine on FB Marketplace (and thankfully still remembered a few things from my Jr. High “Life Skills” class).
Here is the story of four years in a galaxy far, far away, from Kylo Ren and a Jawa to a Clone Commander and Din Djarin, and how each costume leveled up our maker game.
2023: Kylo Ren – Mask Customization and Robe Sewing
When Owen decided he wanted to step into the dark side as the Supreme Leader of the First Order, I knew this could not be a standard store-bought project. Kylo Ren’s look hinges on two things: textured fabrics and a battle-worn helmet. We also wanted to do a family costume this year with Han Solo Dad and Leia Mom (we’ll just ignore what happened to that family in Episode VII).
1. The Helmet: Custom Foam and Chrome Accents
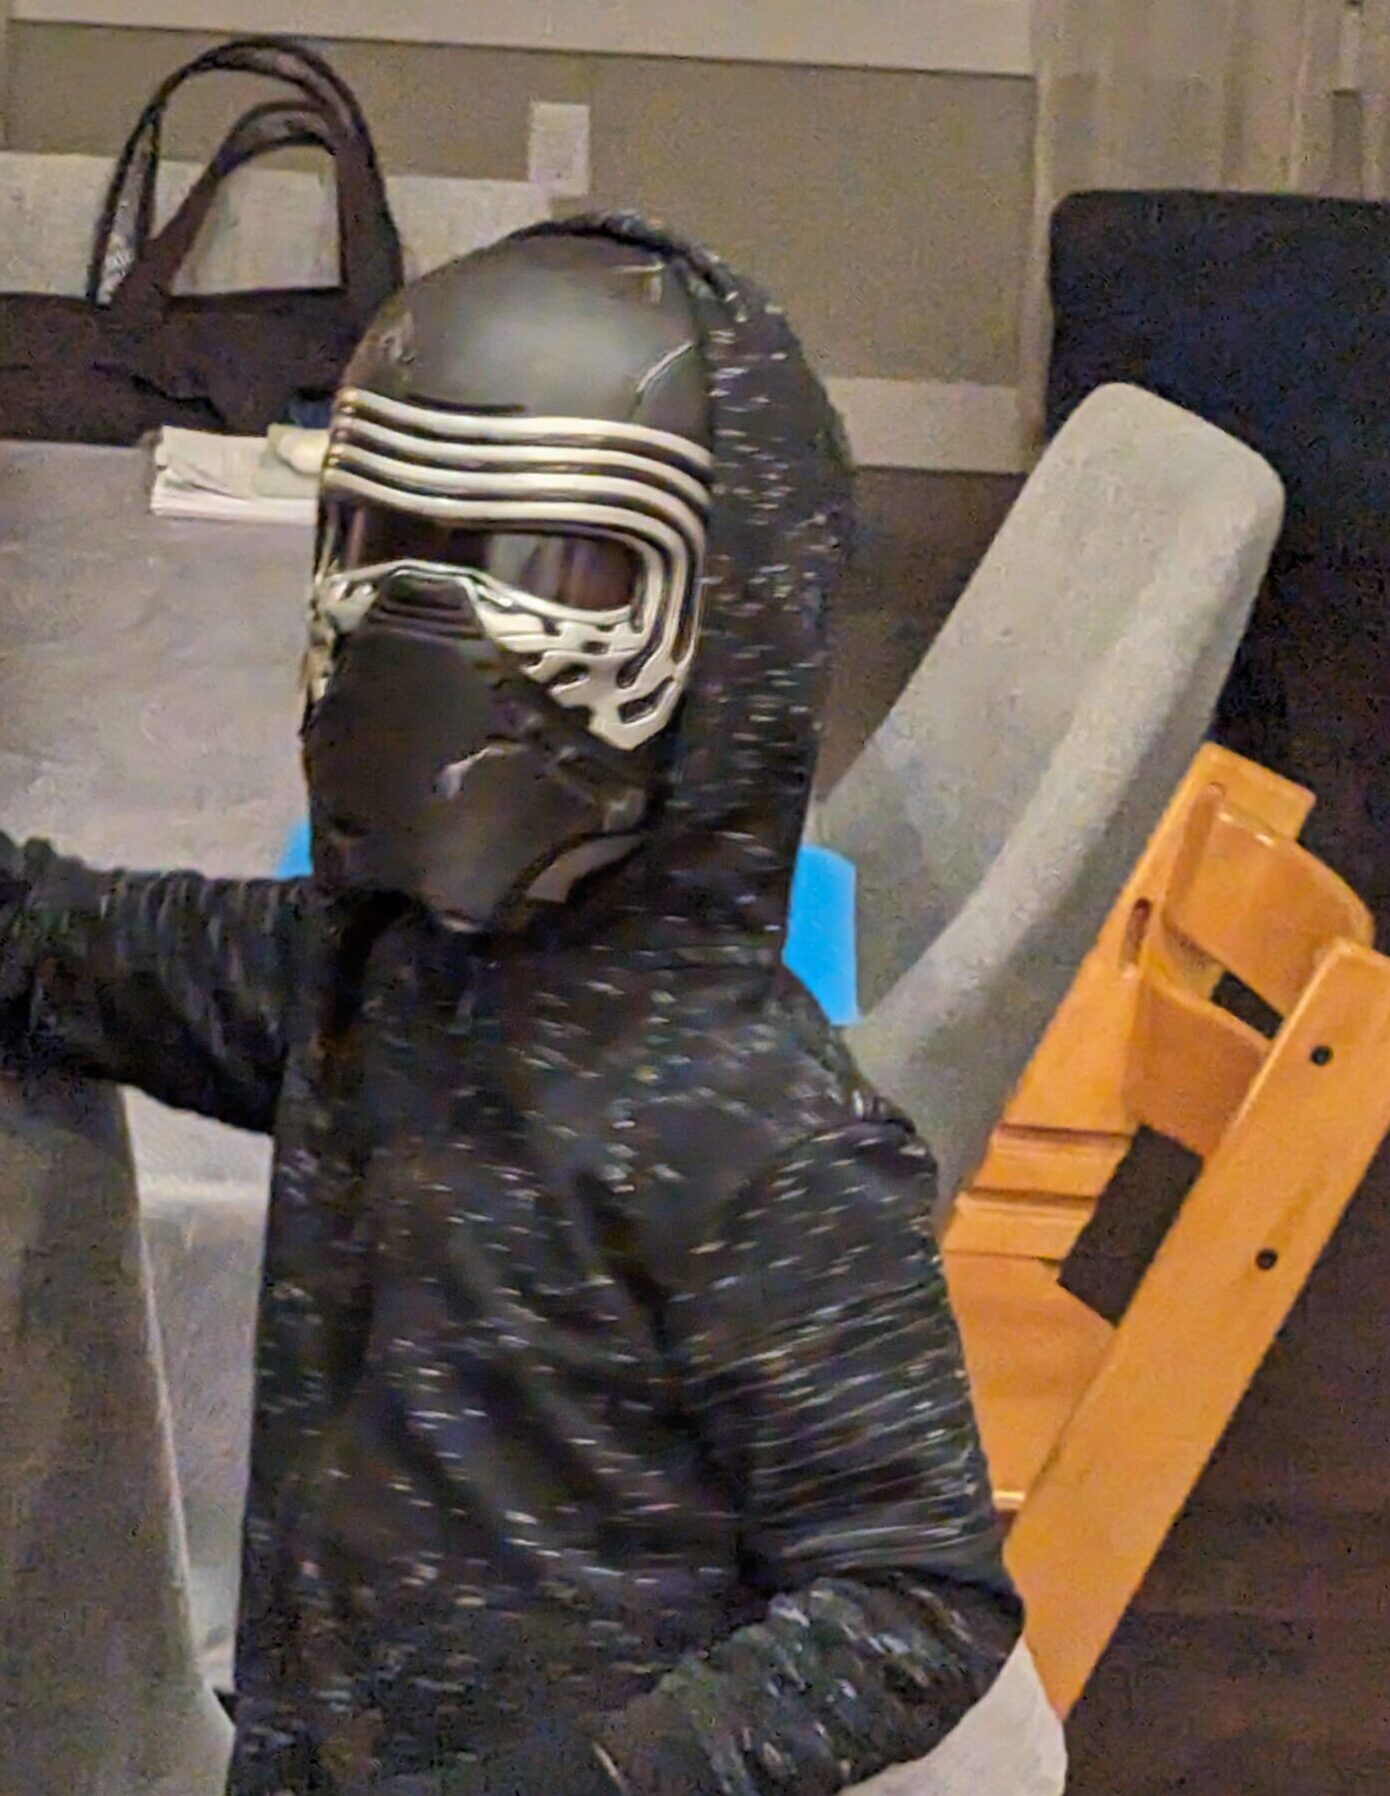
After finding a base helmet on eBay, we modified it to ensure a comfortable fit for a night out trick-or-treating instead of settling for a flimsy, hollow interior:
- Internal Padding and Sizing: We dialed in the mask fit with foam blocks inside the dome and brow. This kept the mask locked in place and stopped it from wobbling.
- The Chrome Inlay: Kylo’s faceplate features raised chrome detailing on the visor. We carefully hand-masked the recessed curves and applied metallic chrome accents with model paint to replicate the cast-metal look.
- Textured Contrast: We kept the main helmet body in a textured satin and matte black, dry-brushing subtle wear so the helmet looked like it had seen its share of battles.
2. The Fabric: Following the Jonesing2Create Pattern
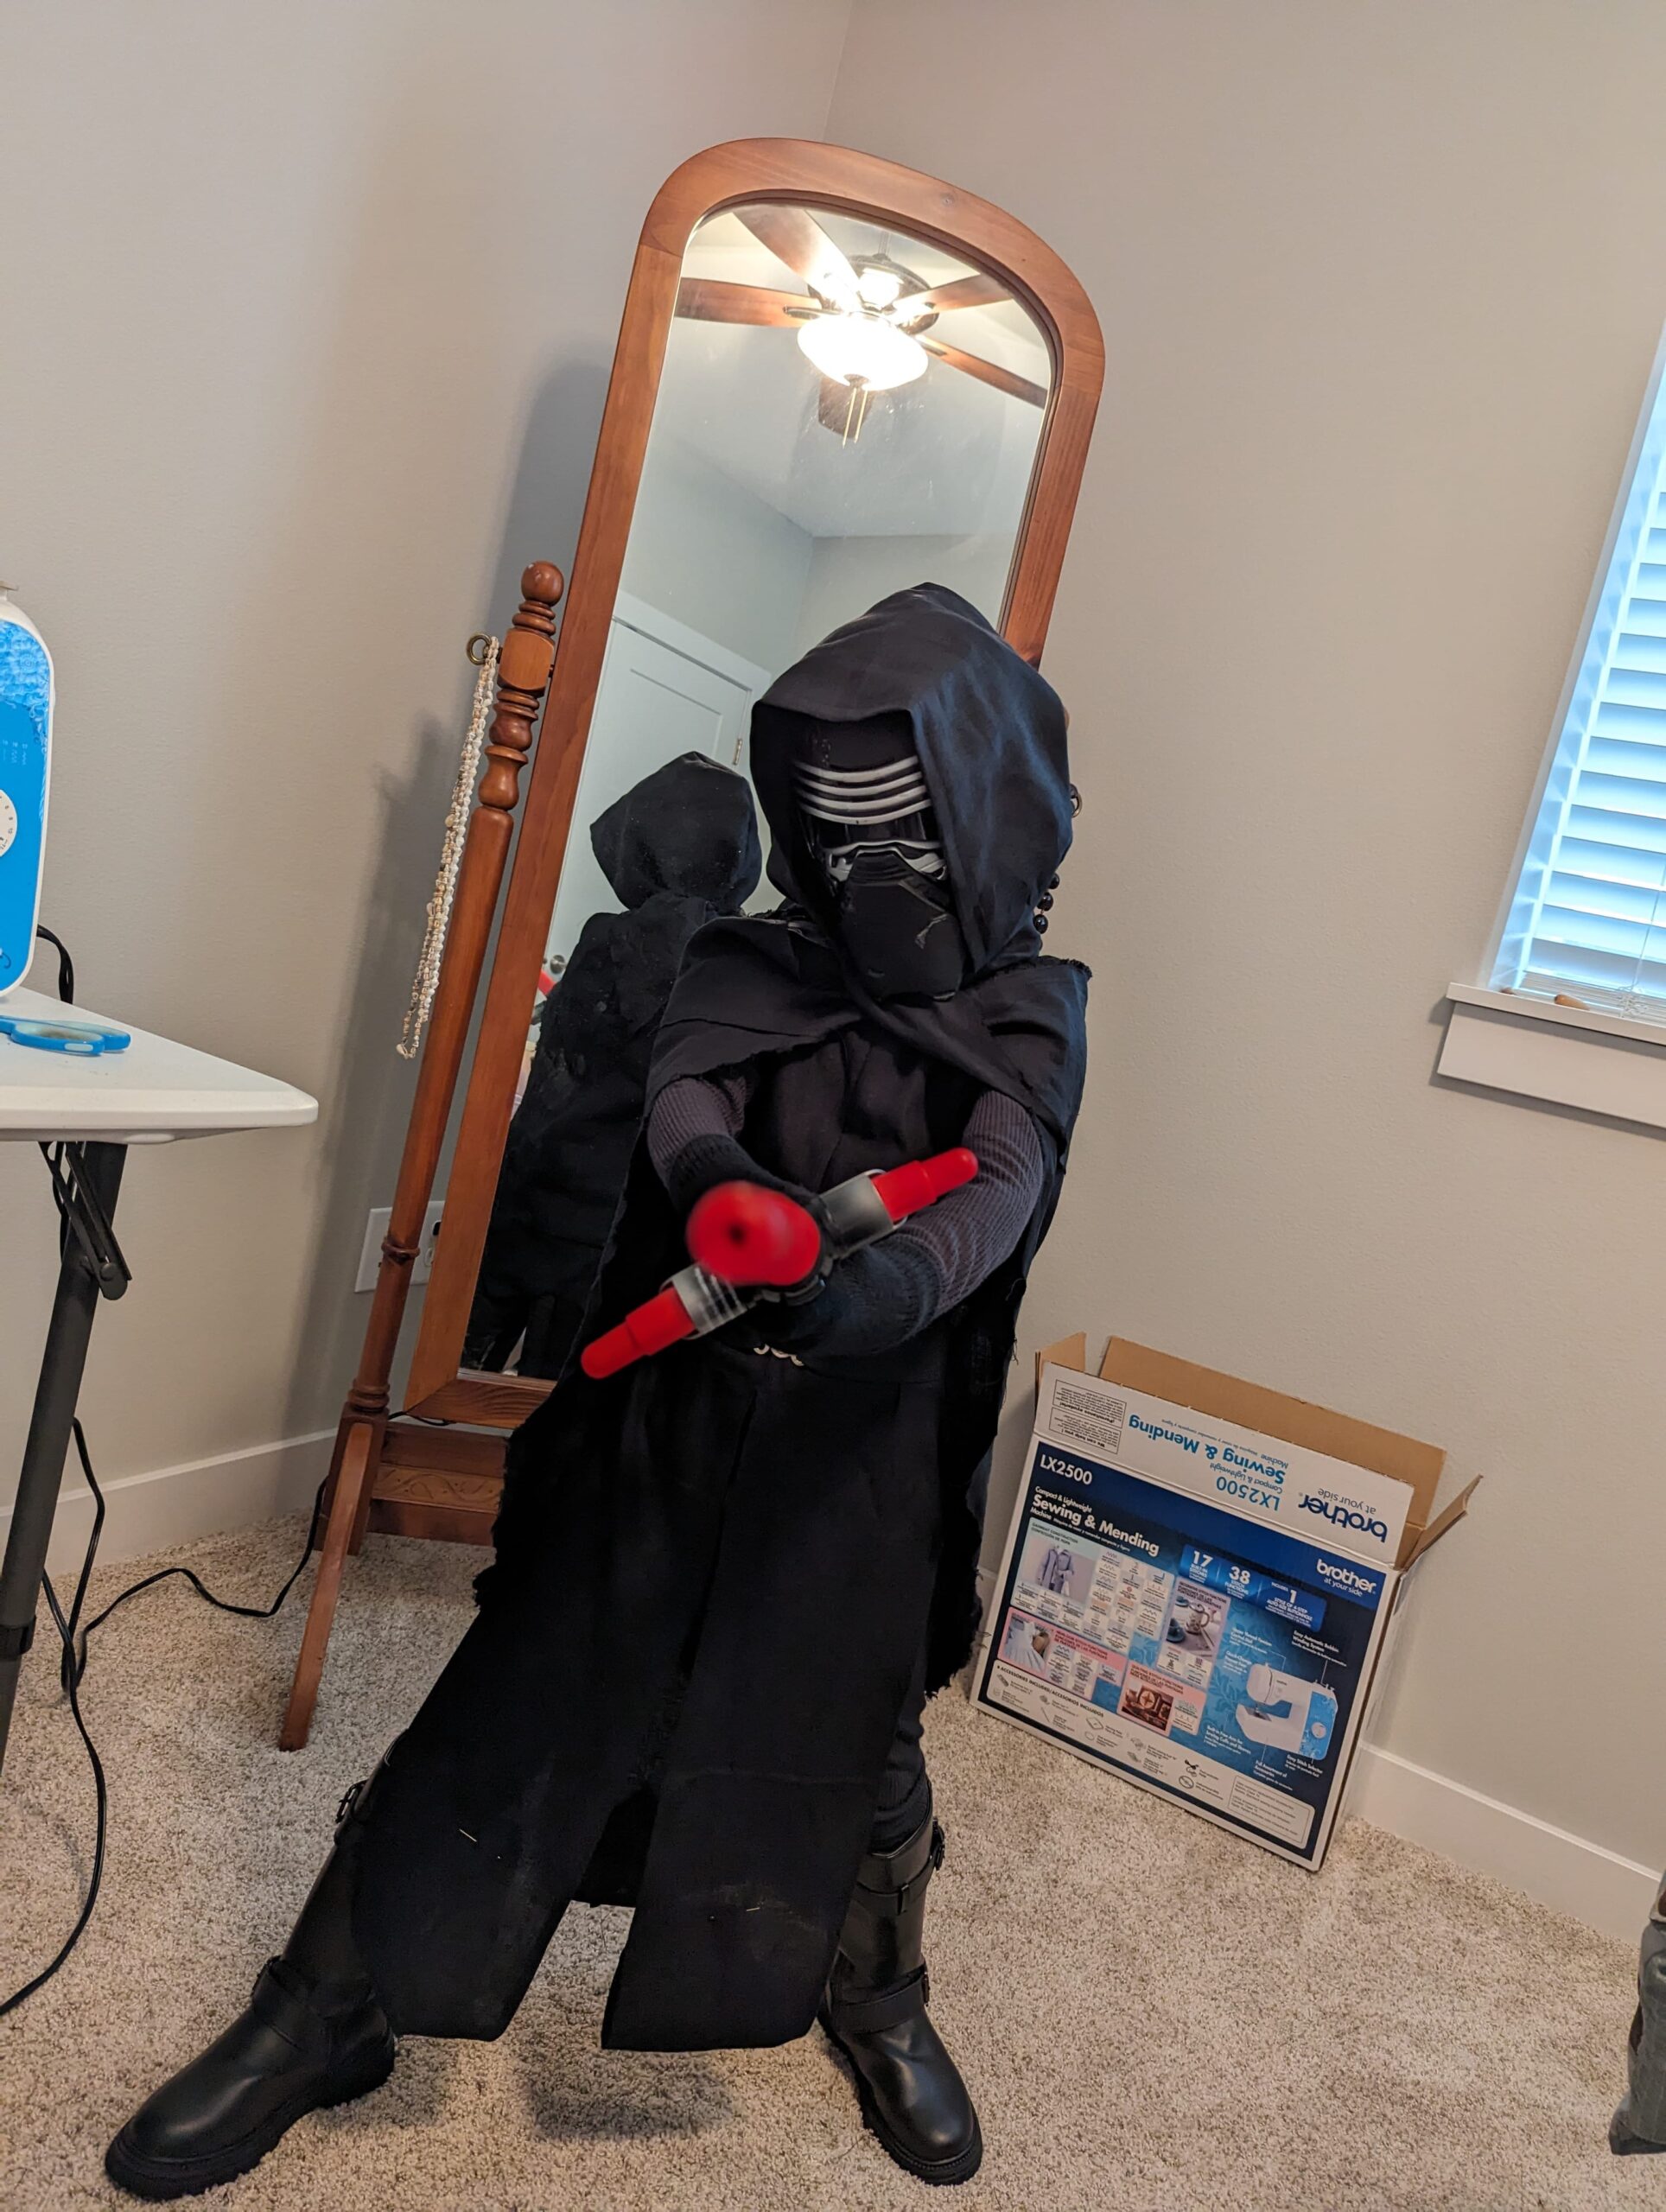
For the soft goods, we followed the homemade Kylo Ren guide from Jonesing2Create, adapting it for Owen’s measurements. This helped the costume look accurate while staying lightweight, fairly simple to construct, and easy to wear.
- The Hooded Scarf (“Scoodie”): We built the hood and cape as a continuous hooded scarf using black linen. Doubling up the linen gave clean interior seams and the right amount of drape. We cut the top back of the hood with a smooth curve so it framed the mask naturally without looking boxy.
- Fraying the Edges: We roughed up the hem and scarf edges by hand, unraveling threads along the border to achieve Kylo’s ragged appearance.
- The 4-Strip Cloak: The ankle-length outer cloak was sewn from four vertical strips of black linen, joined down to the beltline and left open below the waist. This kept the fabric swinging freely with full leg mobility.
- Belt and Hardware: We paired the cloak with a wide utility belt from Amazon, black gloves, and the signature crossguard lightsaber. This was before I had a 3D printer so a friend 3D printed the belt buckle (thanks Steve!).
- Boots: We found some cheap black leather boots on AliExpress that fit the theme.
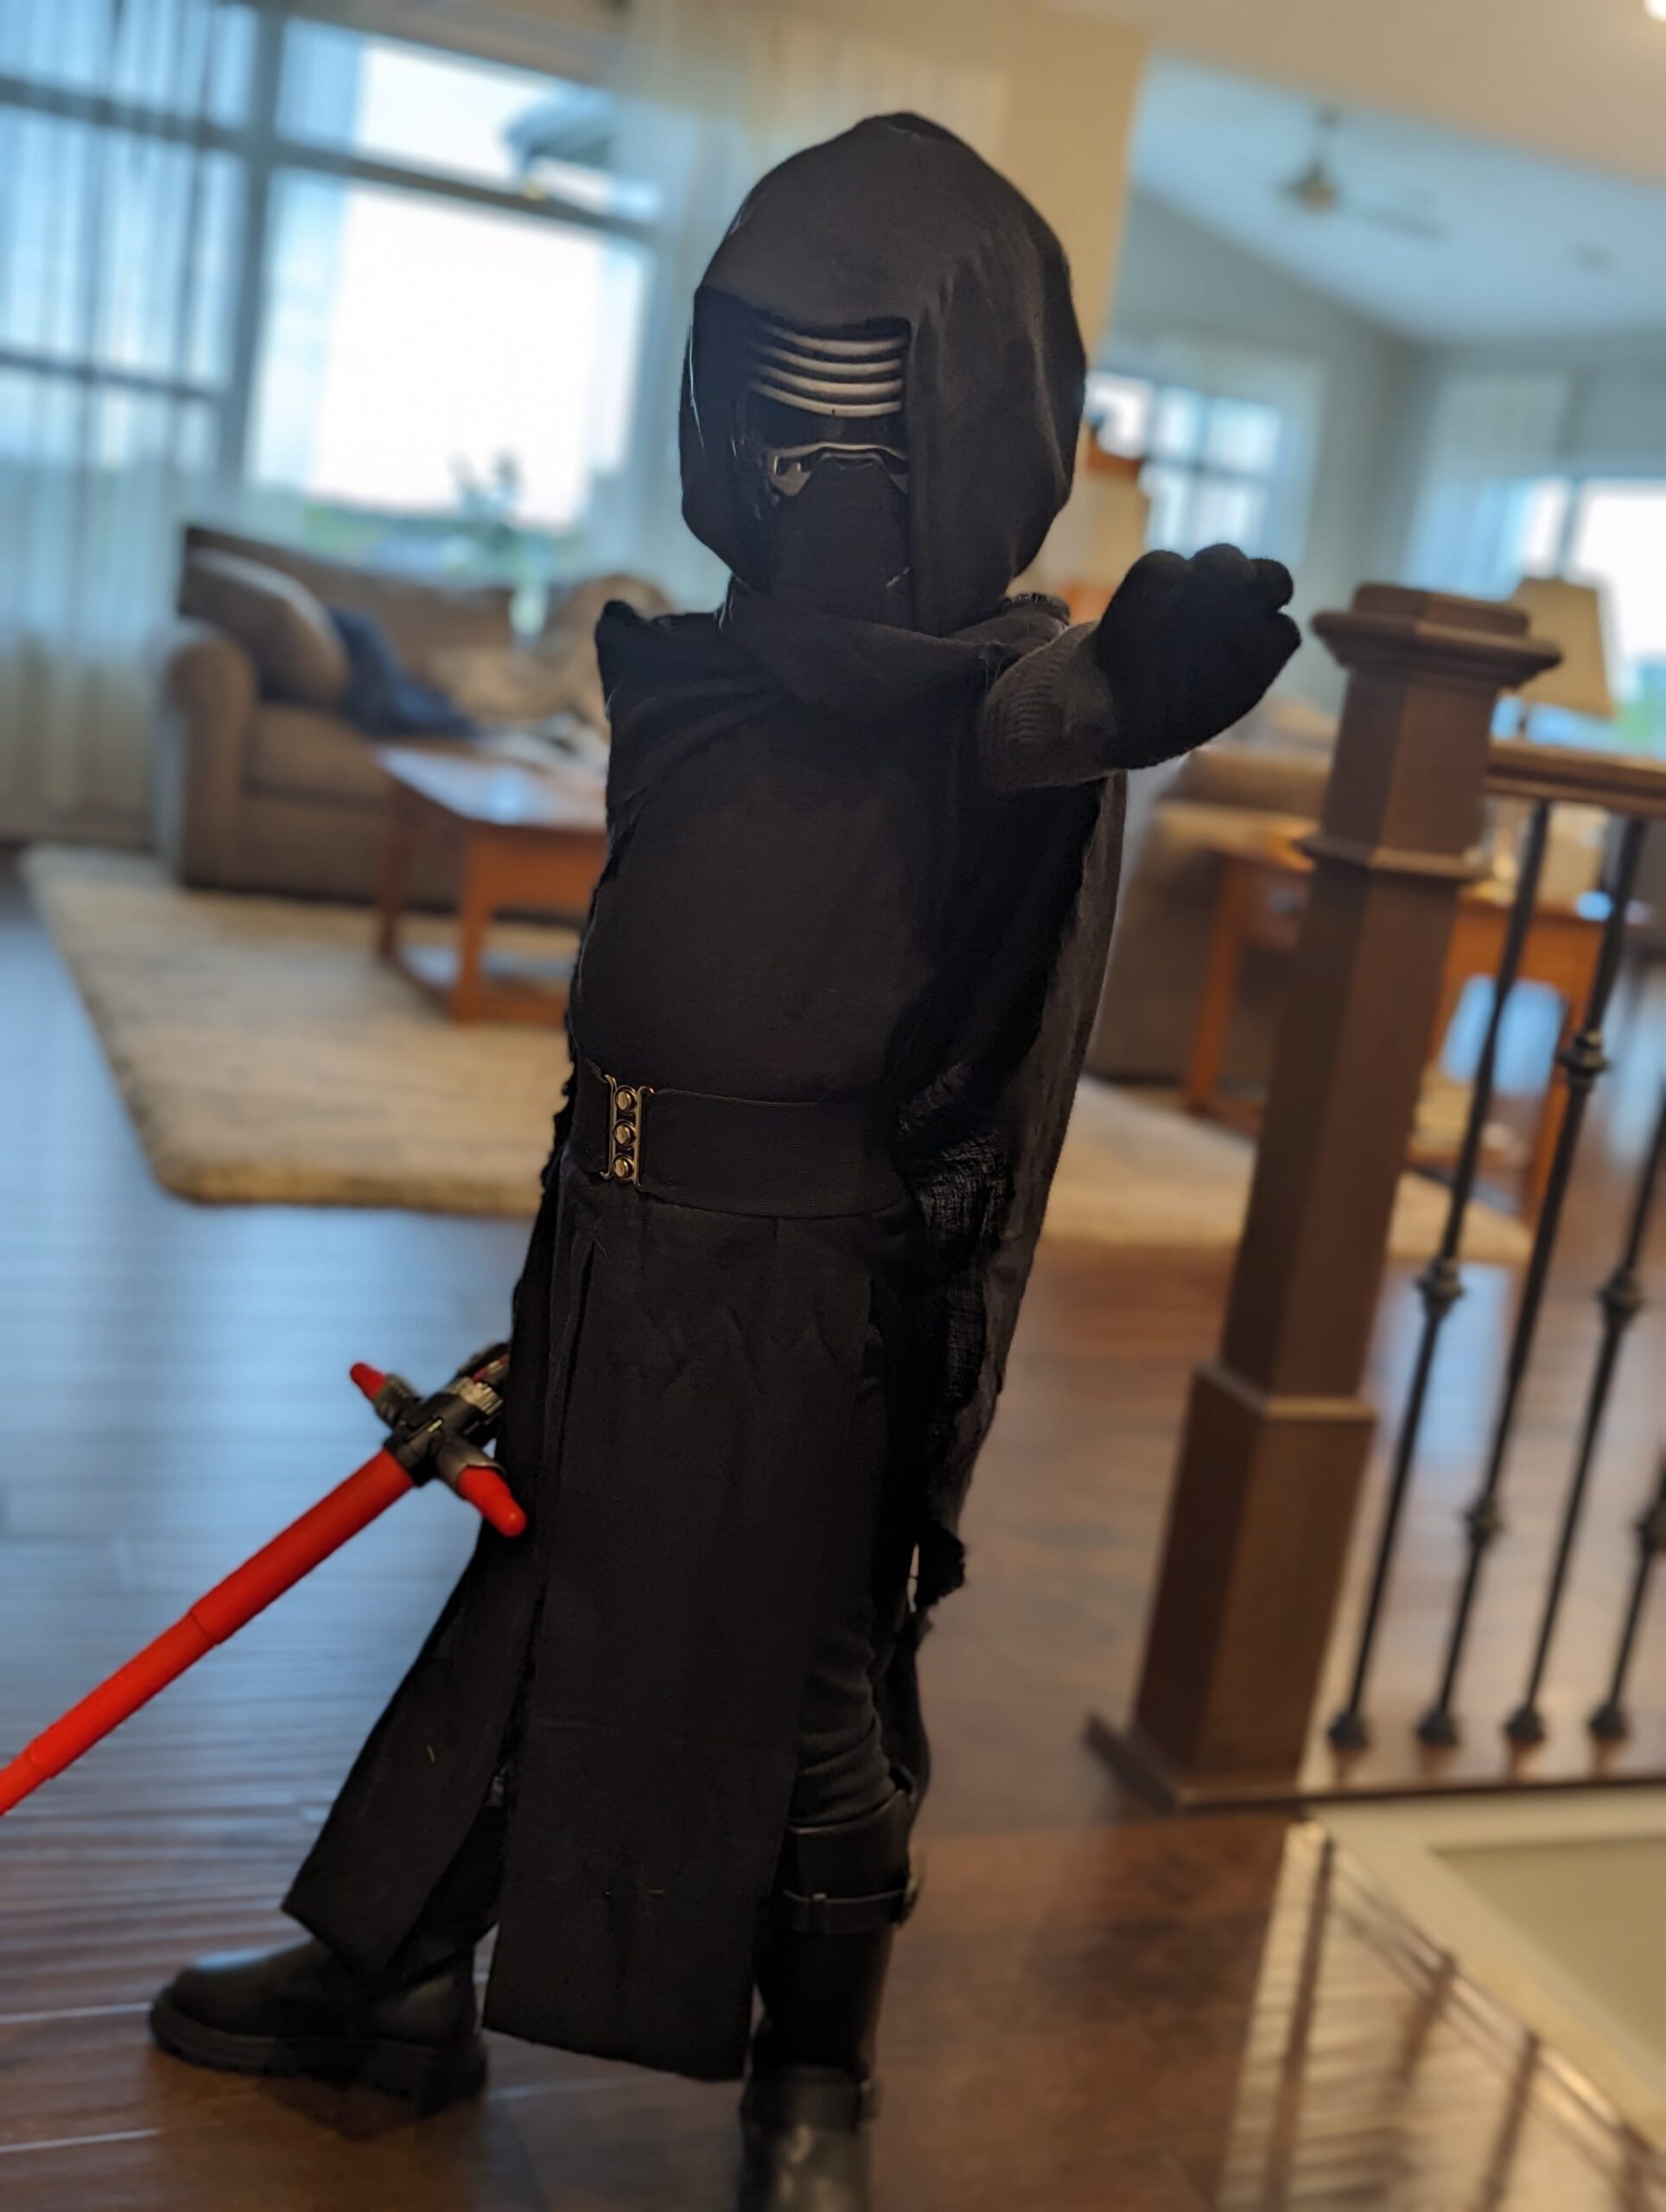
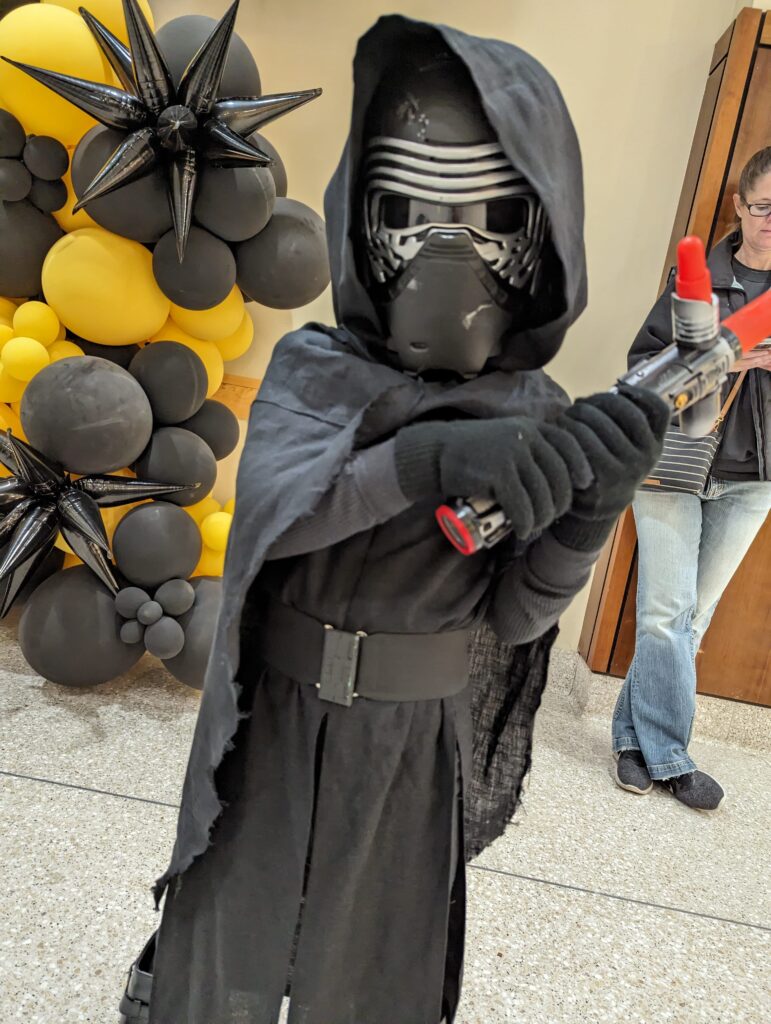
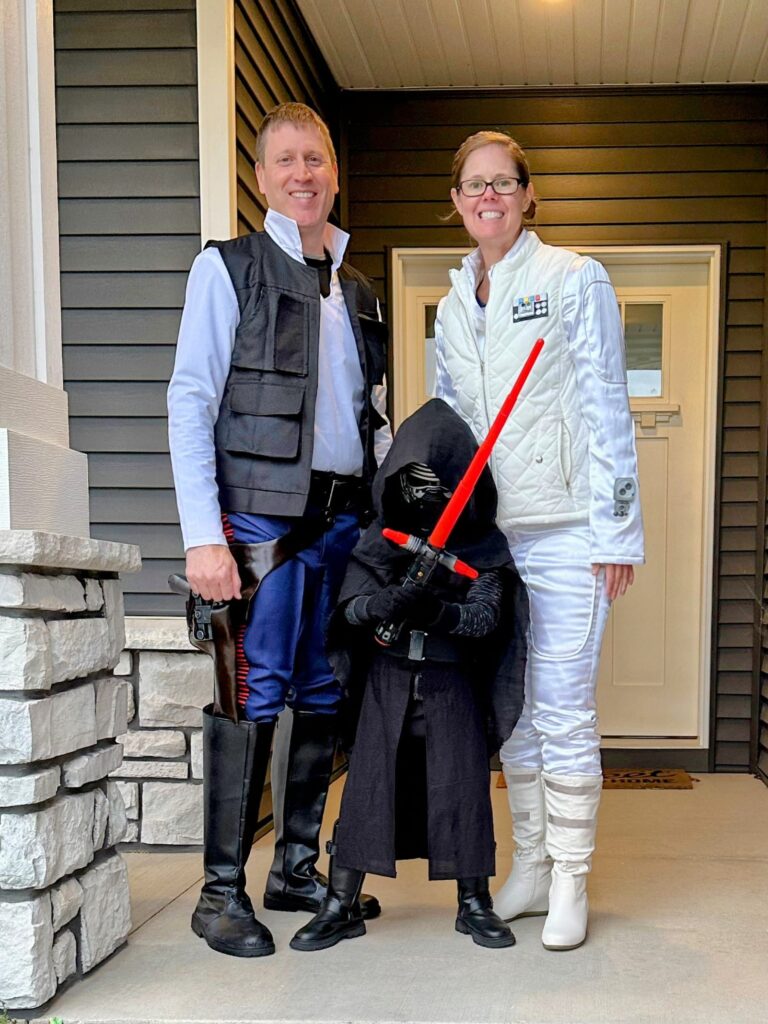
The costumes were a total success and we captured our Star Wars family photo.
2024: The Jawa – Atmosphere, Weathering, and Glowing Eyes
Switching gears from the First Order to Tatooine scavenger territory changed our build priorities. A Jawa does not need pristine lines or high-gloss paint; it demands gritty texture, rough hems, and those unmistakable yellow/orange eyes peering out from a black hood.
1. The Floating Eye Rig
The signature feature of any Jawa is the hood with two glowing orbs. The challenge is building a system that looks intensely bright from the outside while allowing an 8-year-old to navigate dark sidewalks.
- The Hockey Mask Base: We started with an inexpensive hockey face mask. The shell and adjustable straps kept everything secure on Owen’s head, while the built-in ventilation prevented fogging.
- The Blackout Scrim: We stretched breathable black see-through cloth across the entire front of the mask and mounted two sunglasses lenses in front of the eye holes. In daylight or direct lighting, it looks like pure shadow; in twilight, Owen could look straight out while his face remained completely hidden.
- Nite Ize SpotLit LEDs: For the eyes themselves, we mounted a pair of Nite Ize SpotLit LED carabiner lights in orange. These provide an even, diffused glow without needing custom wiring or soldering.
2. Crafting the Scavenger Robe
To help visualize the assembly, we used this video for construction of the robes. The design was based on the classic RPF Jawa costume pattern diagram:
- Shoulder Fold: Following the pattern, we folded the fabric at the top across the shoulders rather than cutting a shoulder seam. This gives the robe its authentic seamless drape and flares out into an A-line.
- Bell Sleeves: We cut wide bell sleeves from the remaining fabric, joining them at the shoulder drops so Owen had total freedom of motion.
- Bandoliers and Leather Gear: For the scavenger hardware, we used a reproduction ammo pouch bandolier across the chest and paired it with a vintage surplus belt from eBay.
- The Ionization Blaster: We built a custom blaster by modifying an old toy gun from eBay as the base and added PVC pipe fittings from Lowe’s for the stepped barrel. A quick coat of satin black paint and dry-brushed silver weathering gave it that perfectly scavenged desert look.
- Boots: We found some cheap rain boots at WalMart and wrapped and glued frayed pieces of the robe fabric. We then spray painted them with beige paint to add the effect of Tatooine desert dust.
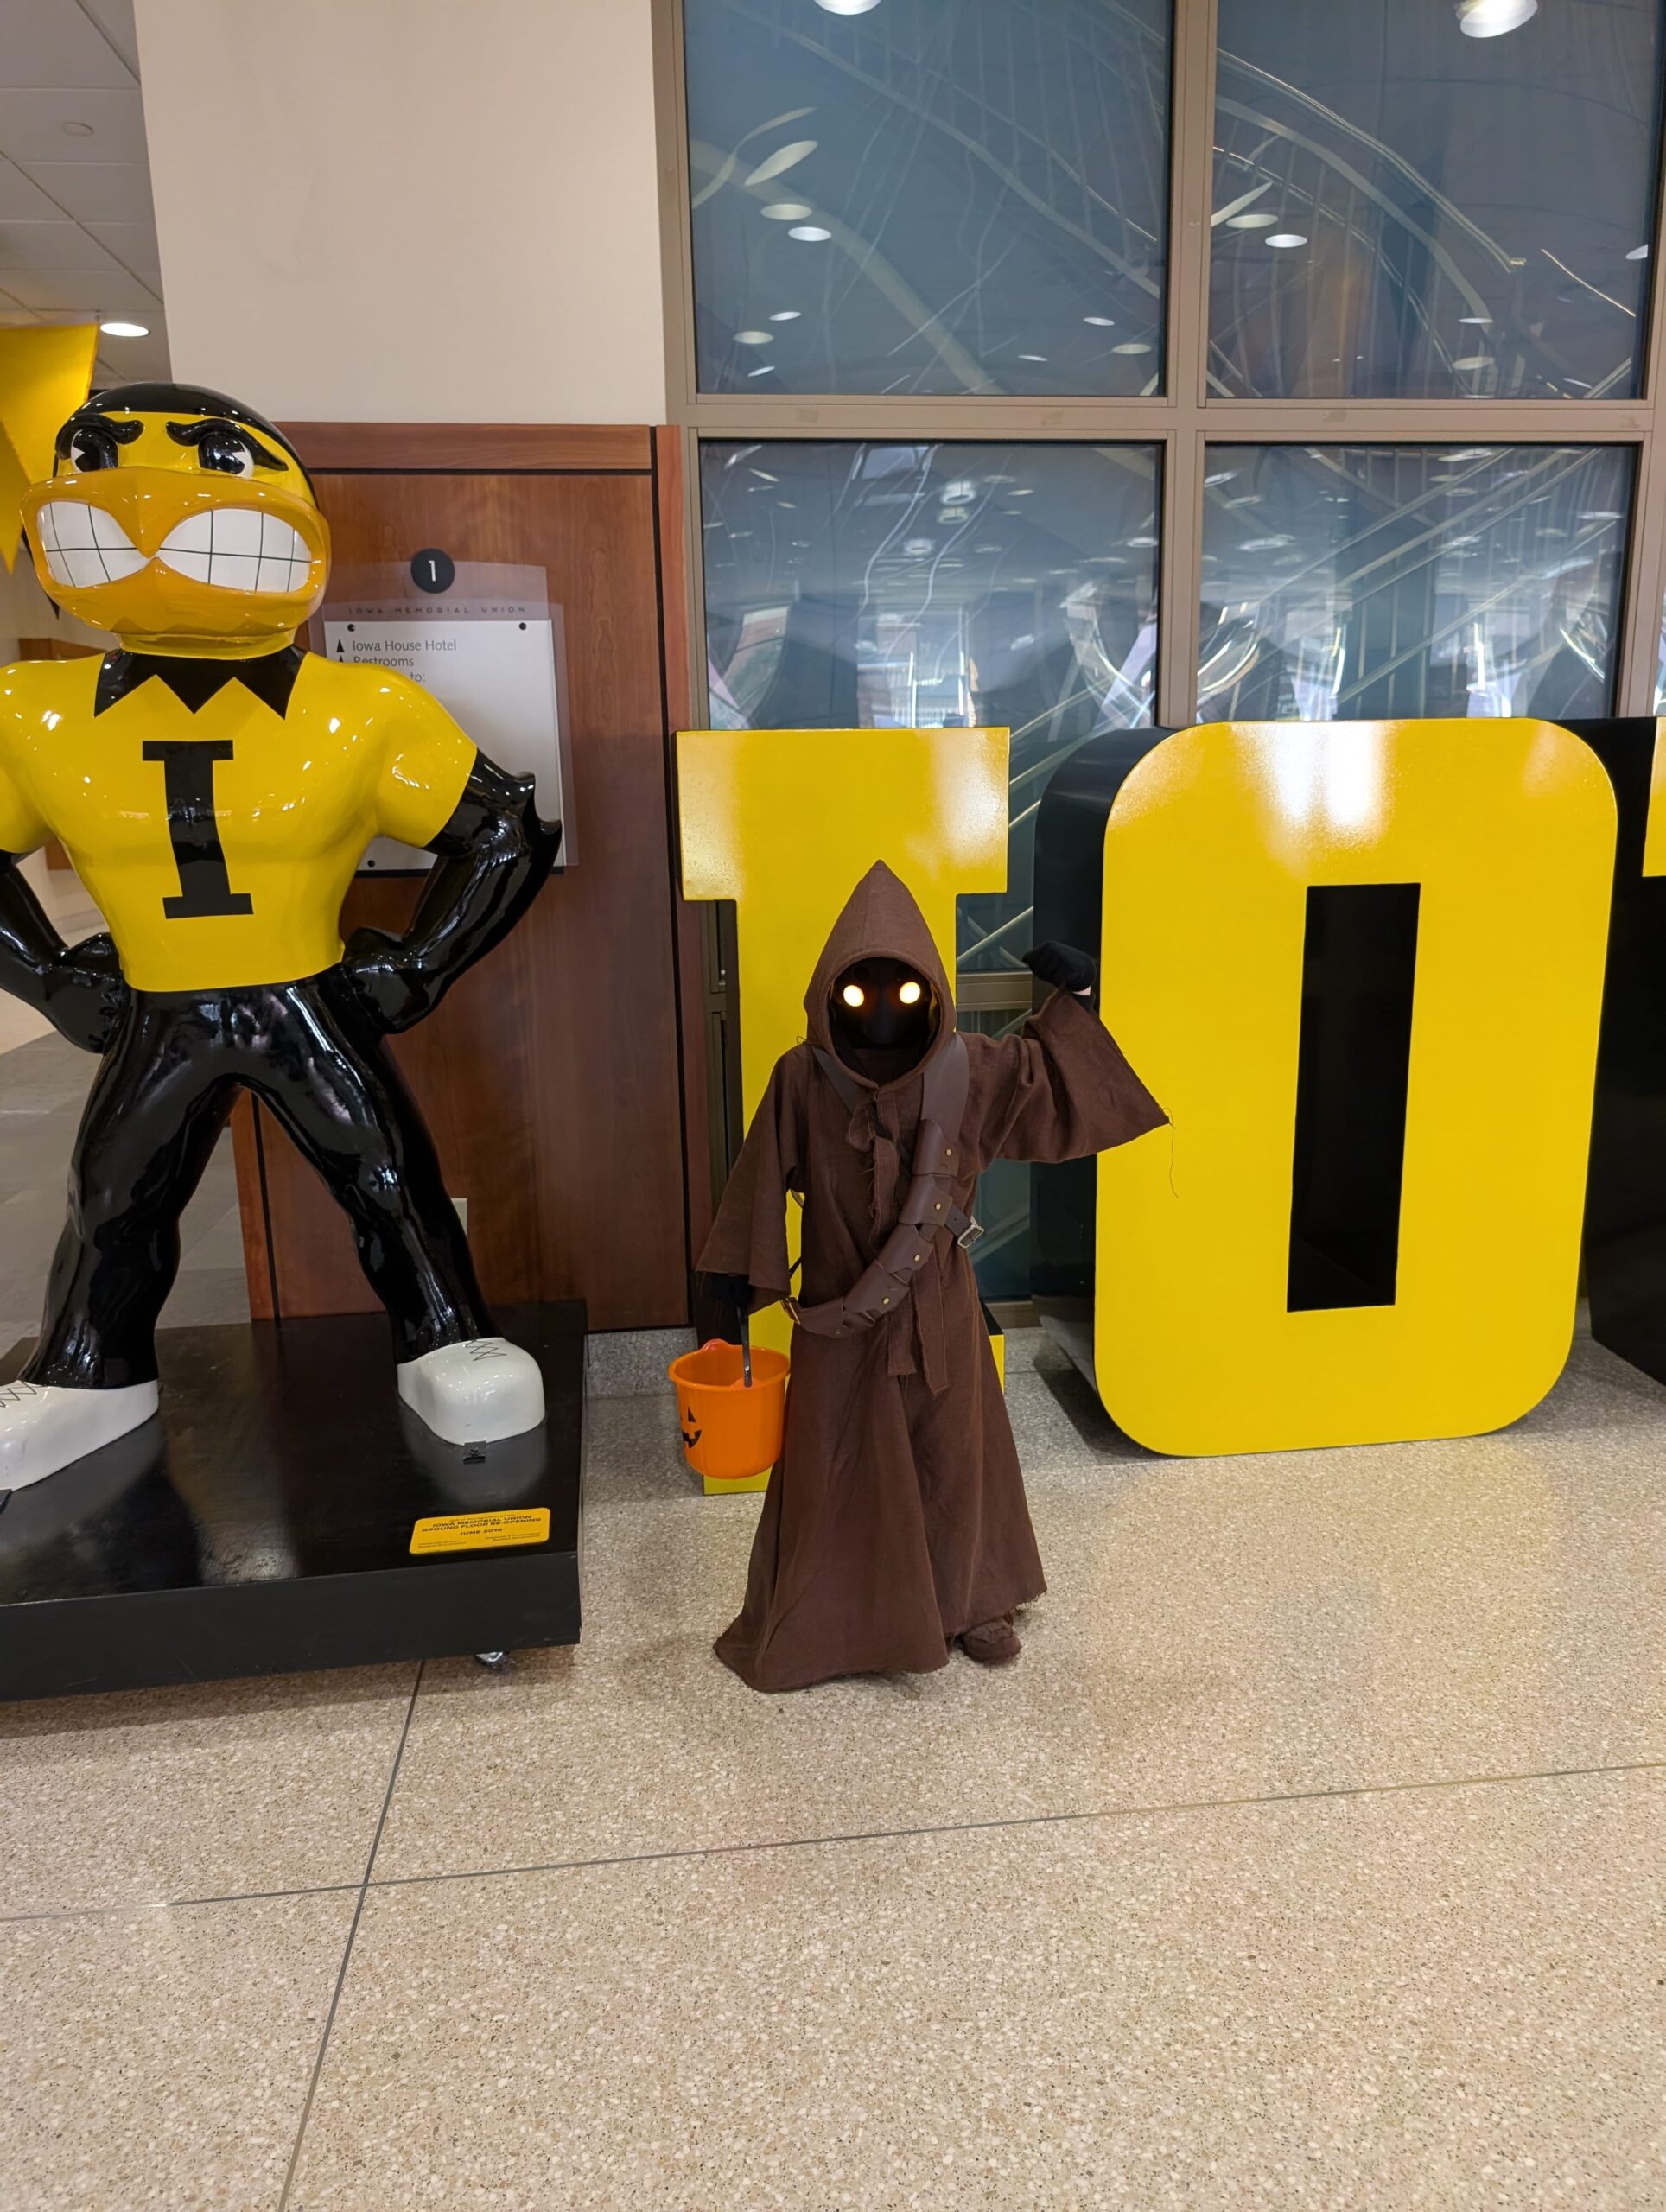
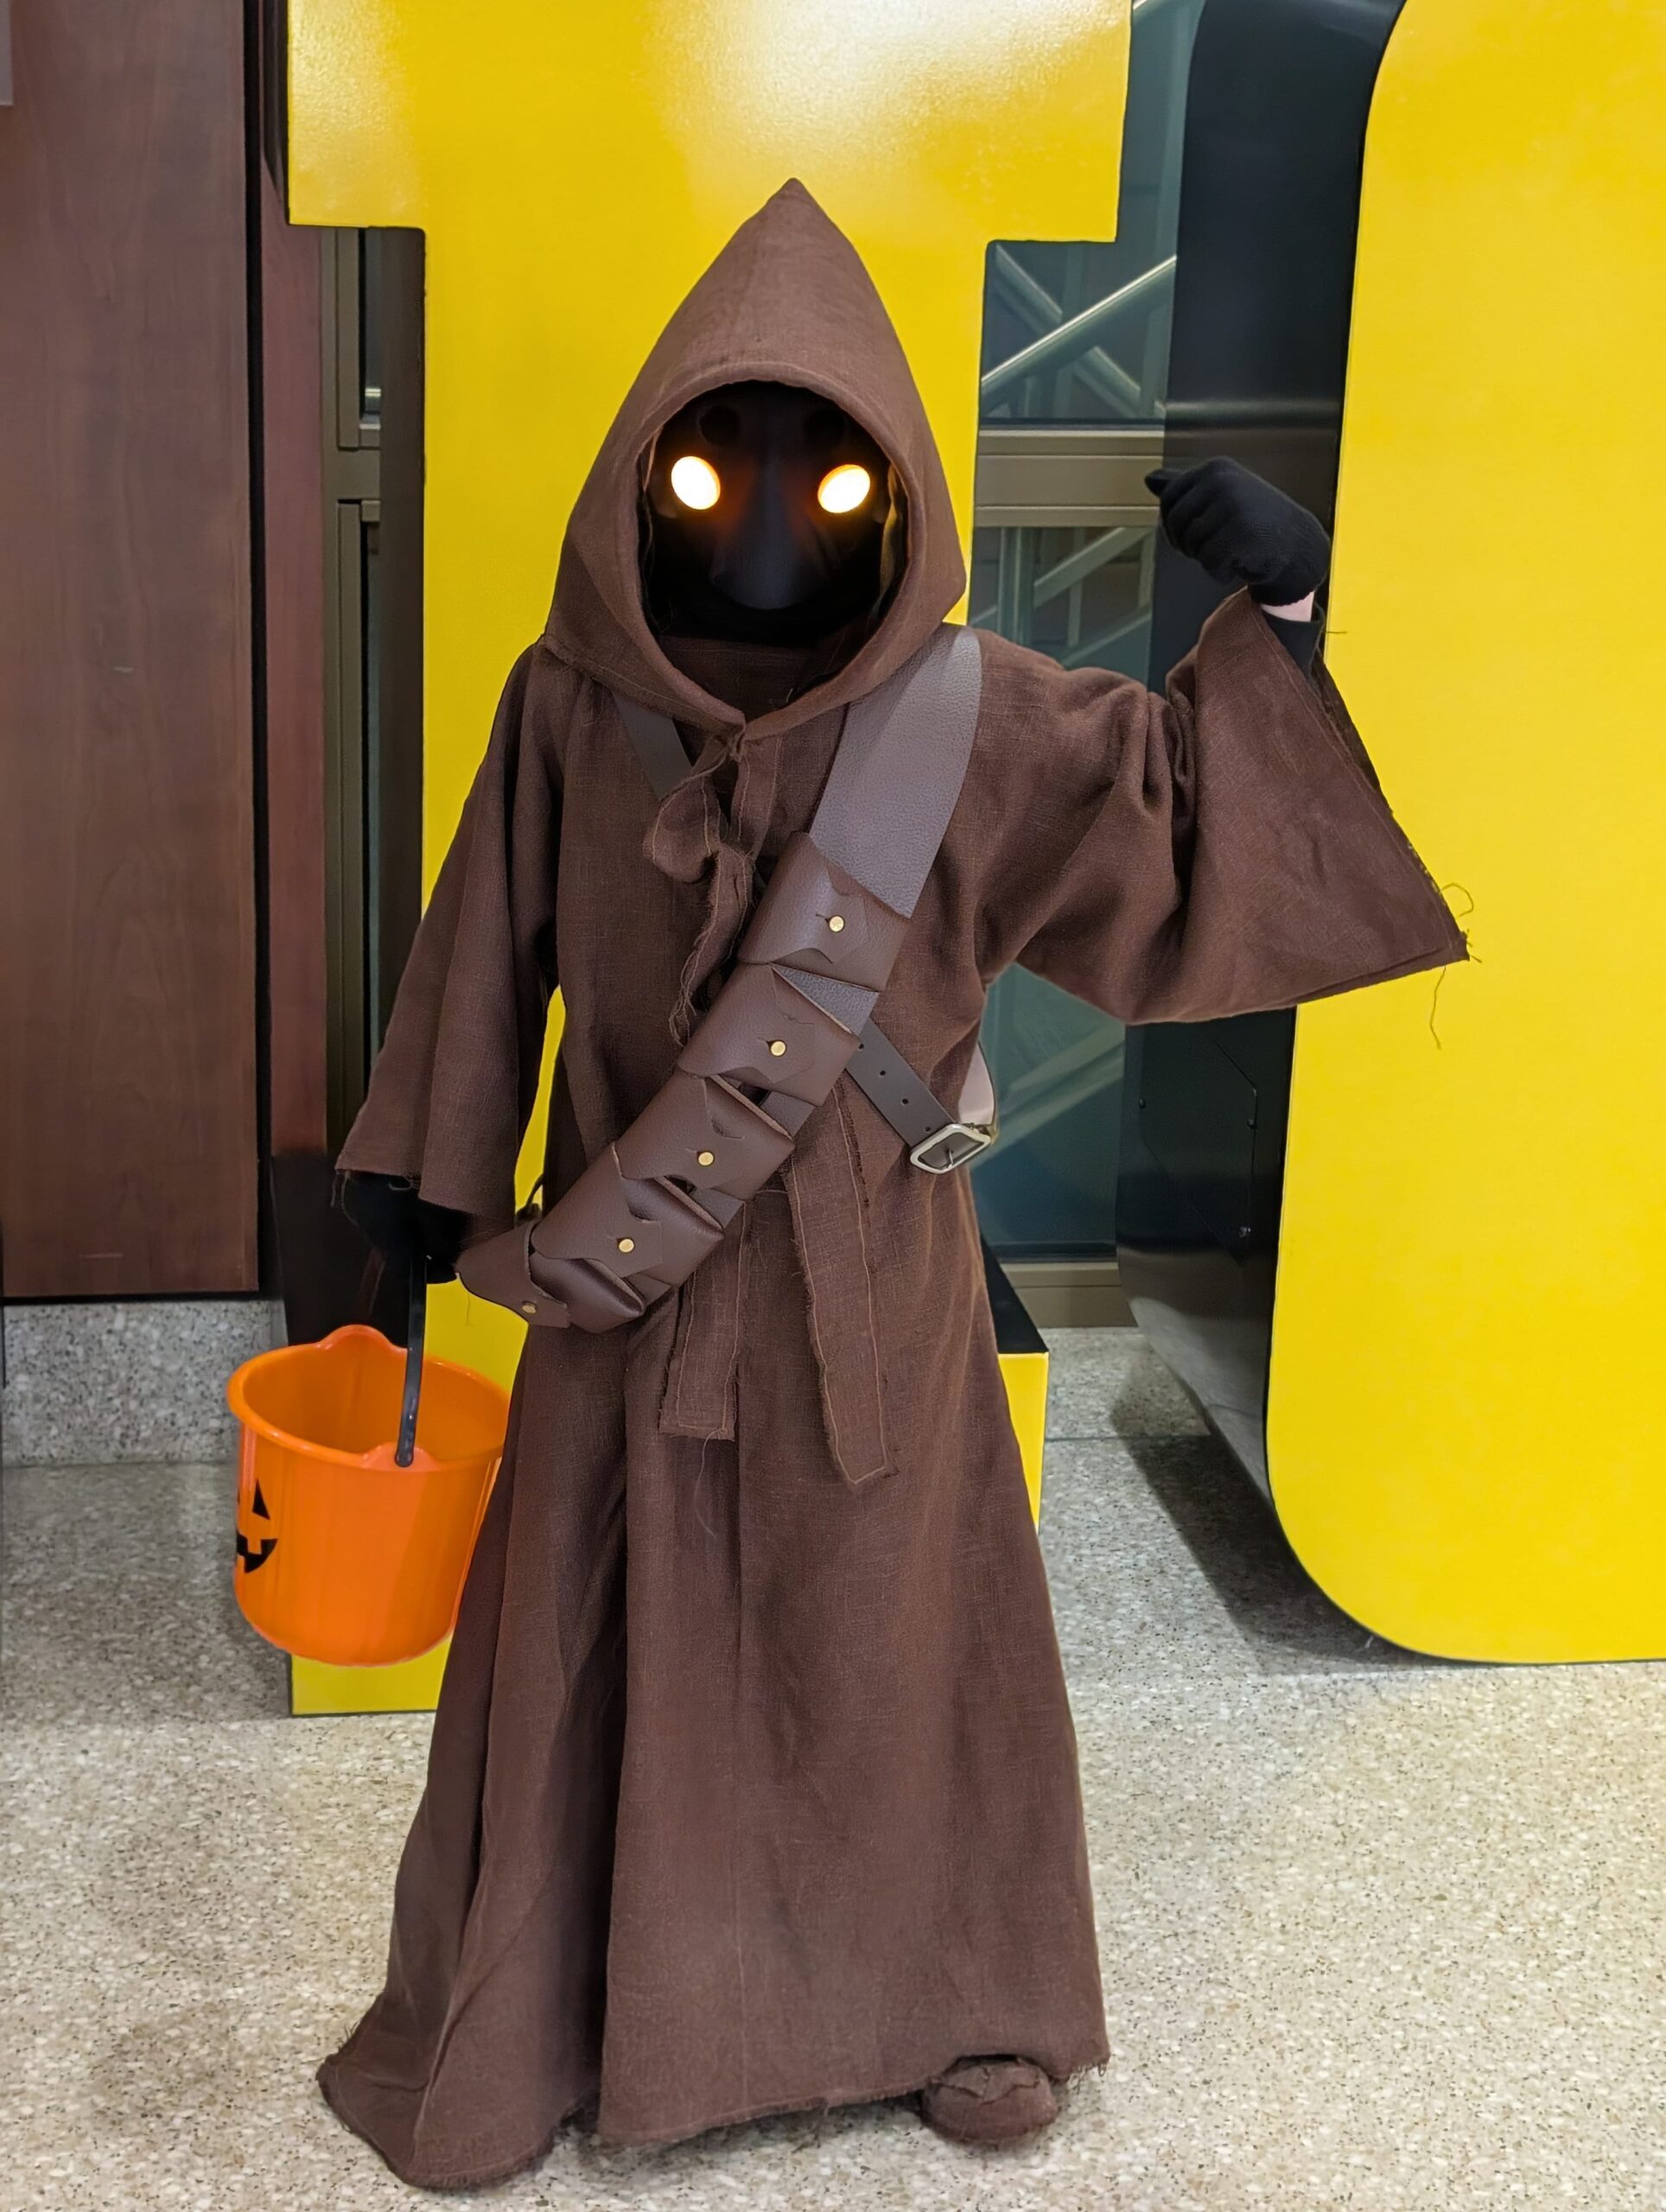
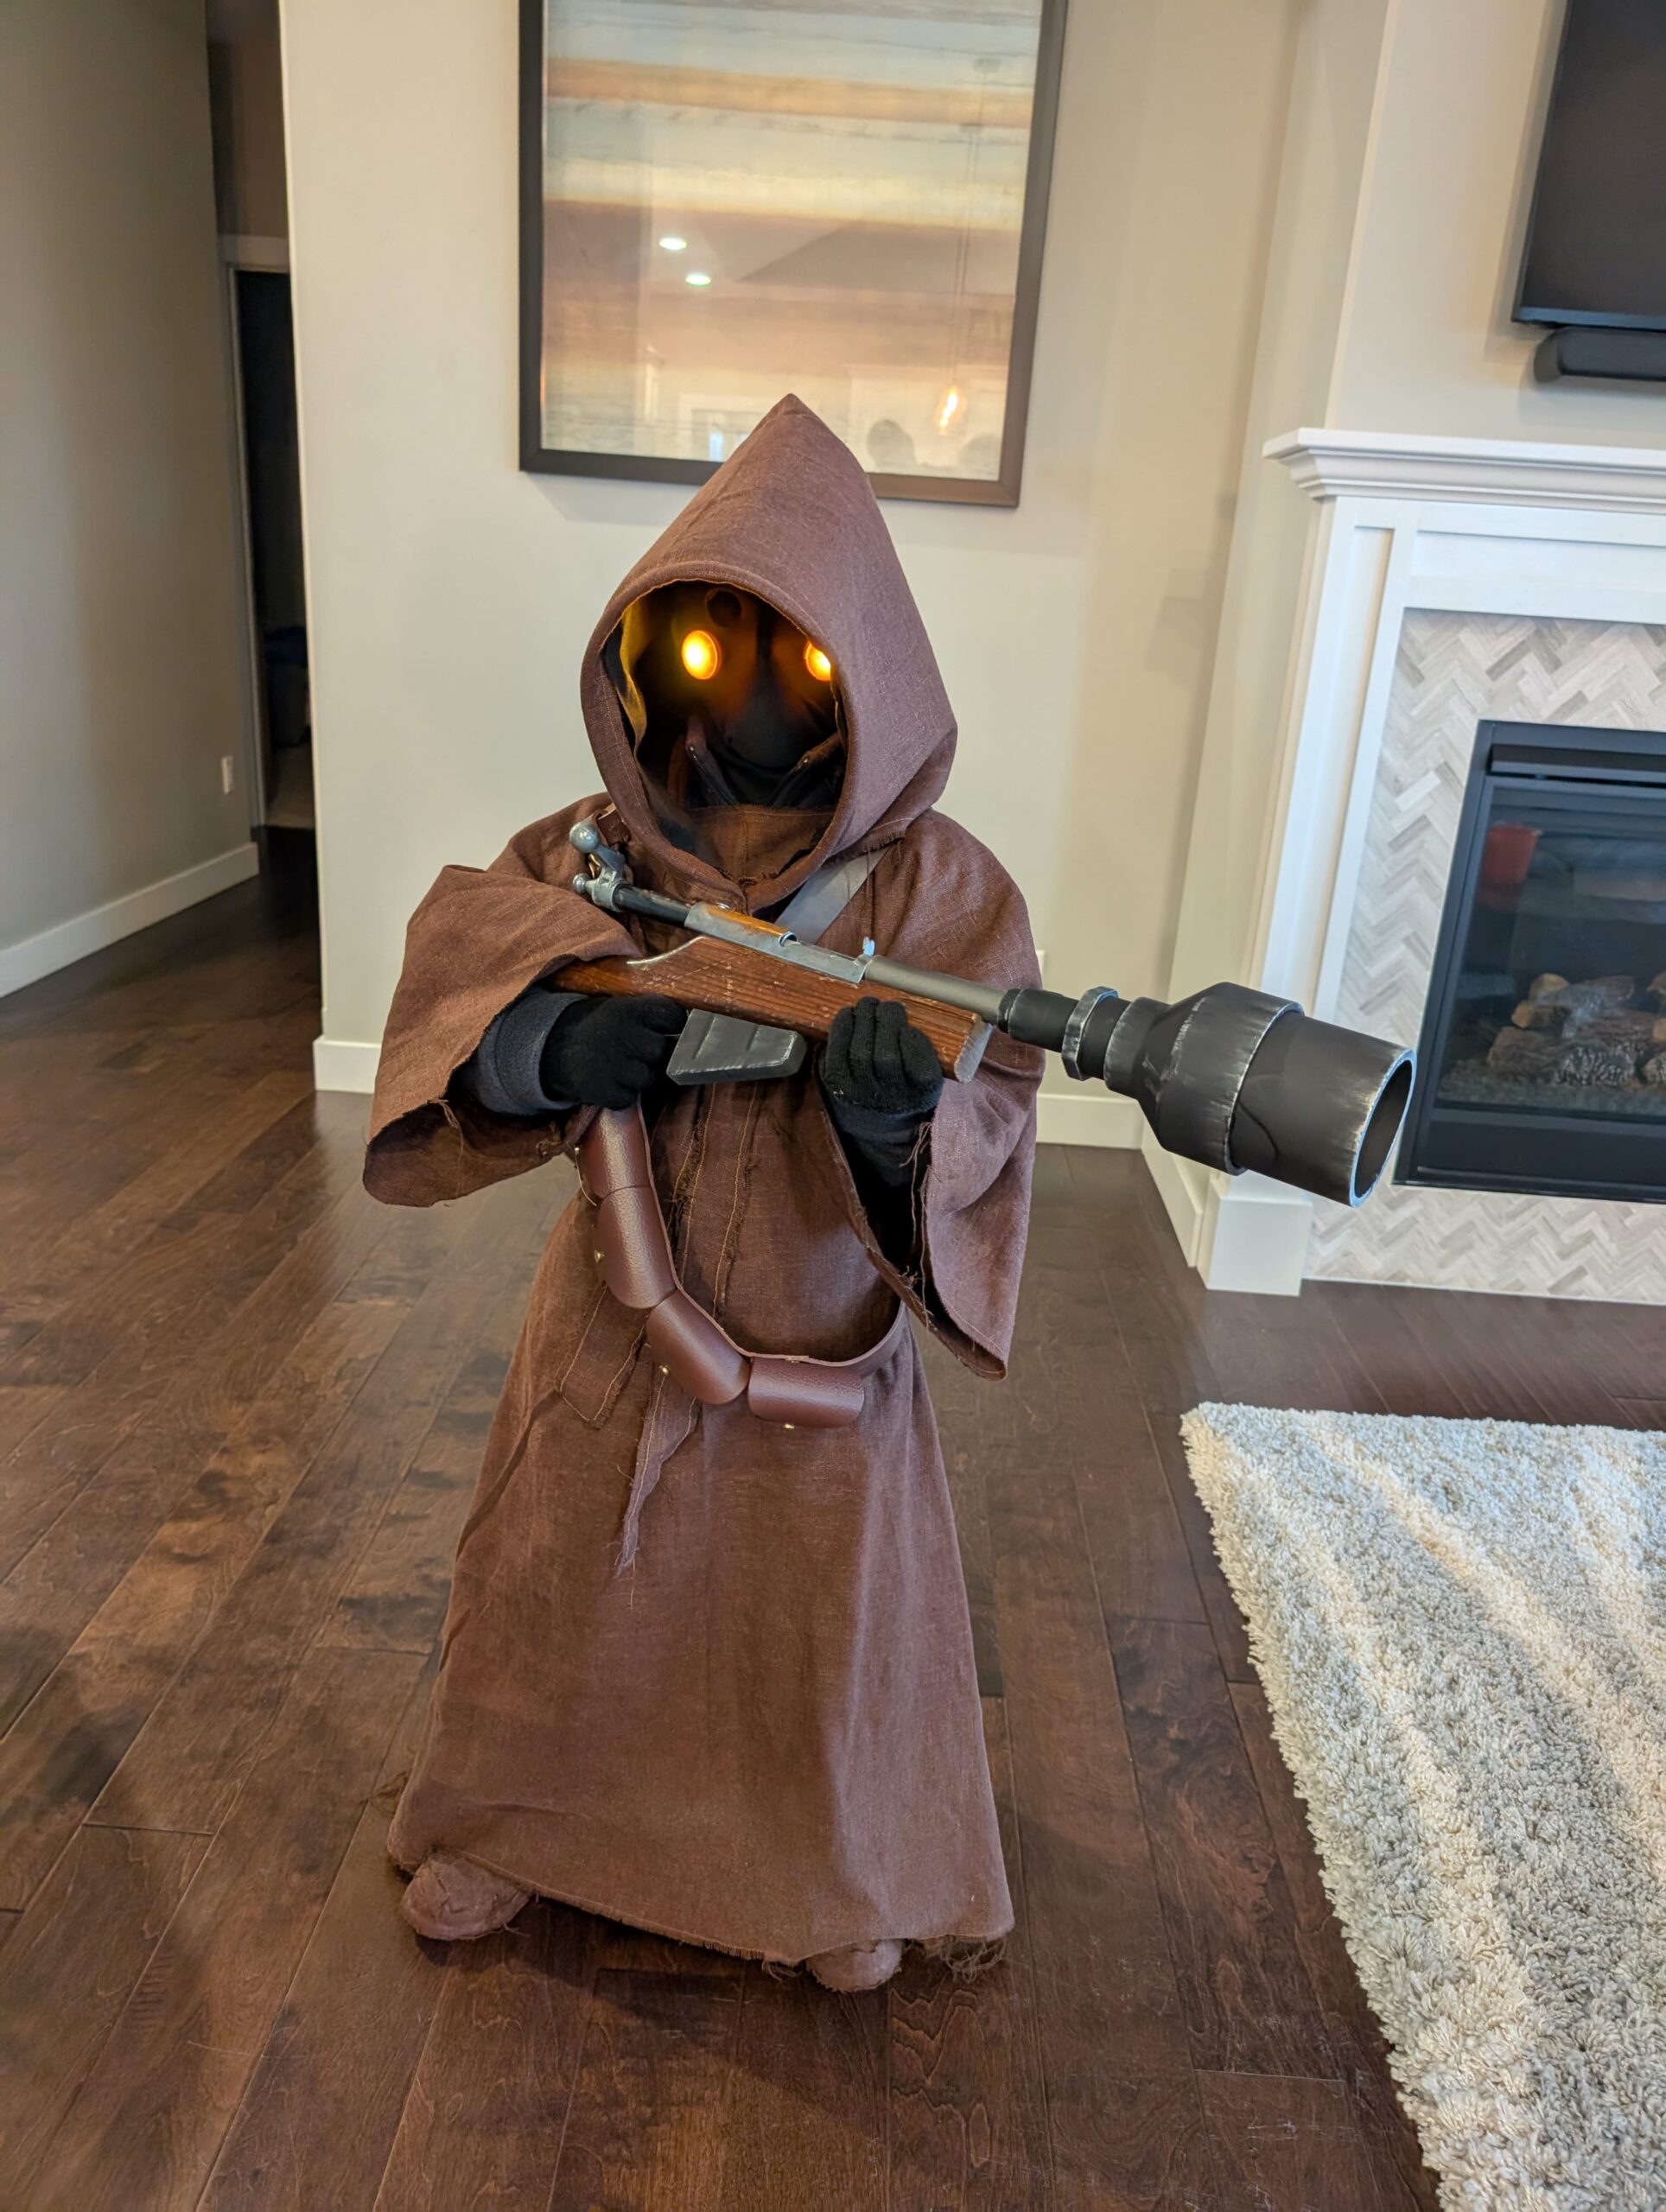
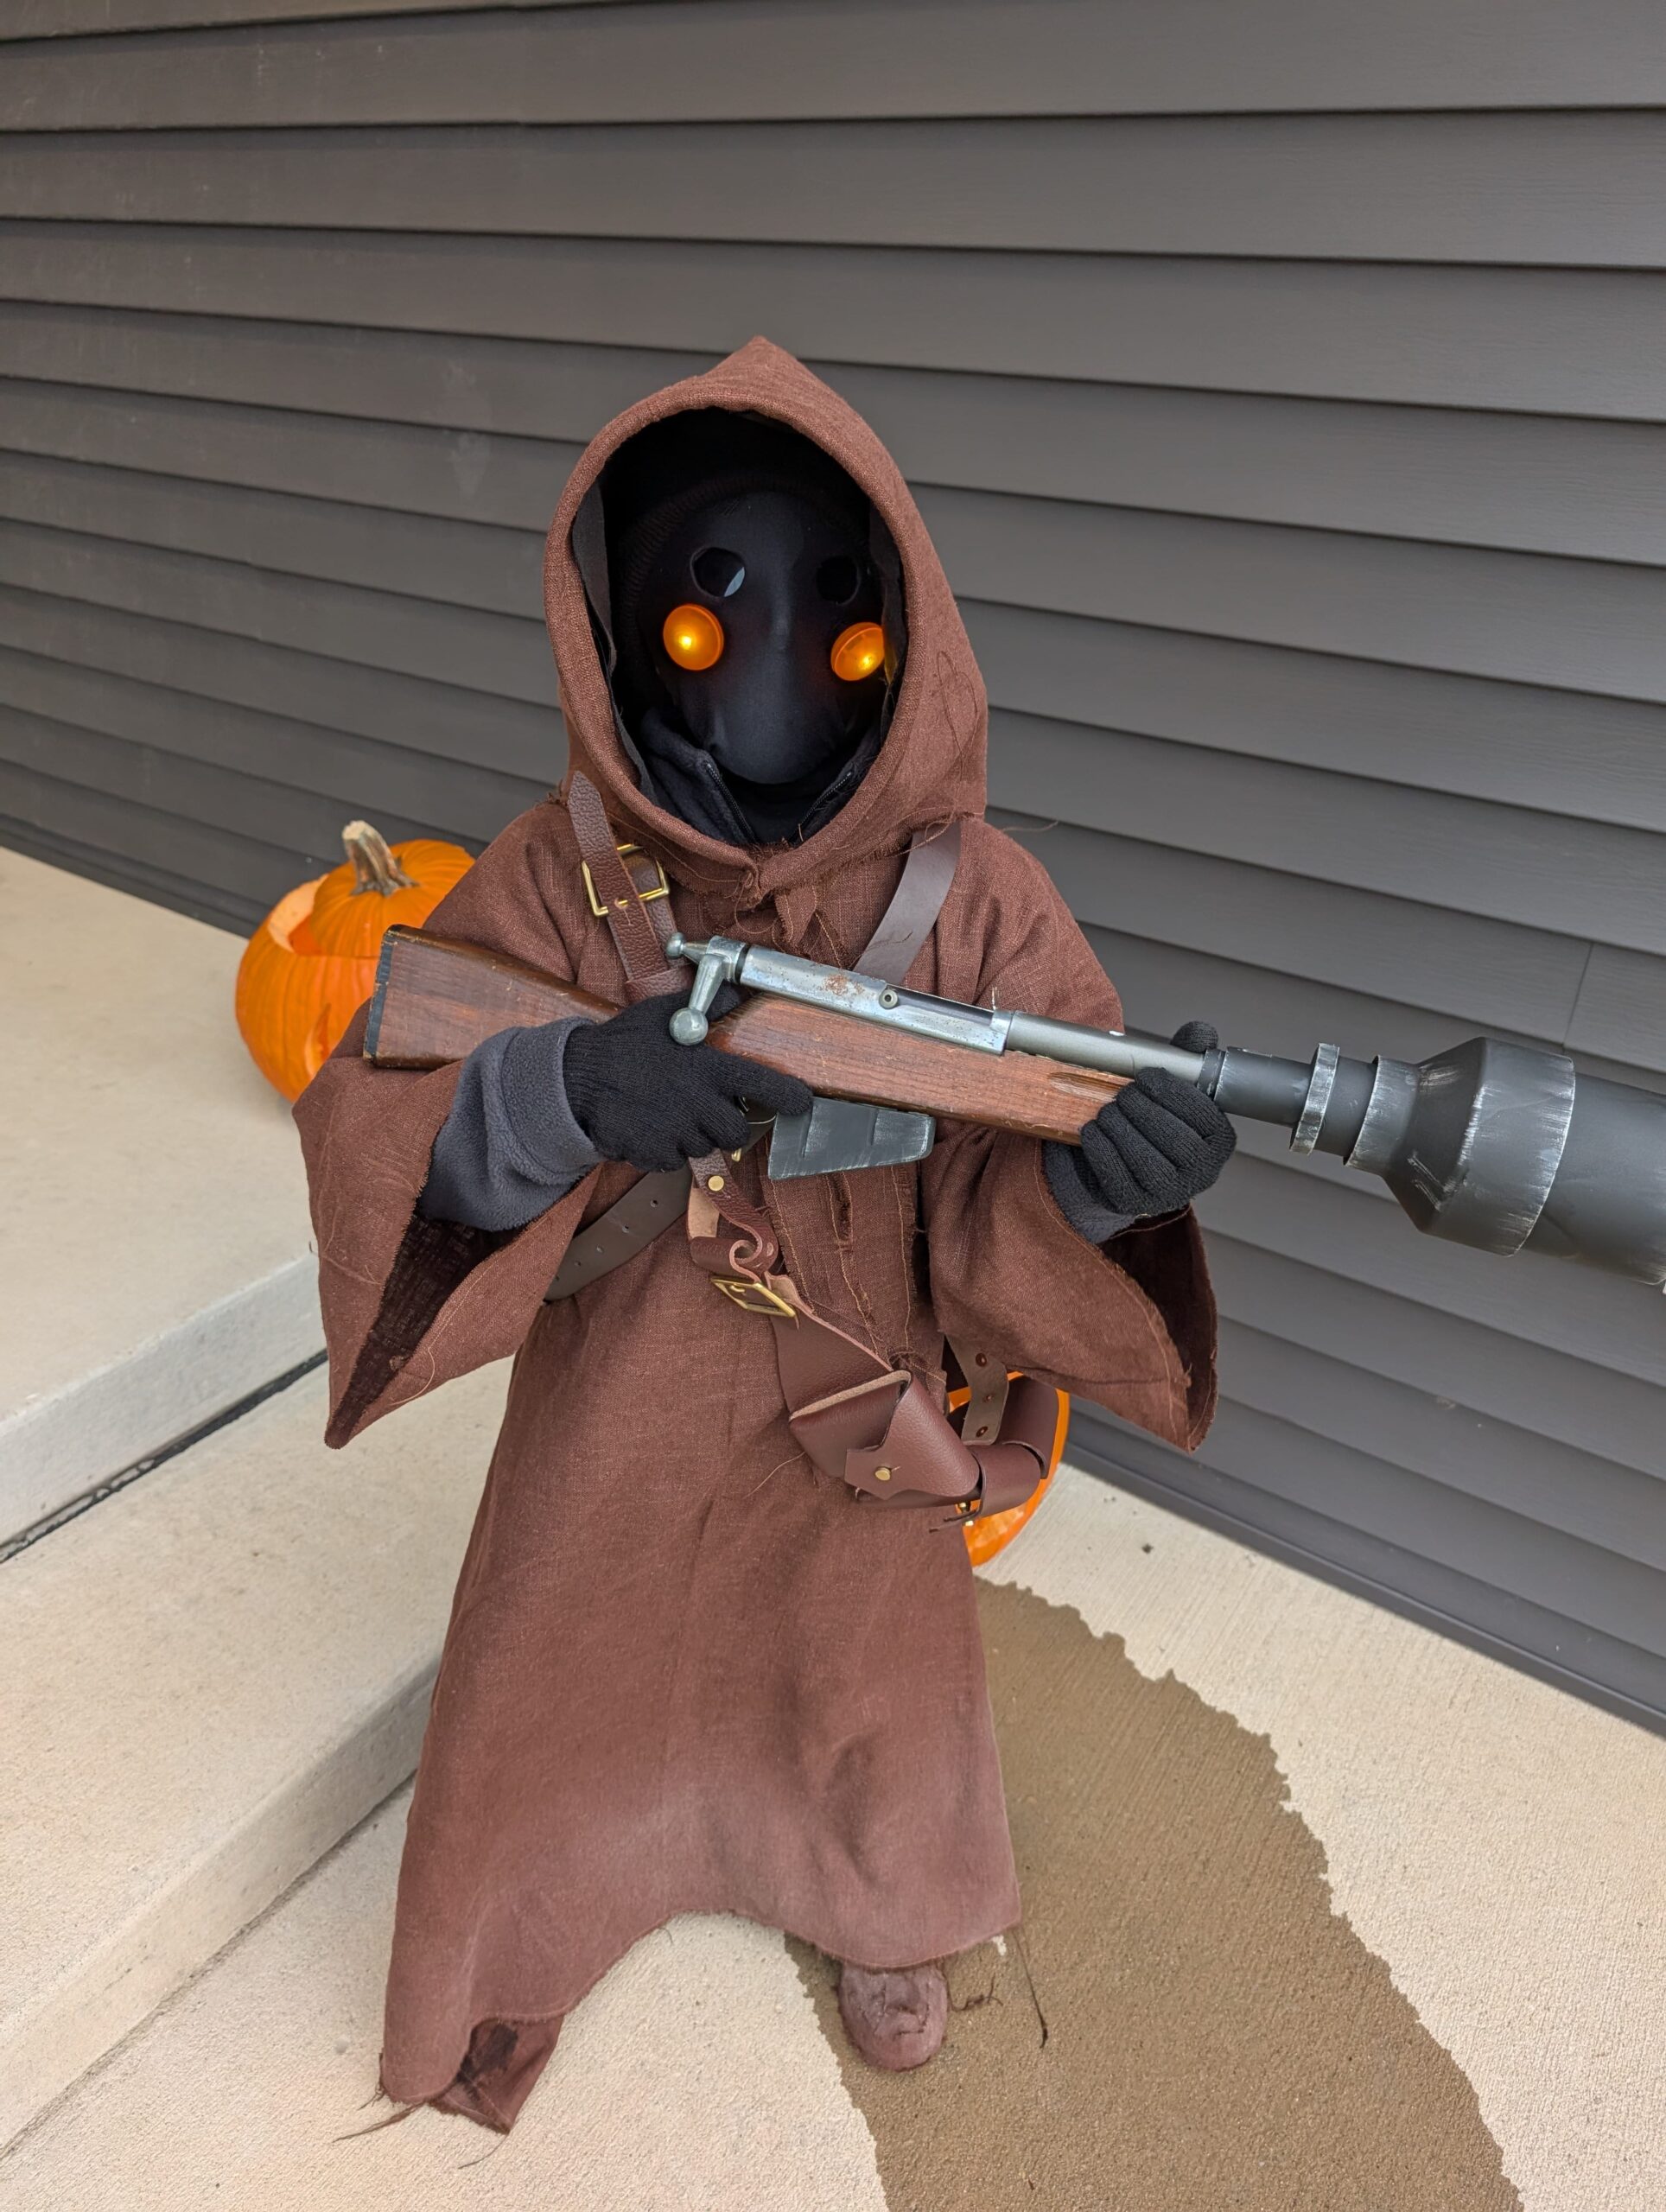
Key Takeaway: The props don’t need to be complicated. A lightweight mask, clip-on push-button LEDs, and a smart fabric pattern made a standout costume.
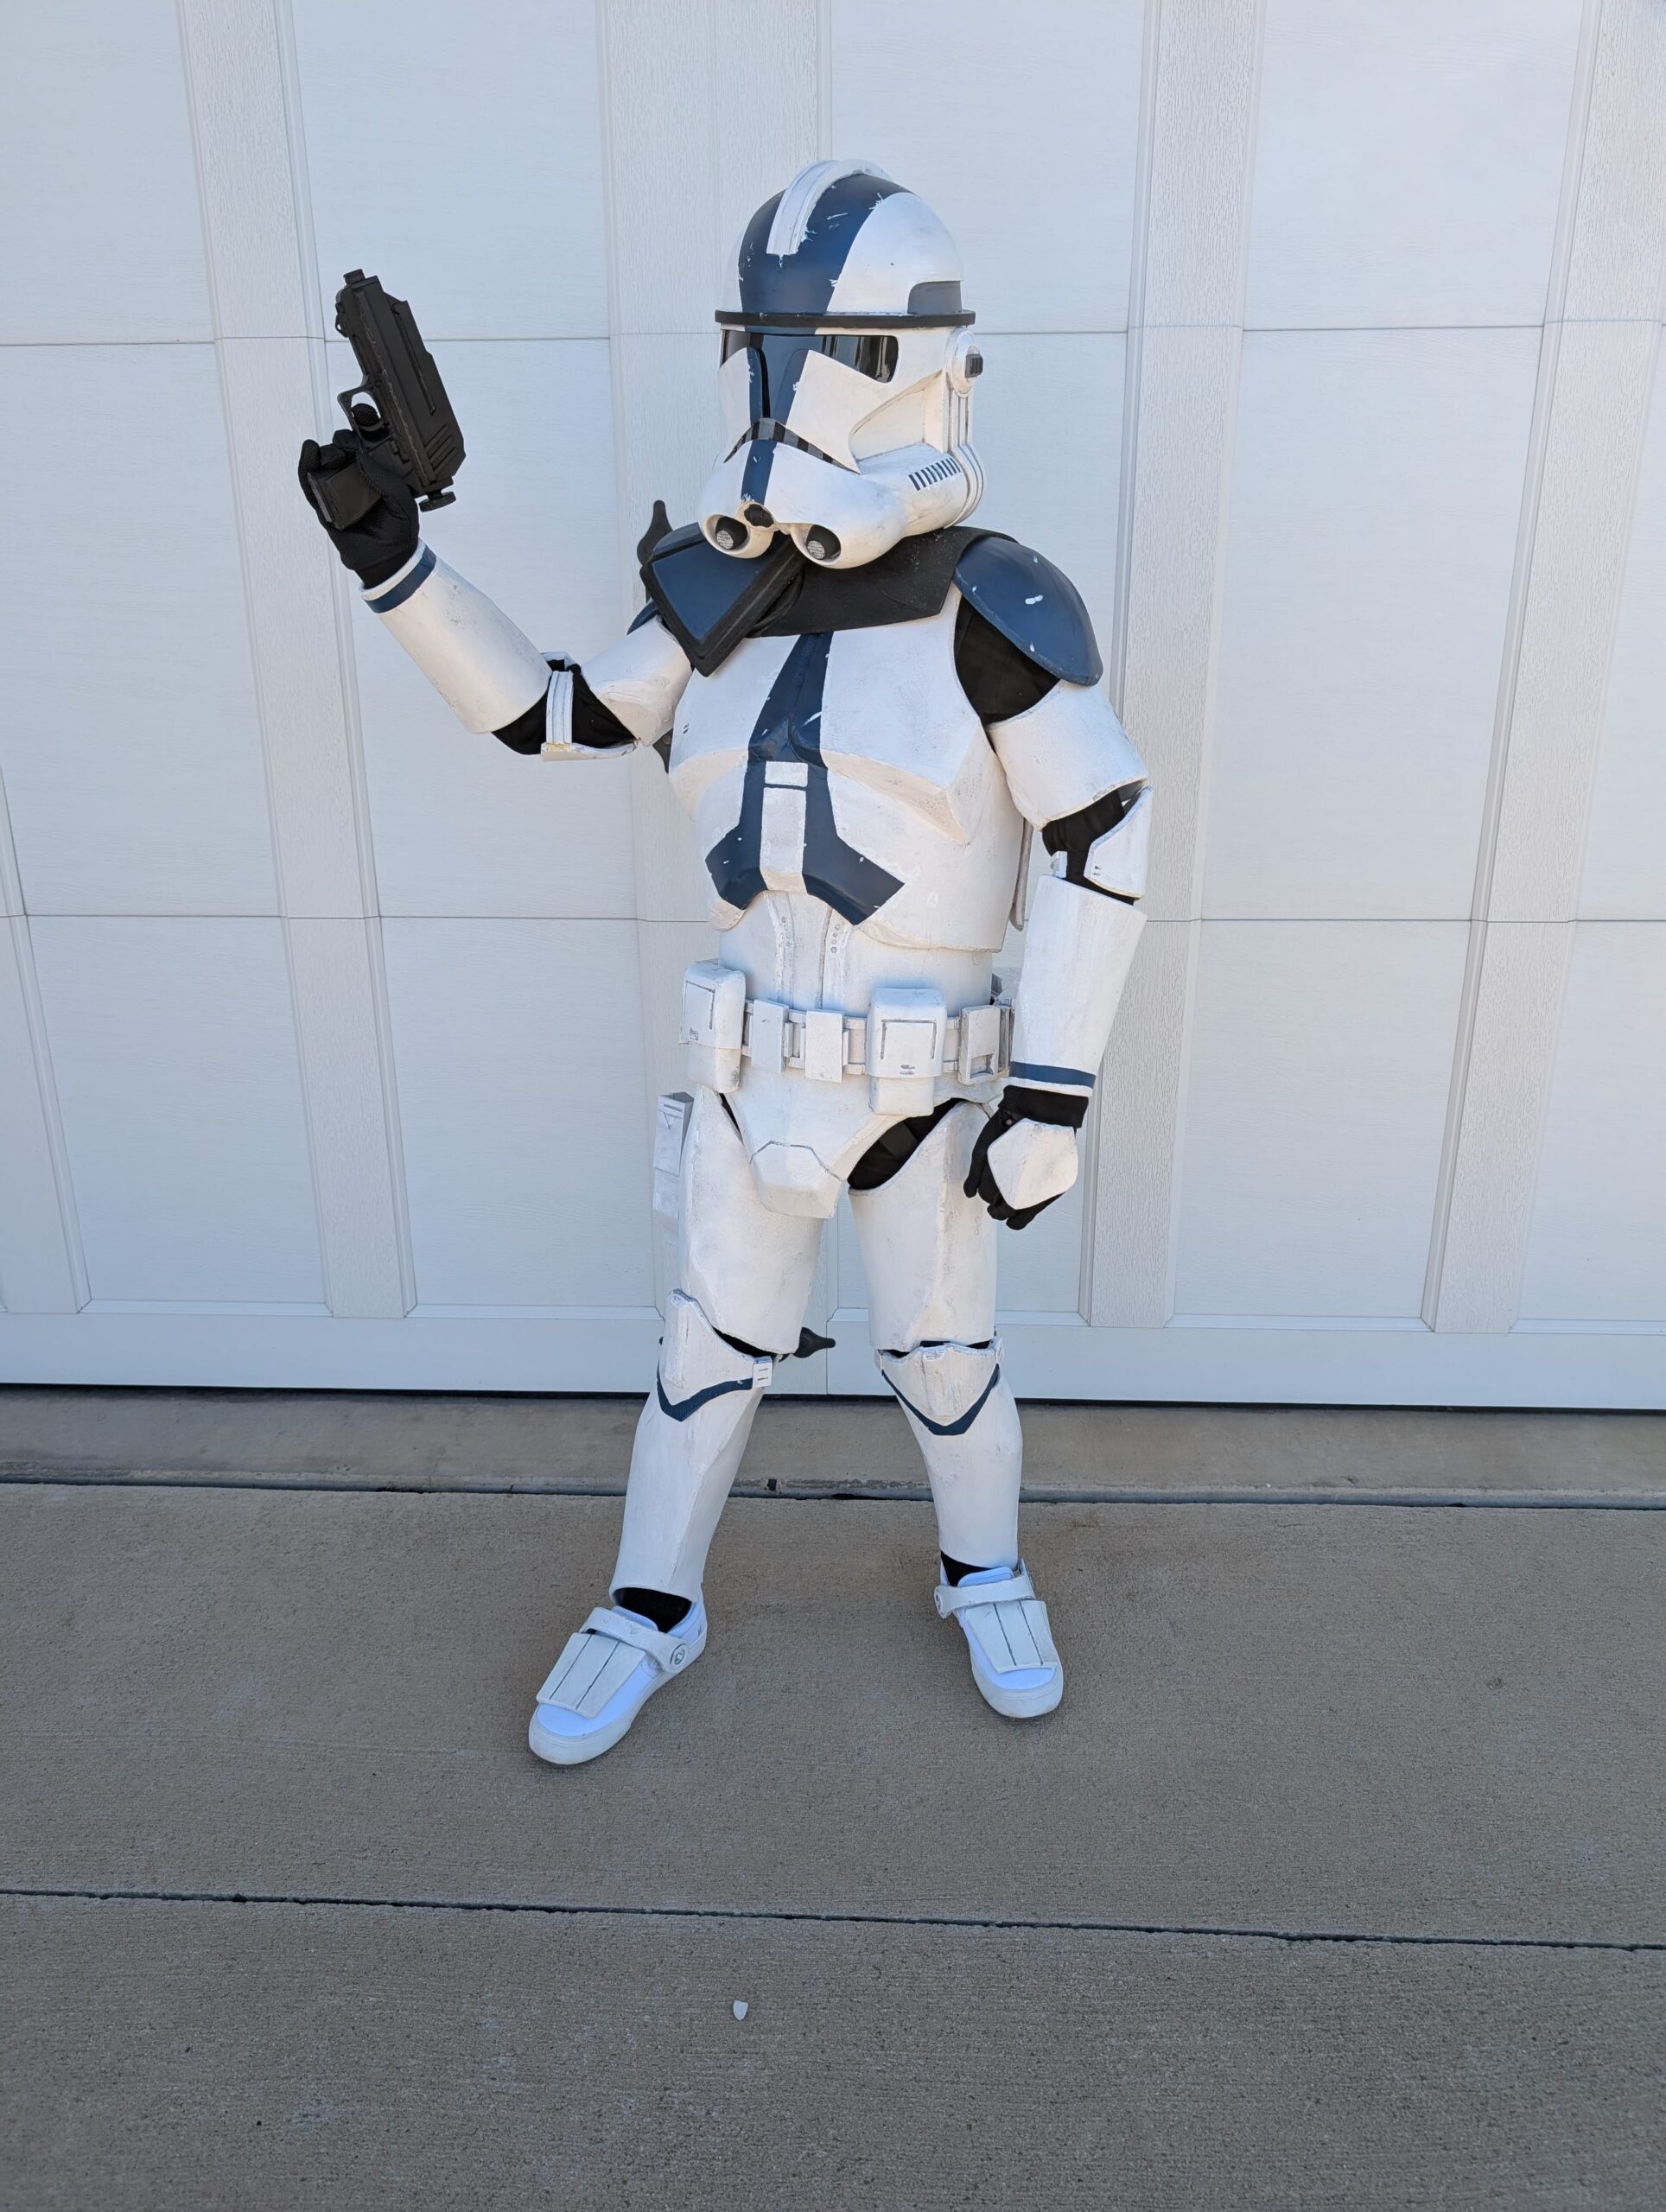
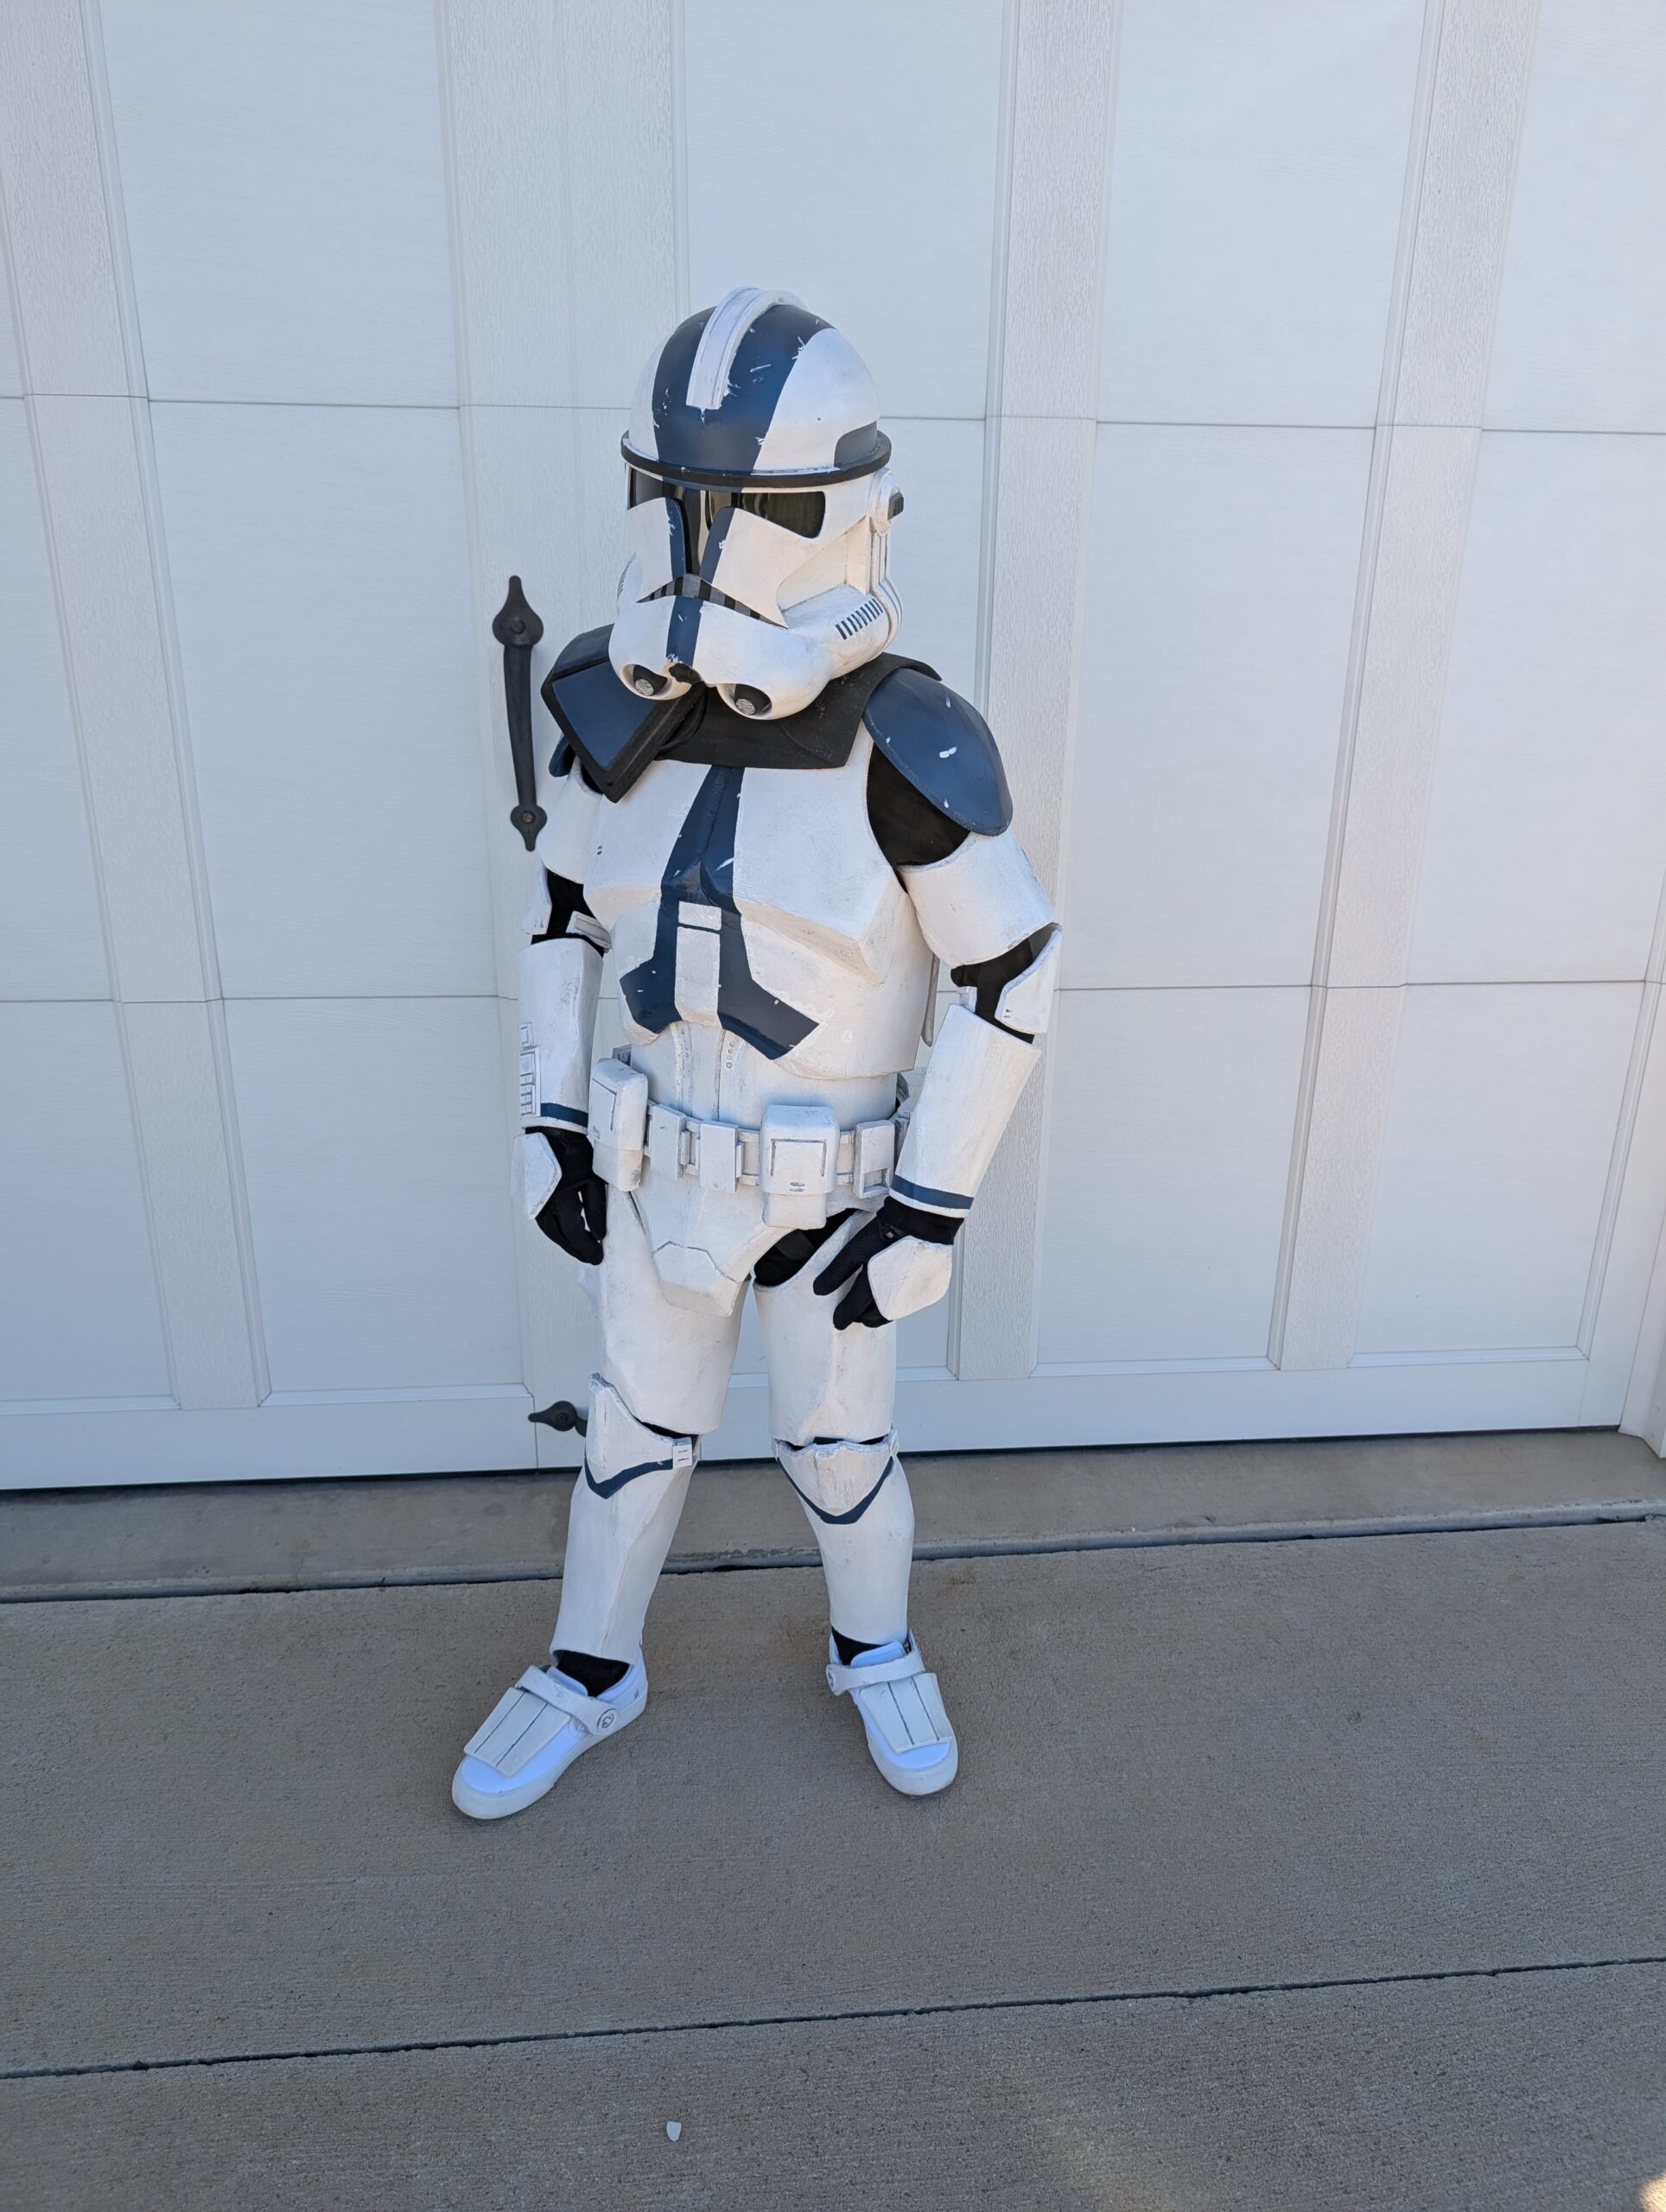
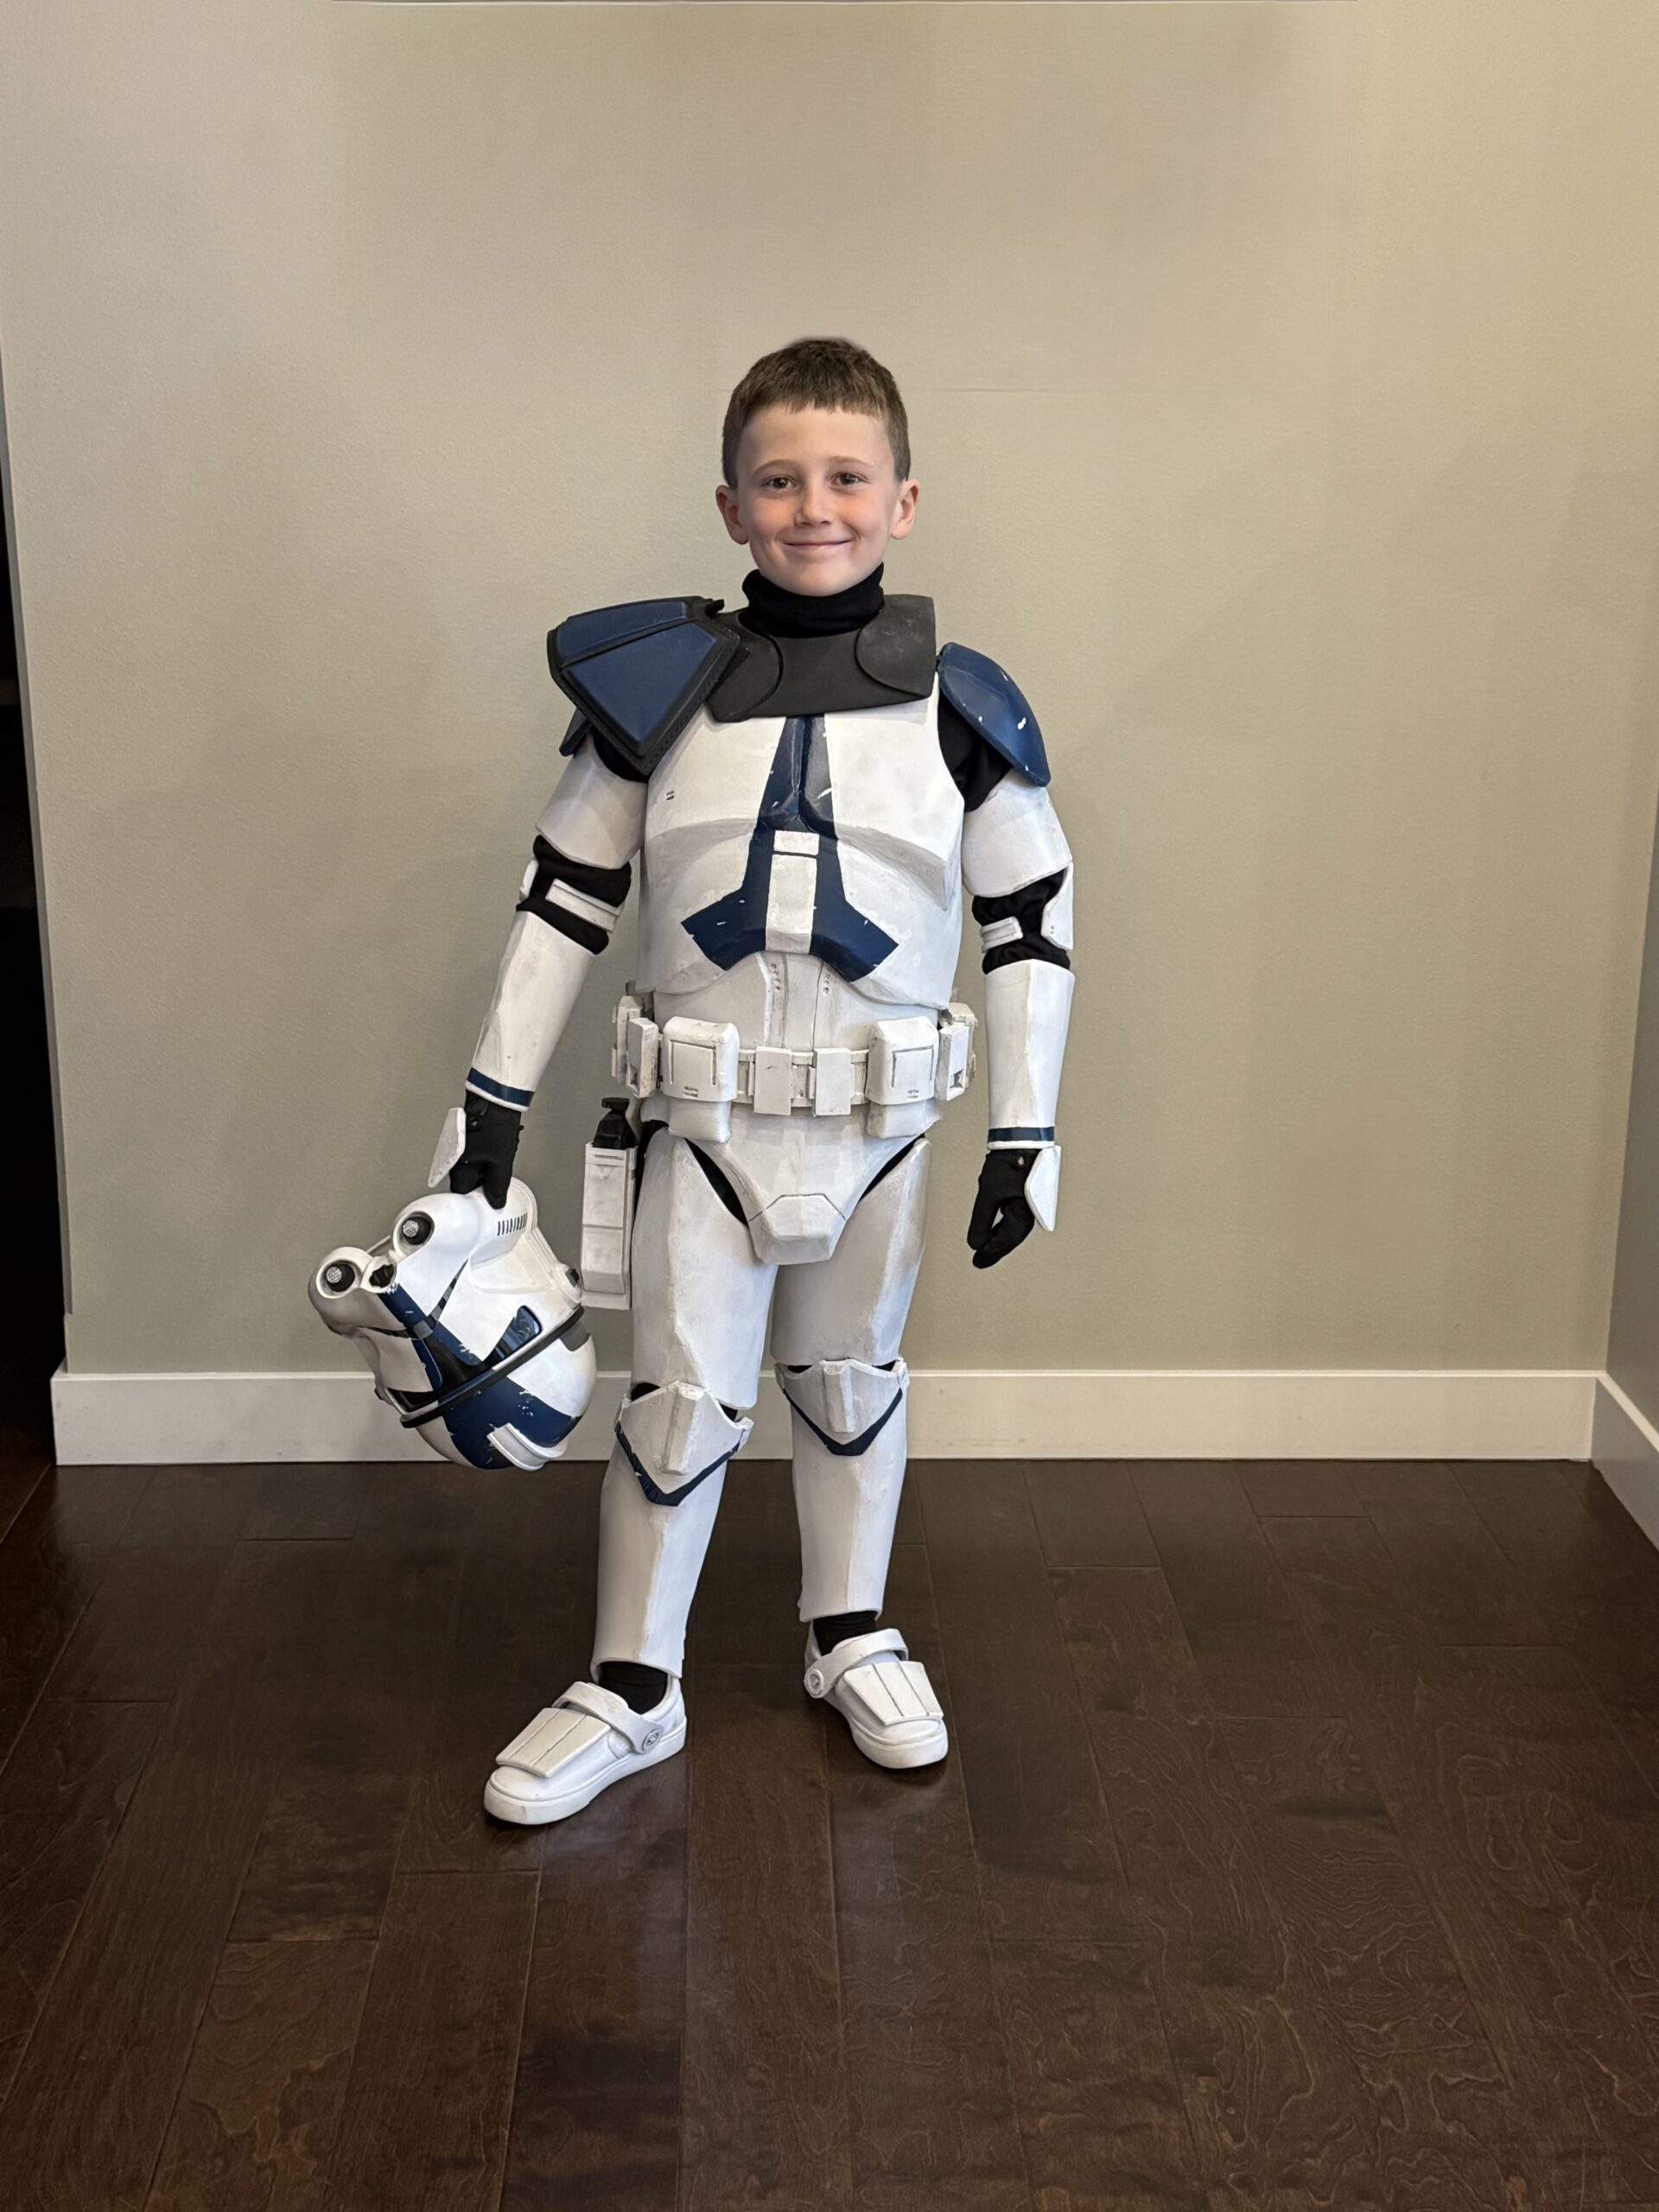
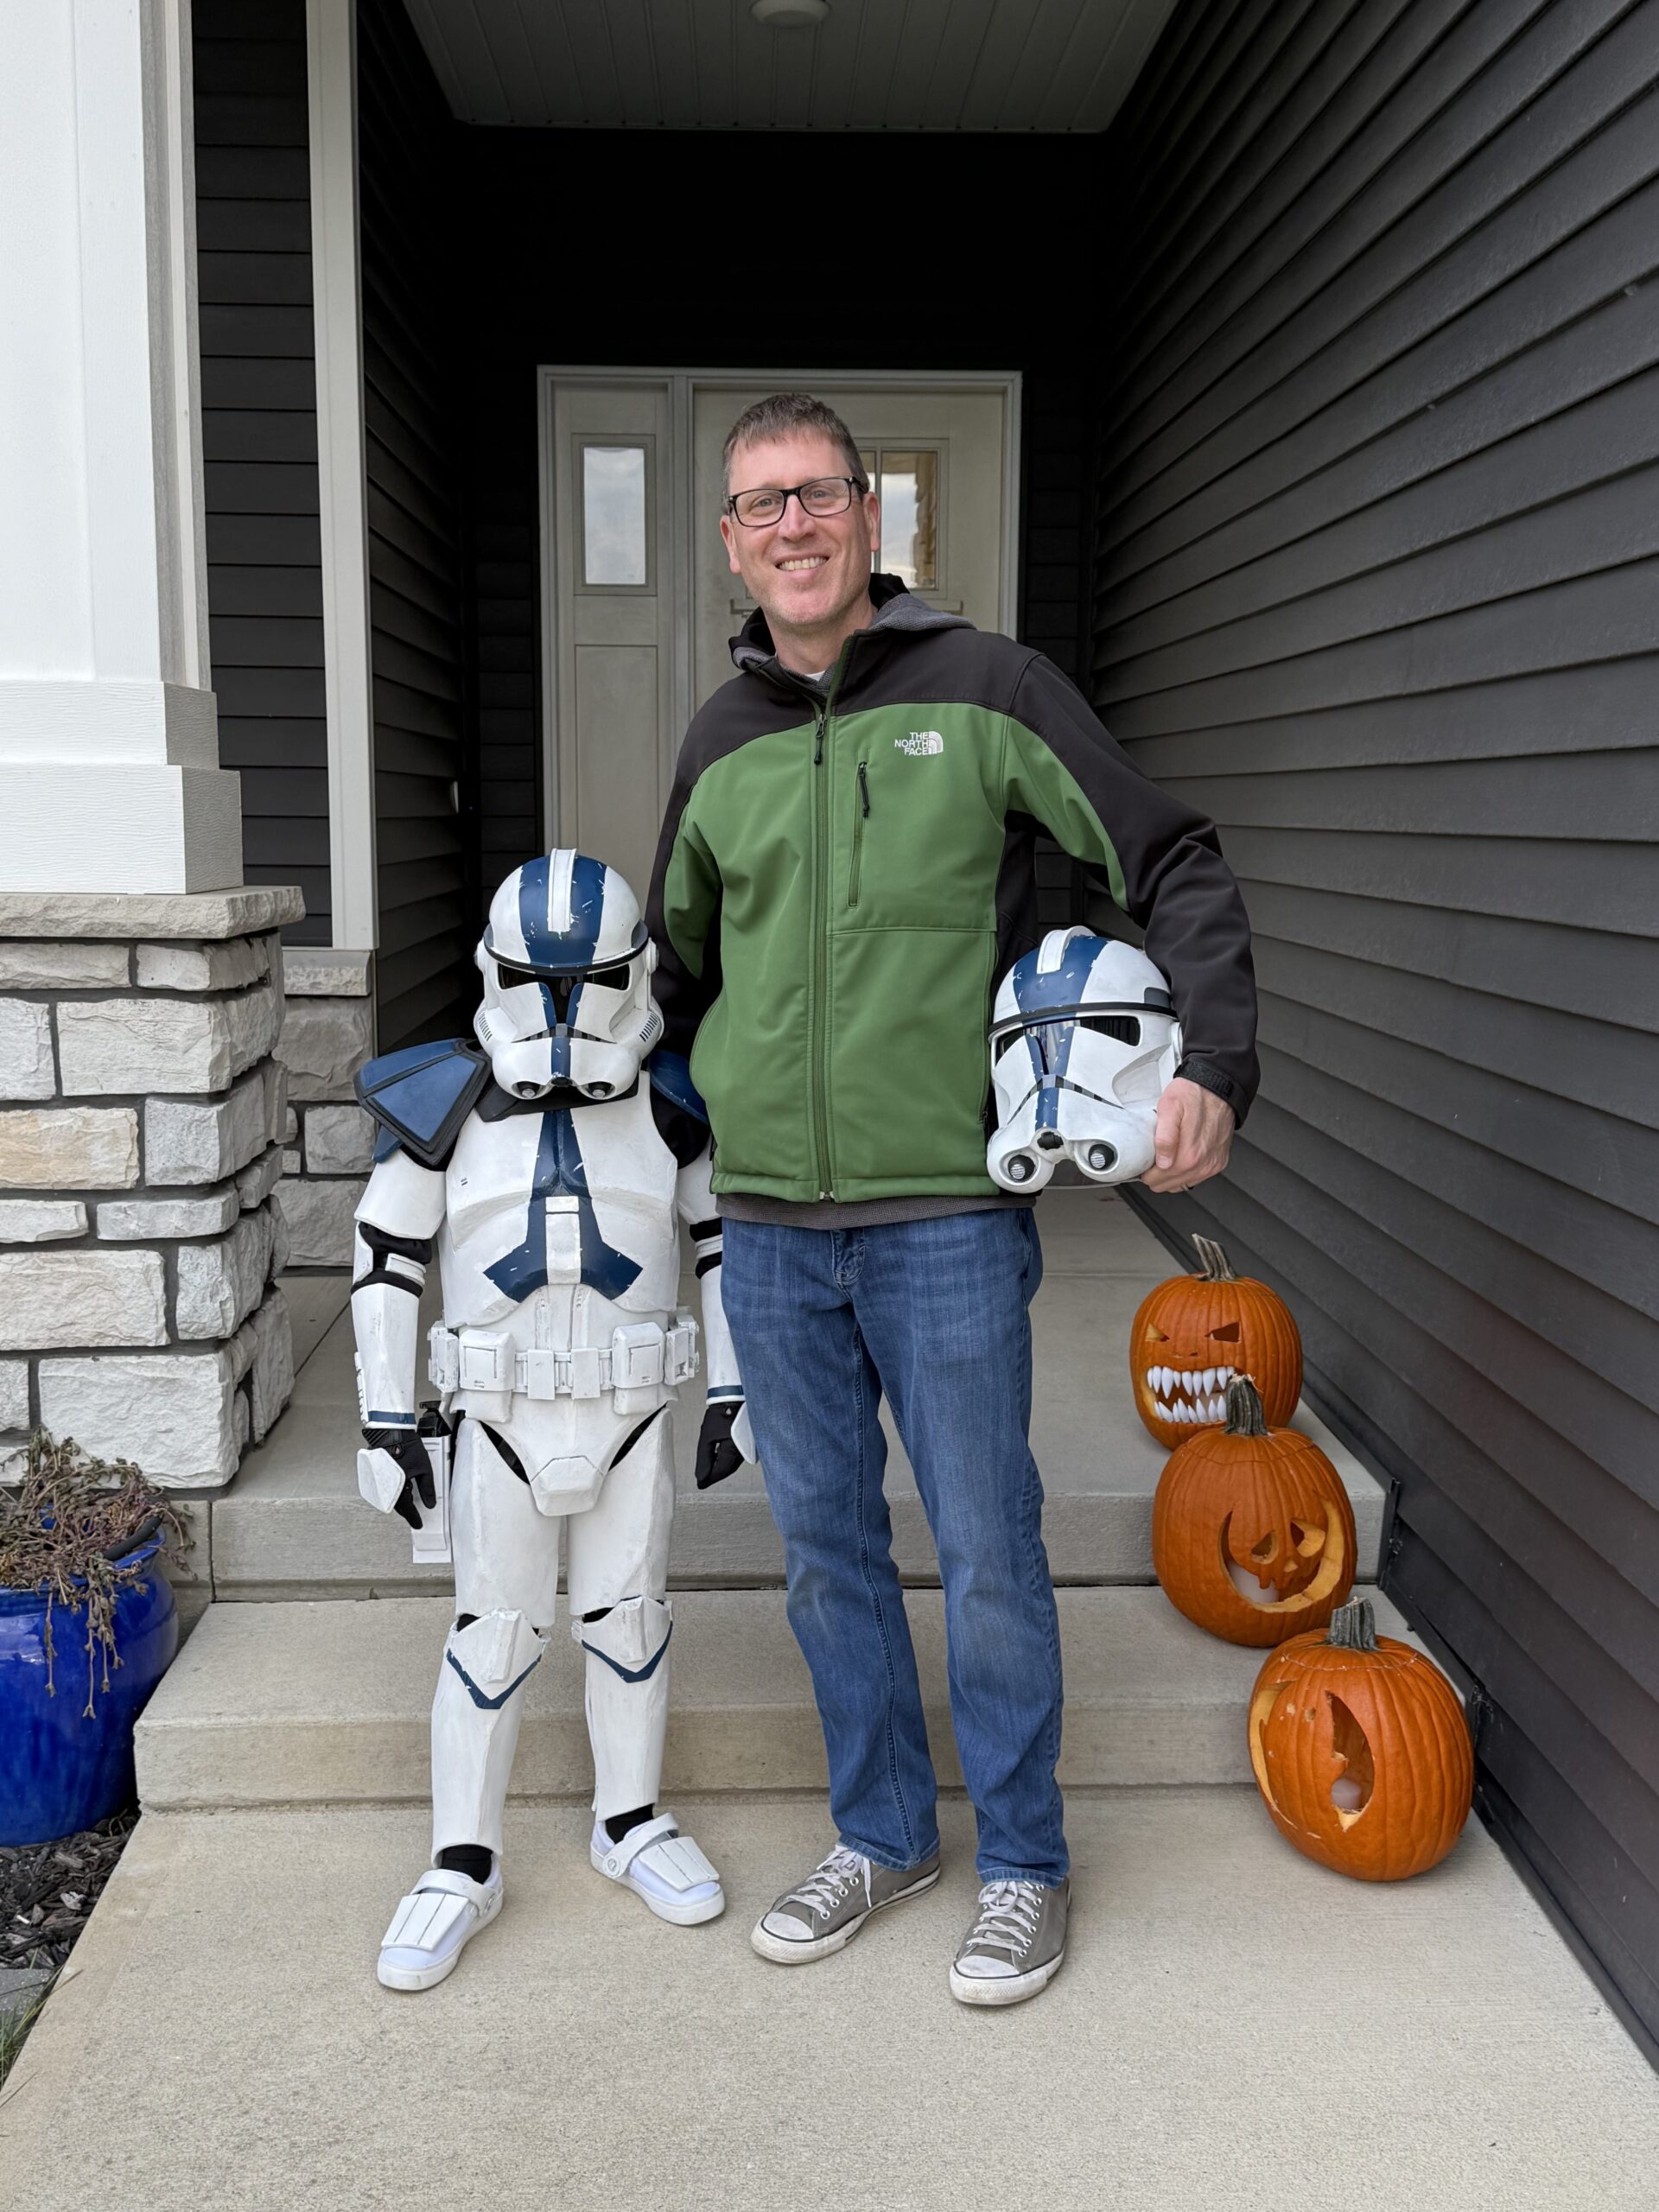
2025: Phase II Clone Trooper – Full 3D Body Armor
By year three, the workshop transitioned from fabrics to heavier production. Crafting a full Phase II Clone Trooper suit meant trading scissors and thread for a 3D printer, contact cement, and an Xacto knife!
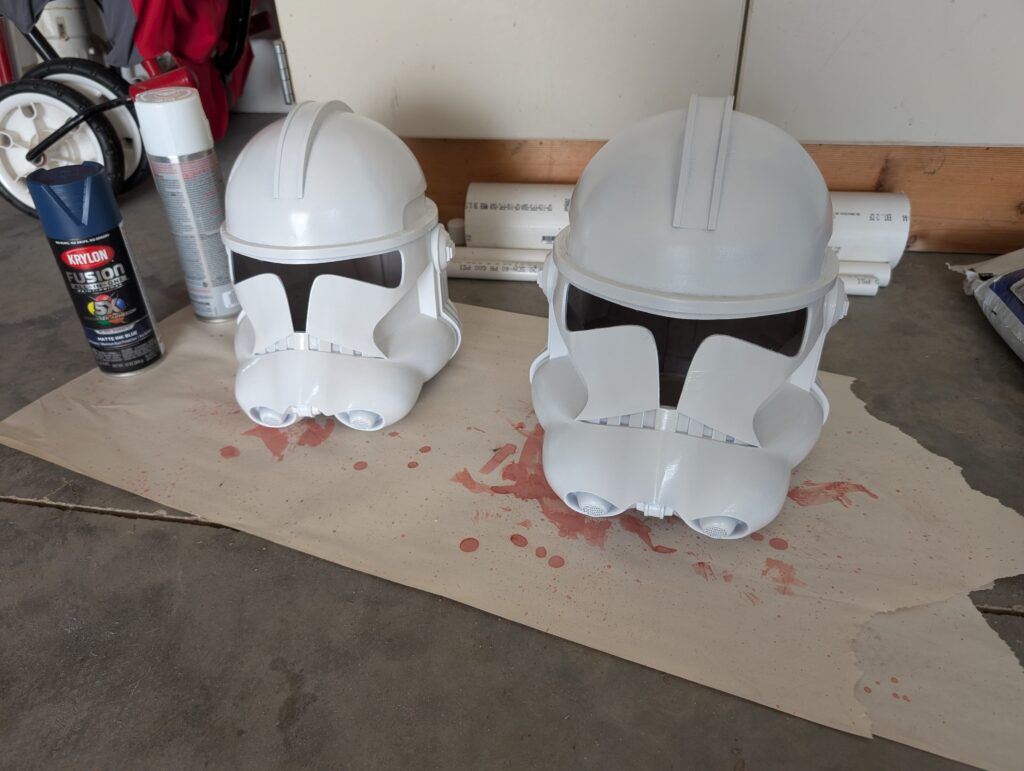
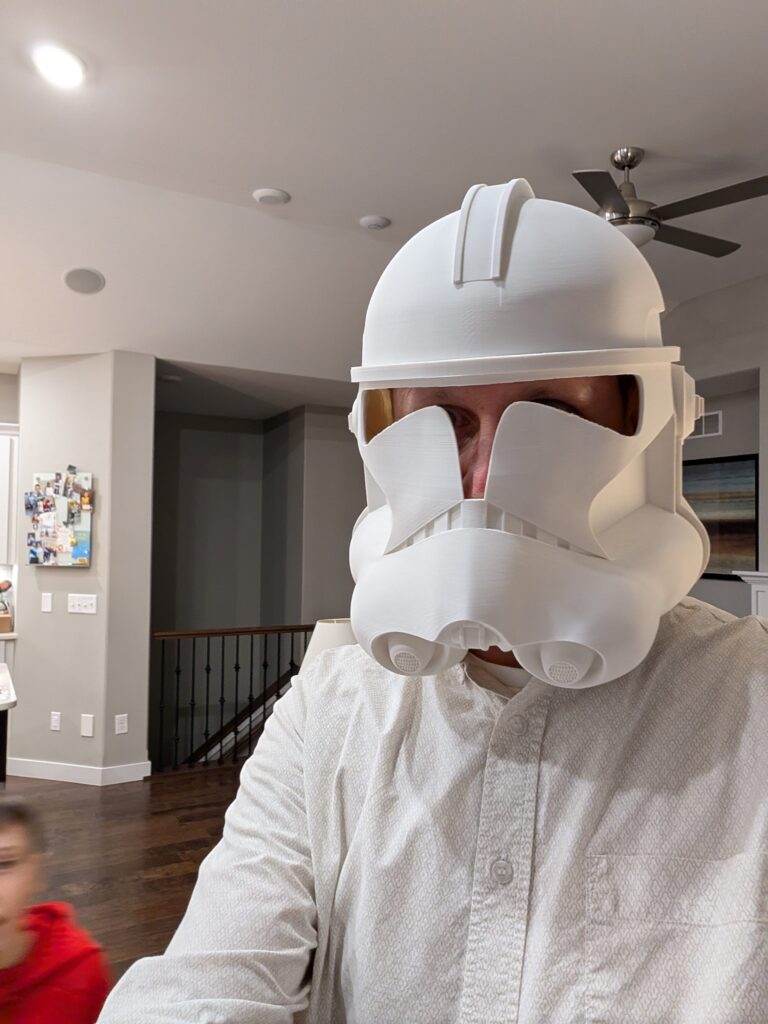
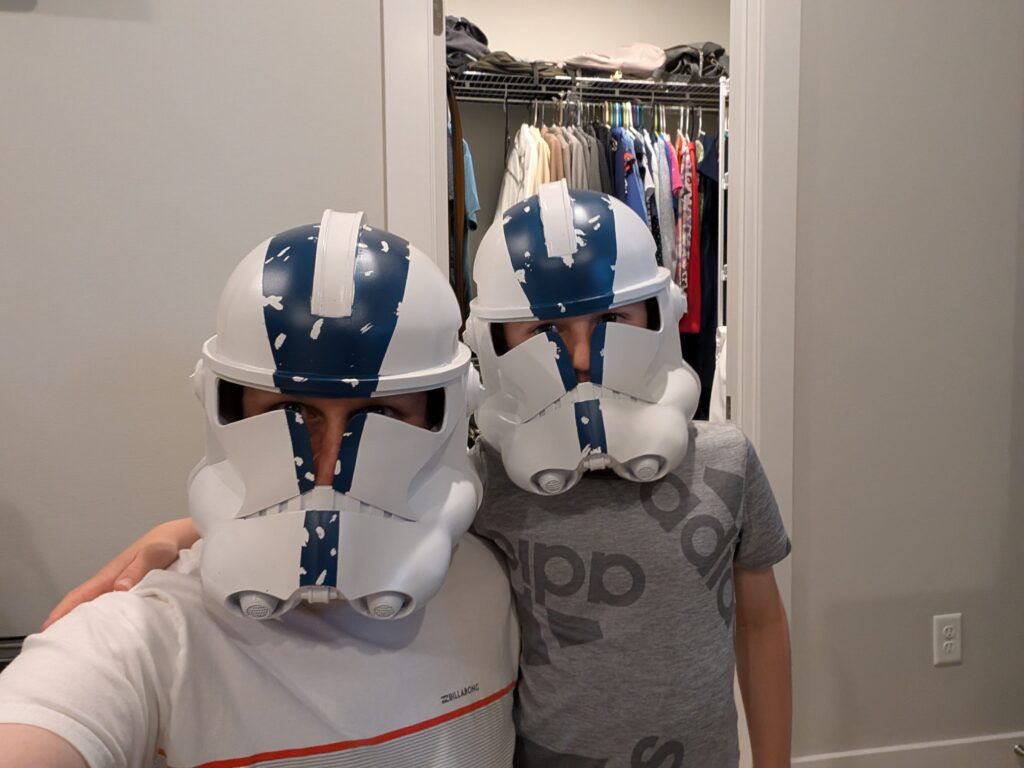
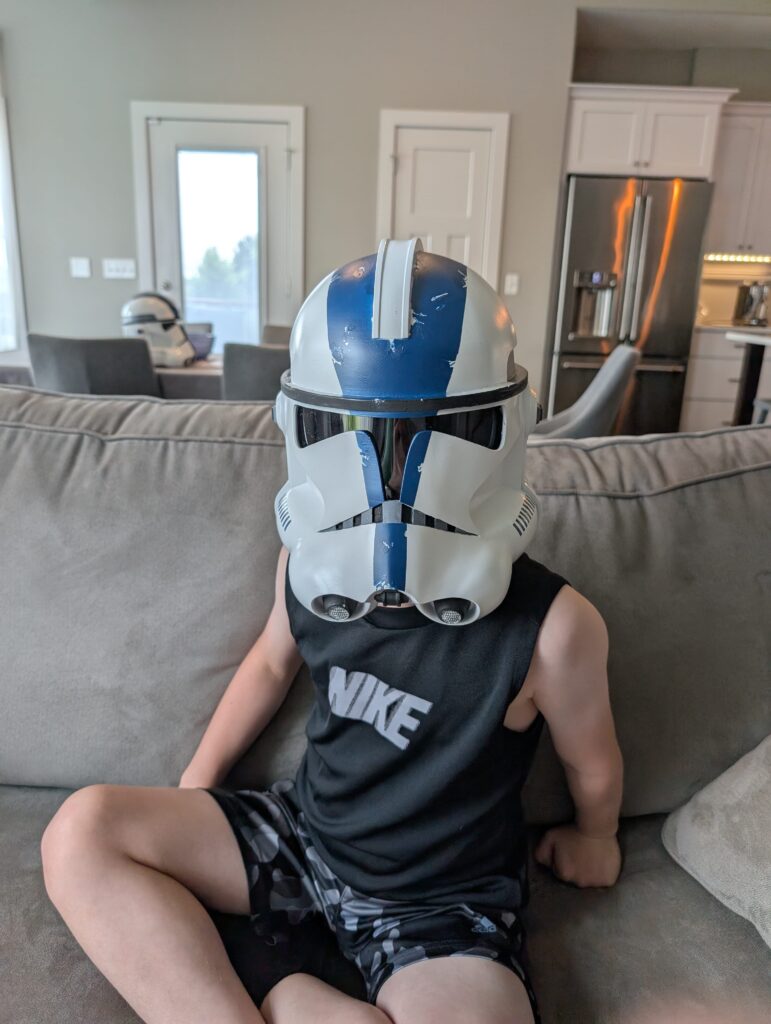
1. 3D Printing the Helmet and EVA Foam Scaling
While the Phase II helmet was 3D printed, building the full body armor out of EVA foam required following a detailed construction guide and carefully scaling patterns to fit a growing kid:
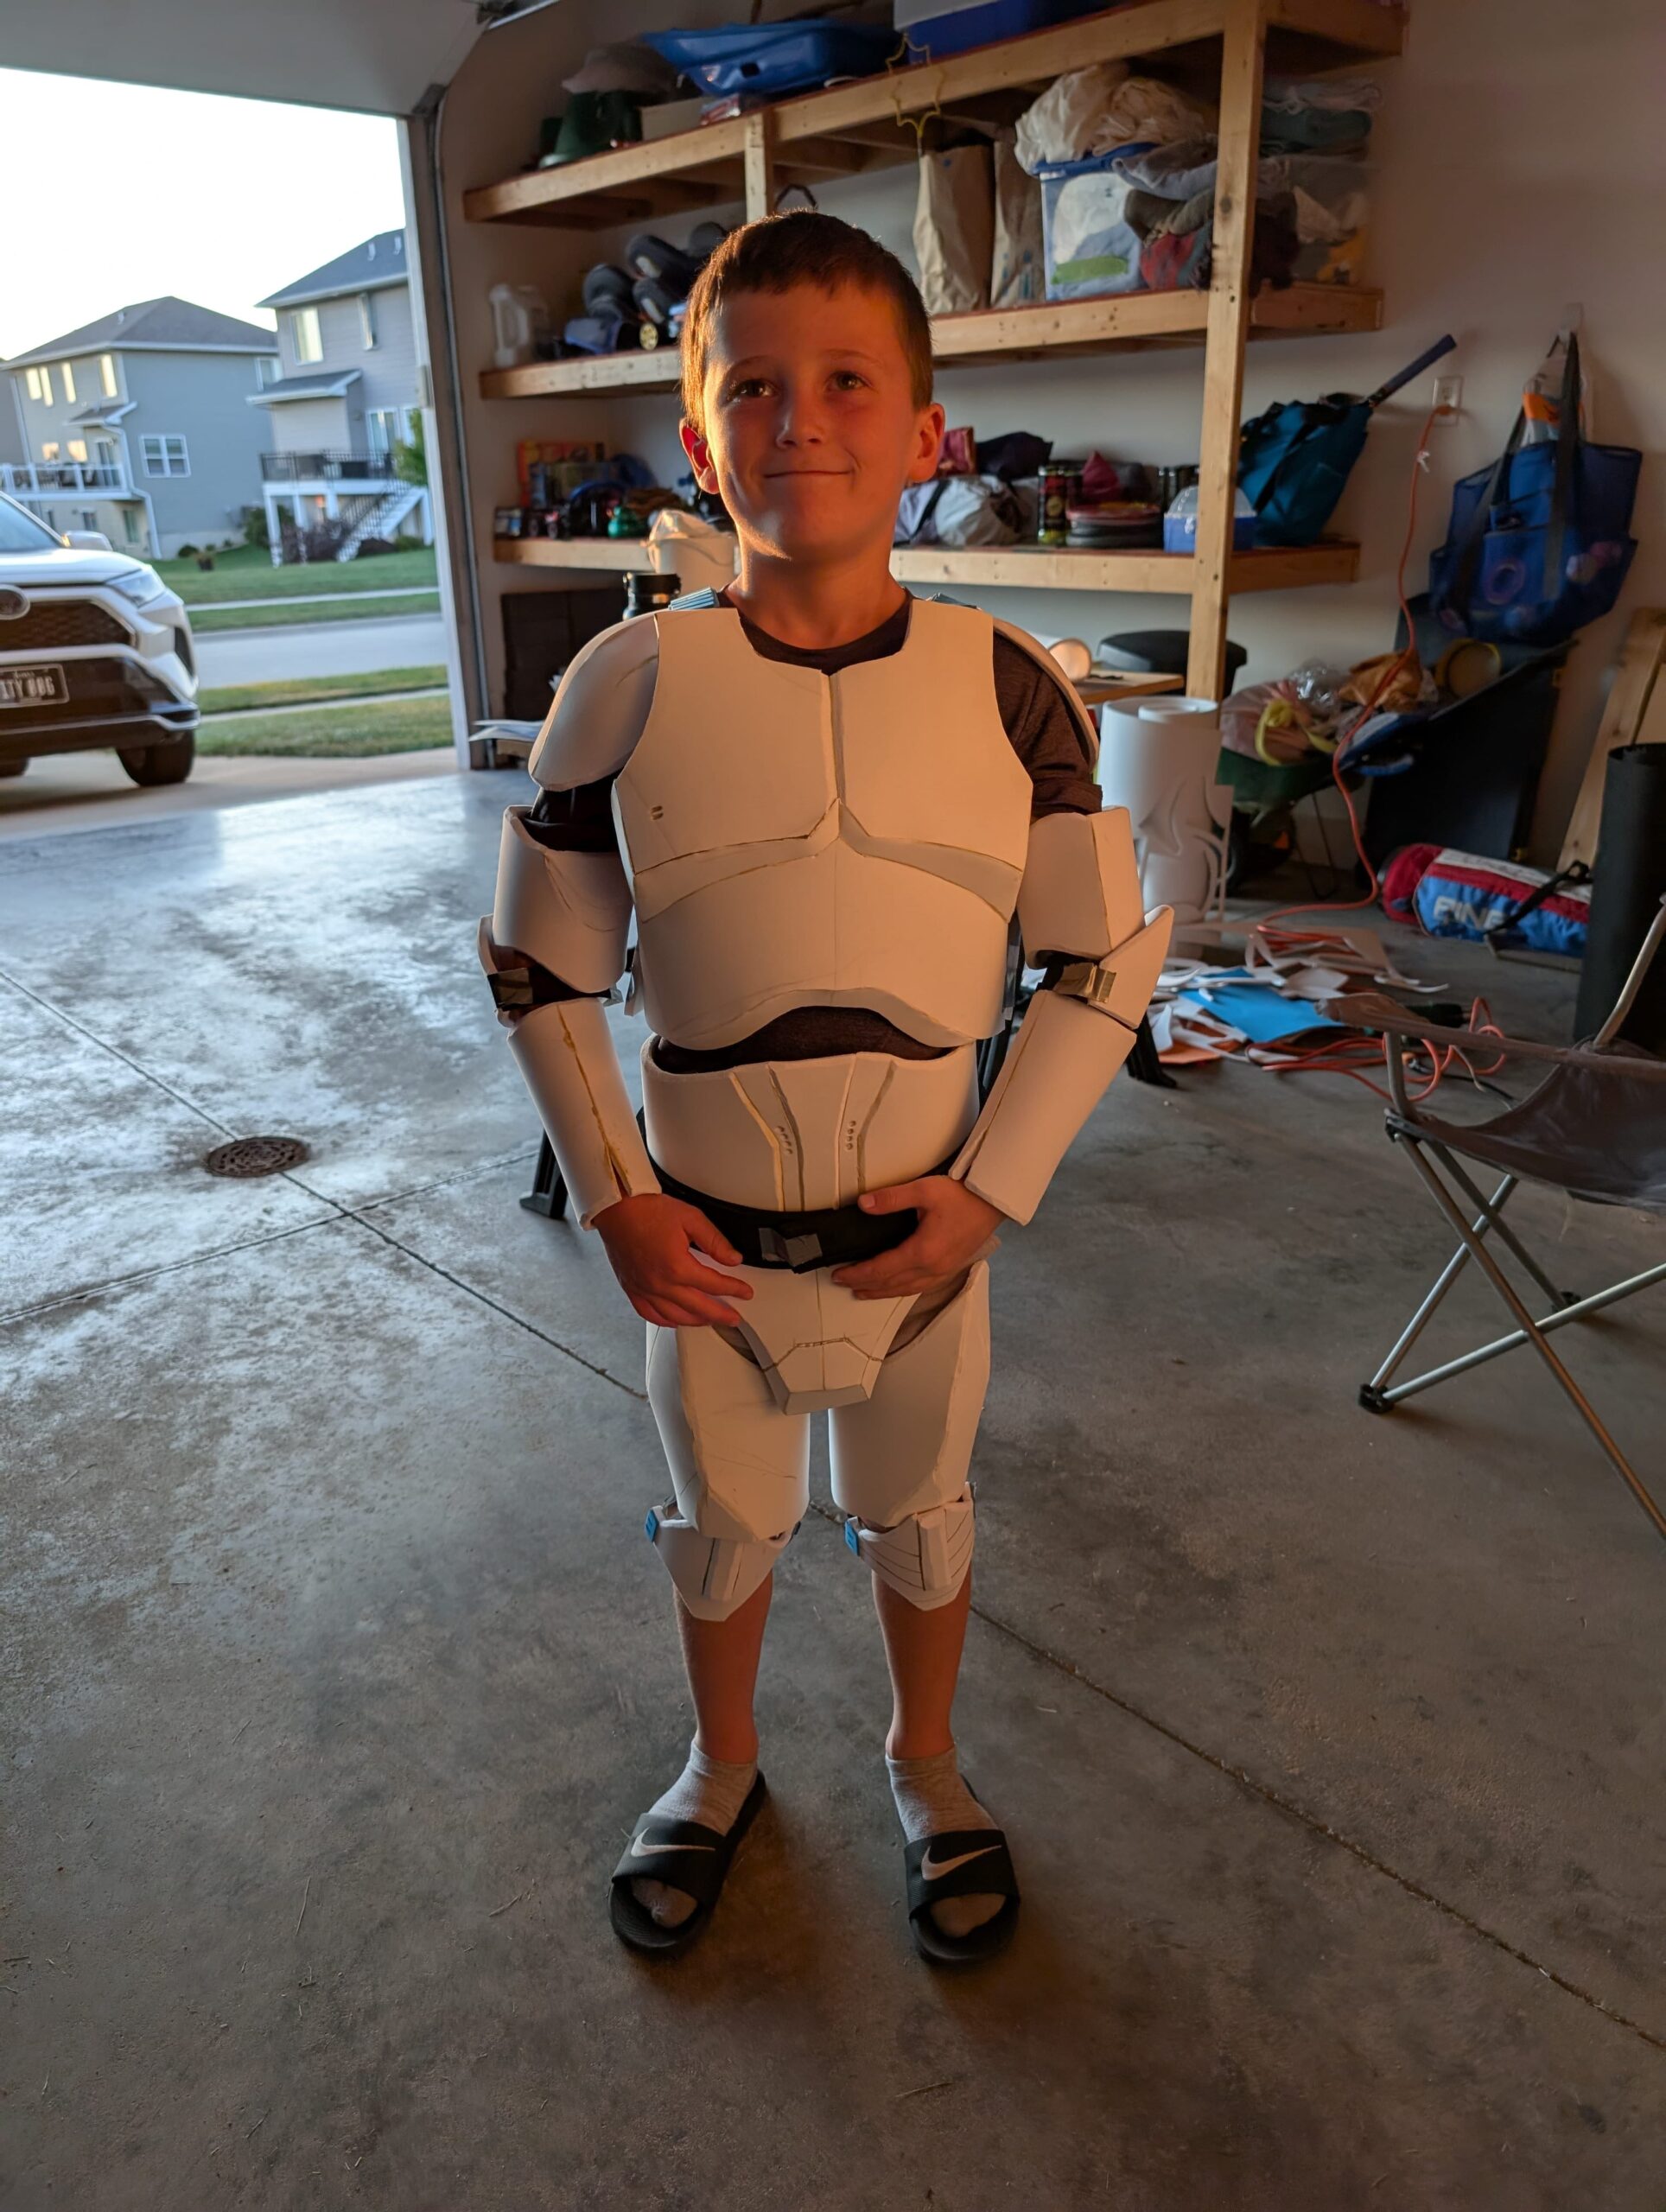
- EVA Foam Armor Crafting: We crafted the body armor out of EVA foam by following this Clone Trooper EVA foam tutorial, cutting, beveling, and heat-shaping foam plates for the chest, limbs, and shoulders.
- 3D Printing the Helmet: The iconic Phase II helmet was 3D printed separately, requiring accurate digital sizing in the slicer so it fit comfortably while maintaining accurate proportions (and I made a larger one for me too!).
2. Finishing: Surface Prep and Priming
Preparing both materials for paint required combining foam sealing with 3D print finishing techniques to achieve smooth, unified armor:
- Foam Sealing & Heat Treatment: Heat-sealing the raw EVA foam surfaces and coating them with flexible rubberized primer (Plasti Dip spray) to prevent paint absorption.
- 3D Print Line Smoothing: Sanding the printed helmet, filling print seams with body putty, and applying automotive filler primer.
- Wet Sanding: Block wet sanding the helmet and armor components up to 600 grit to ensure a uniform surface across both foam and 3D-printed parts.
3. Painting and Battlefield Weathering
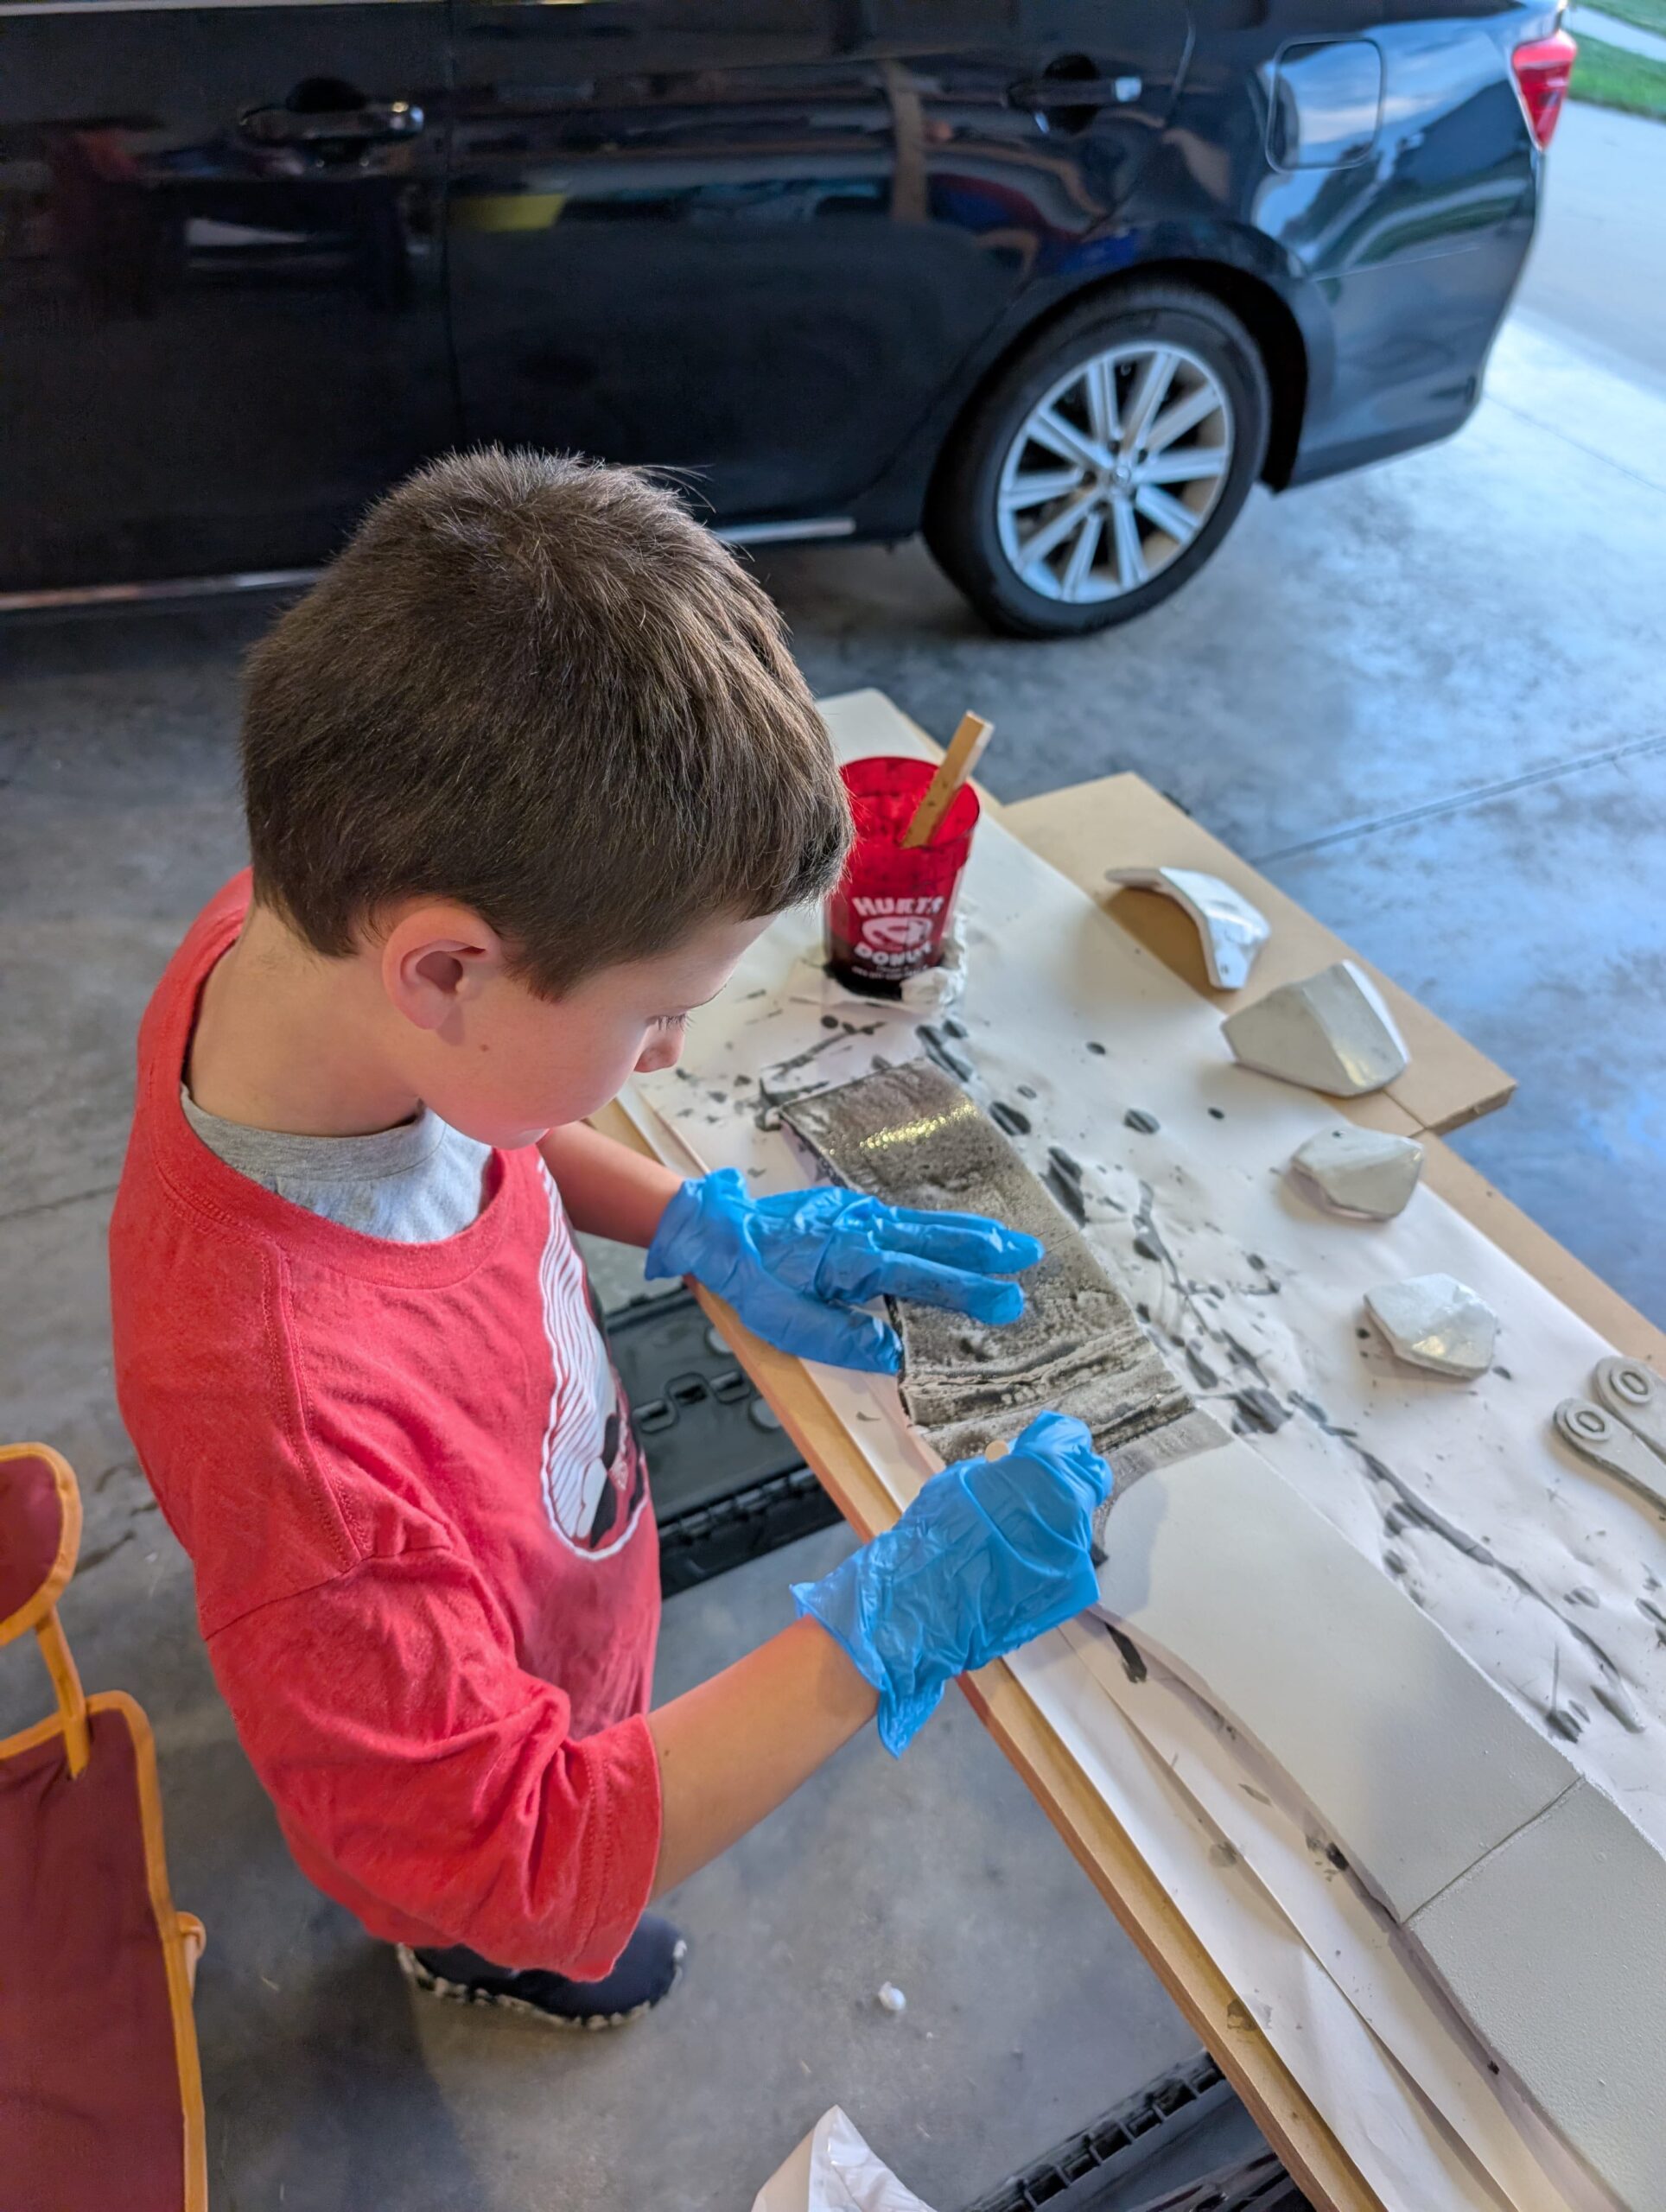
Factory-fresh white plastic looks like a toy under natural light. Bringing the armor into the Star Wars universe required some weathering:
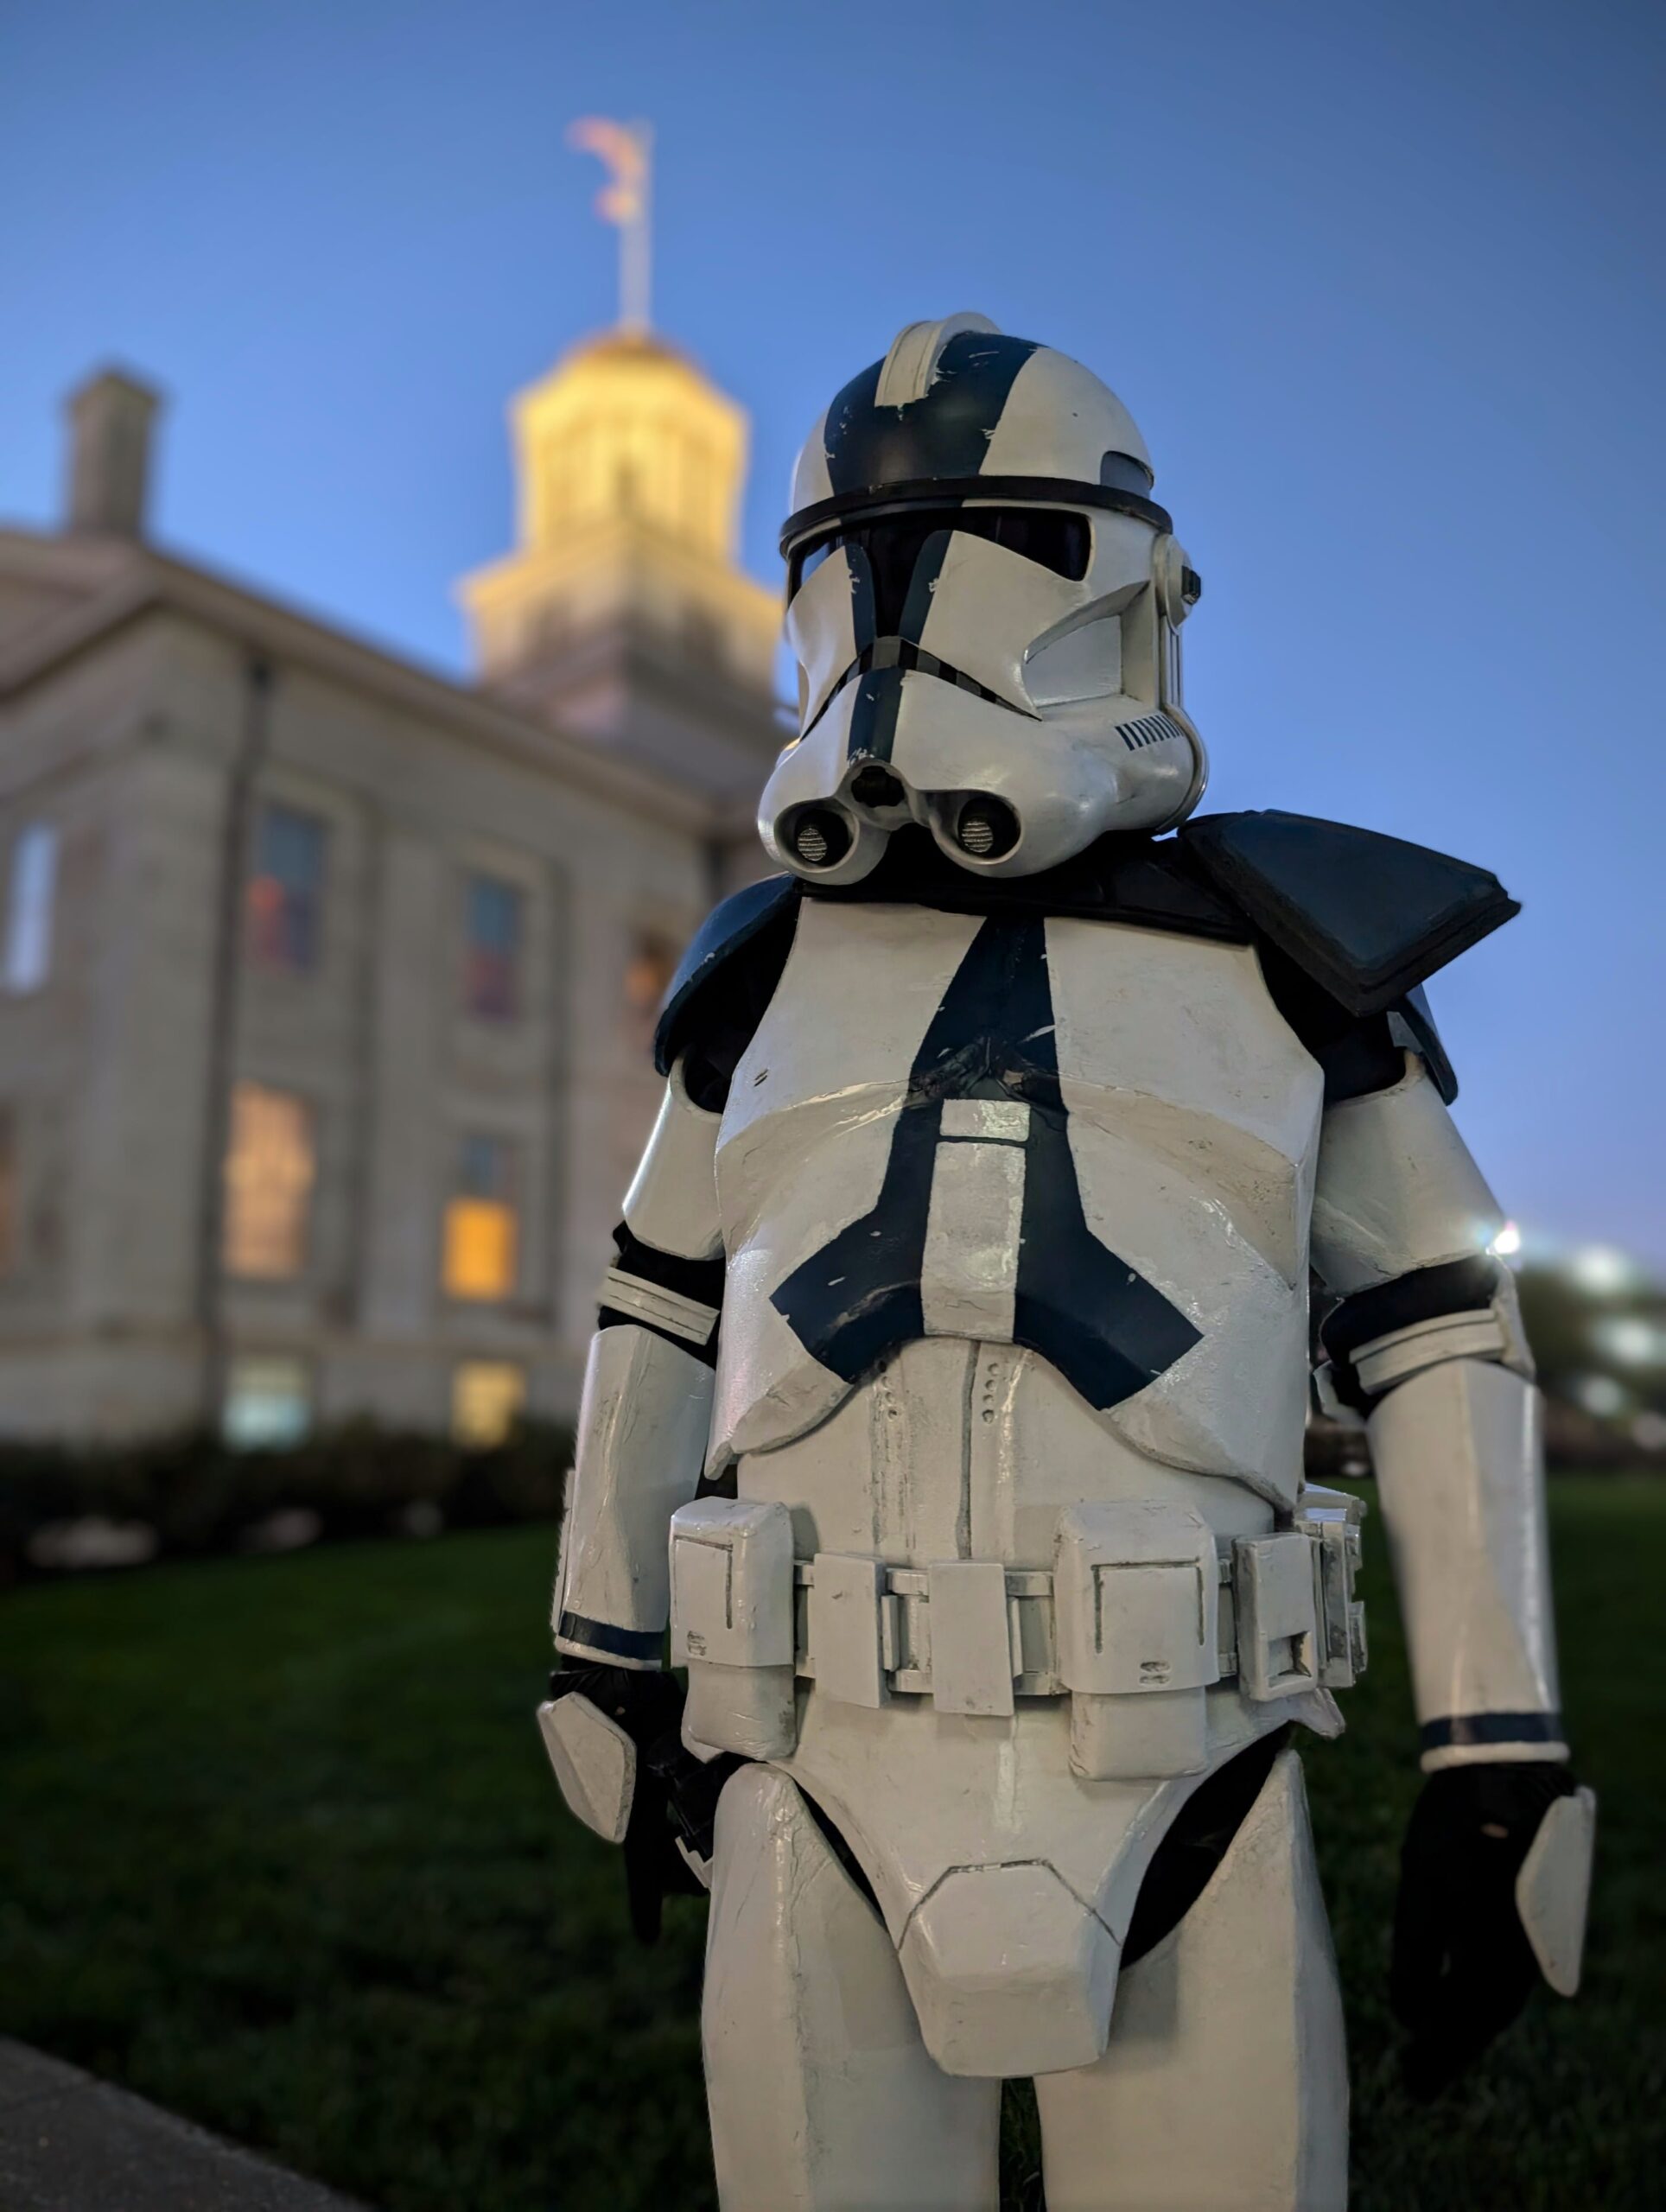
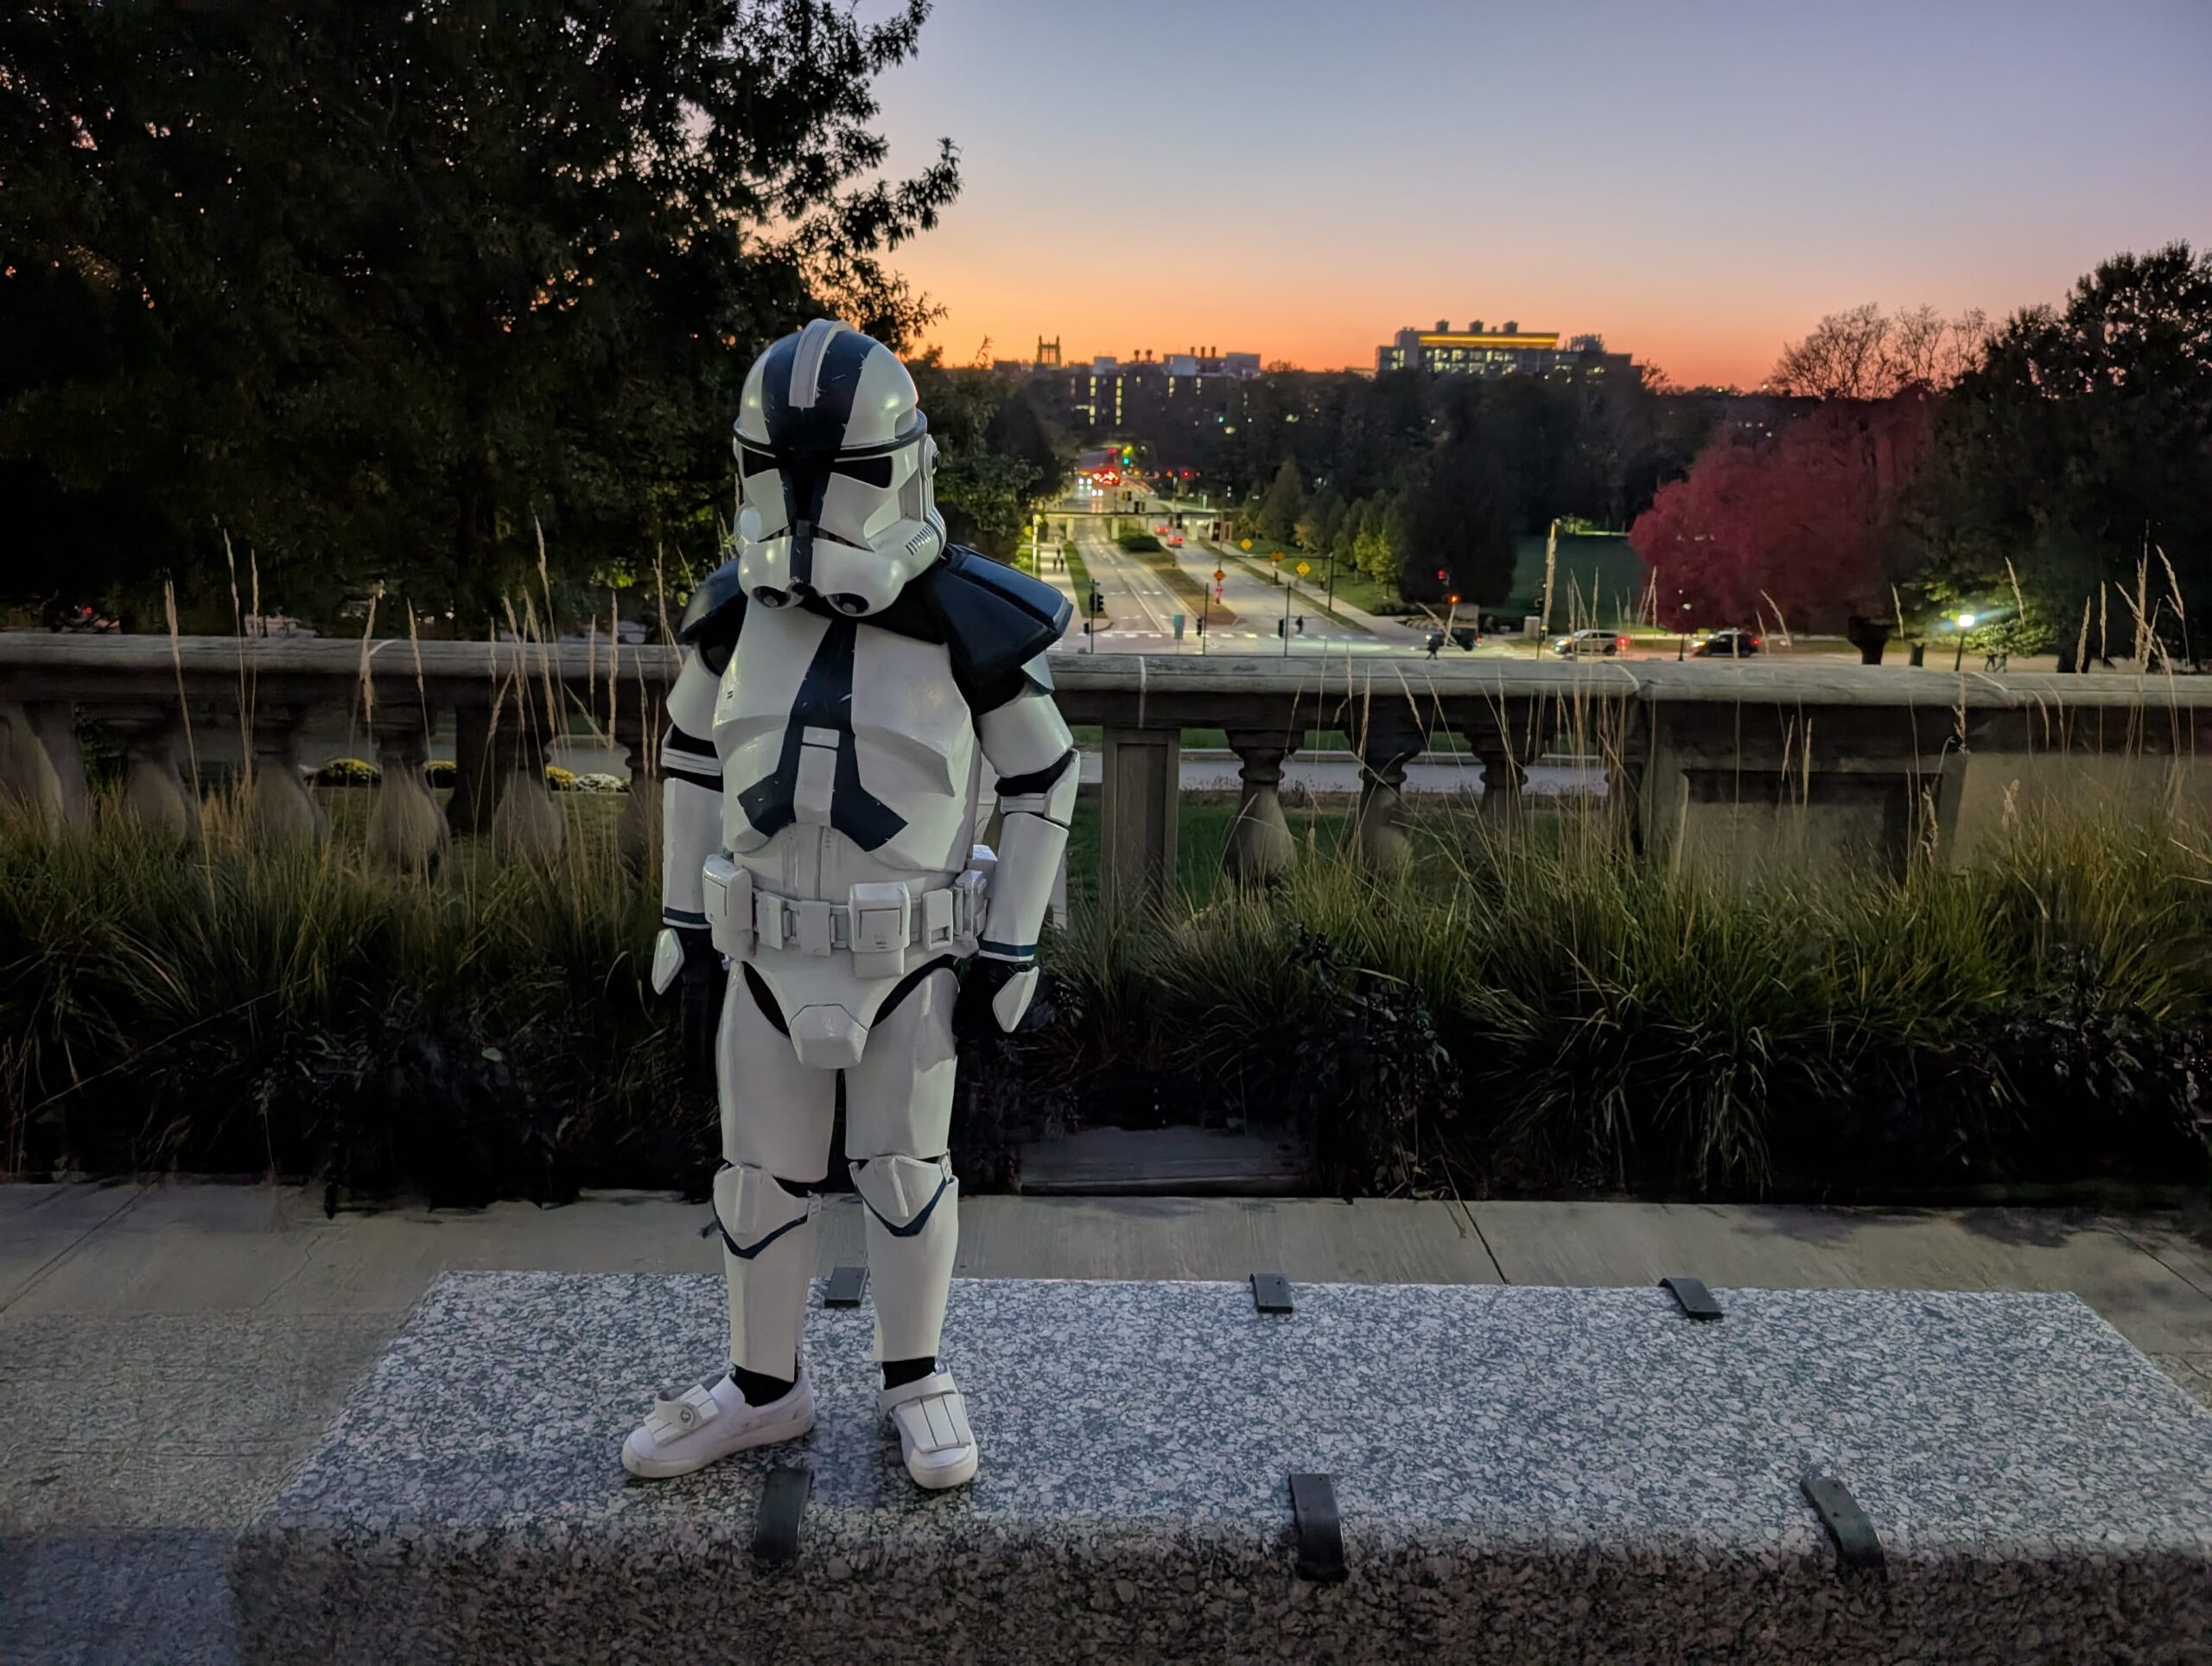
- Base Coats: A durable gloss white enamel formed the foundation, accented with masked detailing around the brow line, helmet teeth, and ear caps.
- Battle Damage: Using liquid latex prior to topcoating to peel away sections of paint for scratches and damage, combined with dark acrylic washes for a grunge look and field scuffs, we made the suit look like it survived the real clone war.
4. Harness and Fit
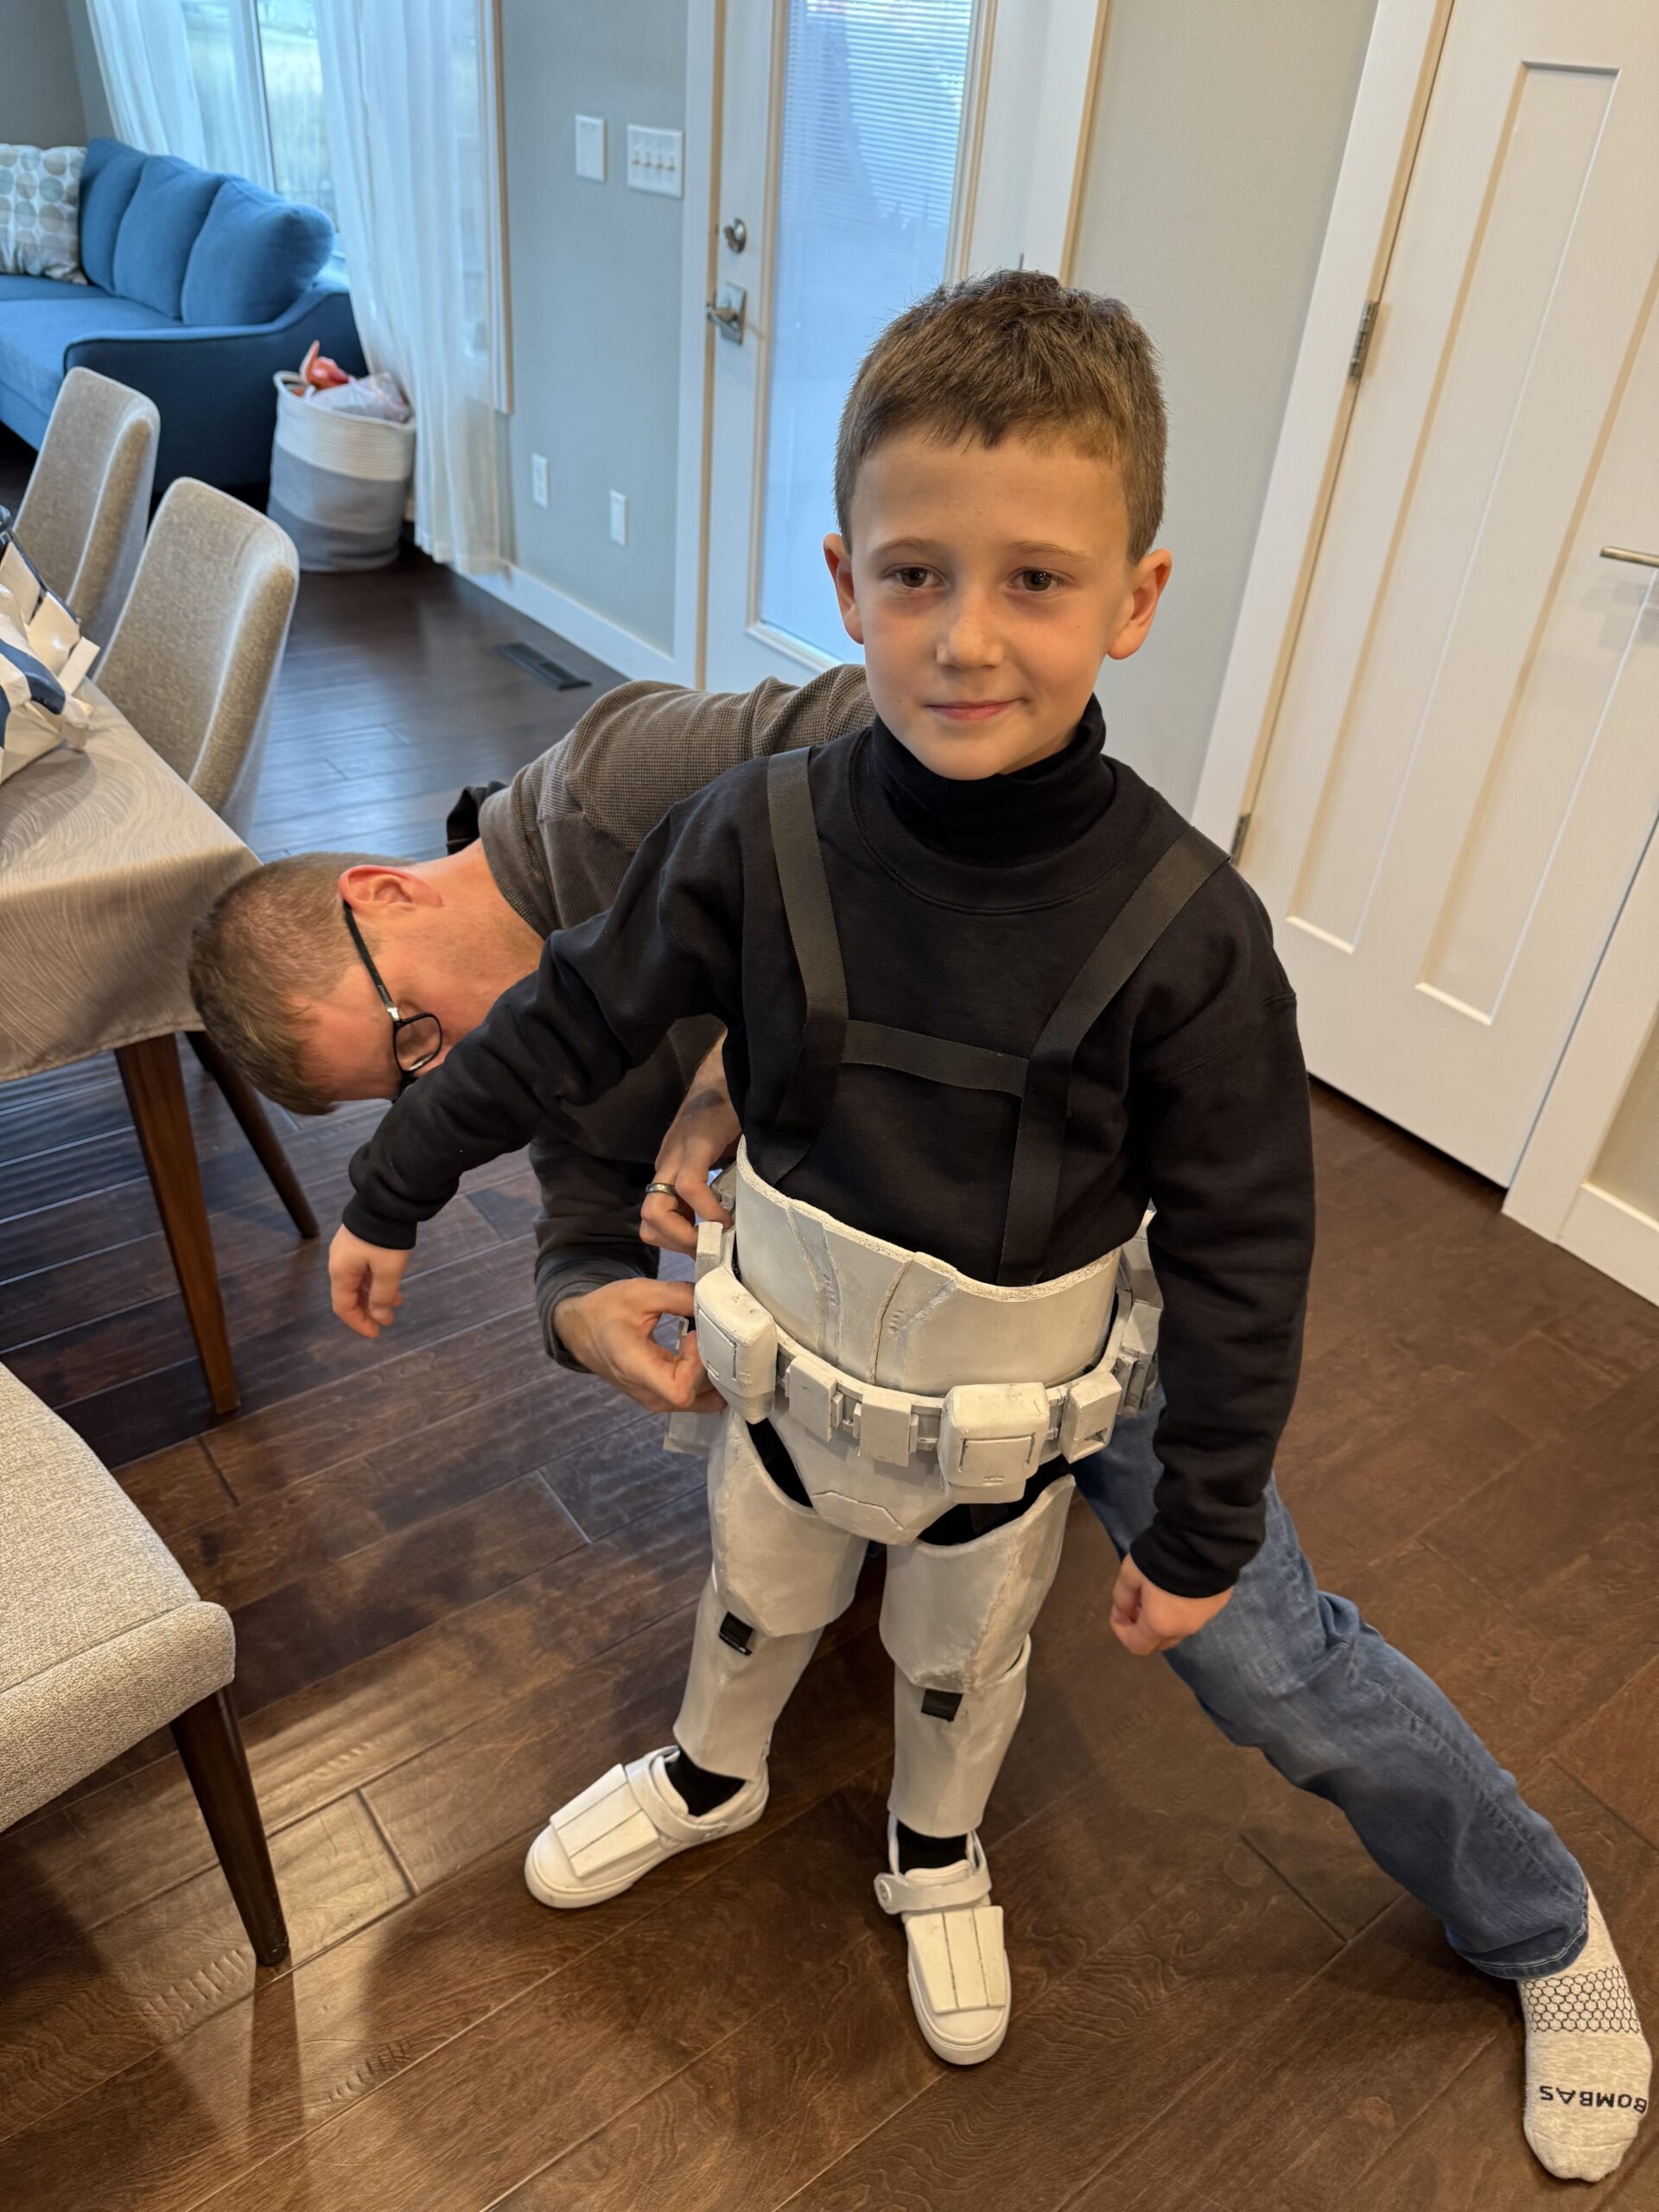
The hardest challenge was movement.
- The Harness: We built an internal webbing-and-elastic harness. Shoulder bells and bicep cuffs suspended from the shoulder harness via heavy-duty elastic webbing, letting the arms swing naturally.
- Clamshell Shins and Thighs: Leg plates were rigged with internal elastic bridges behind the knee joints, preventing the thigh and shin armor from colliding and pinching during a full stride.
The Big Takeaway: Combining a 3D-printed helmet with EVA foam body armor proved that mixing mediums is key. The real challenge was sanding, strapping, and weathering to make materials move and look like a real screen-accurate suit.
2026: The Mandalorian – Forging Beskar
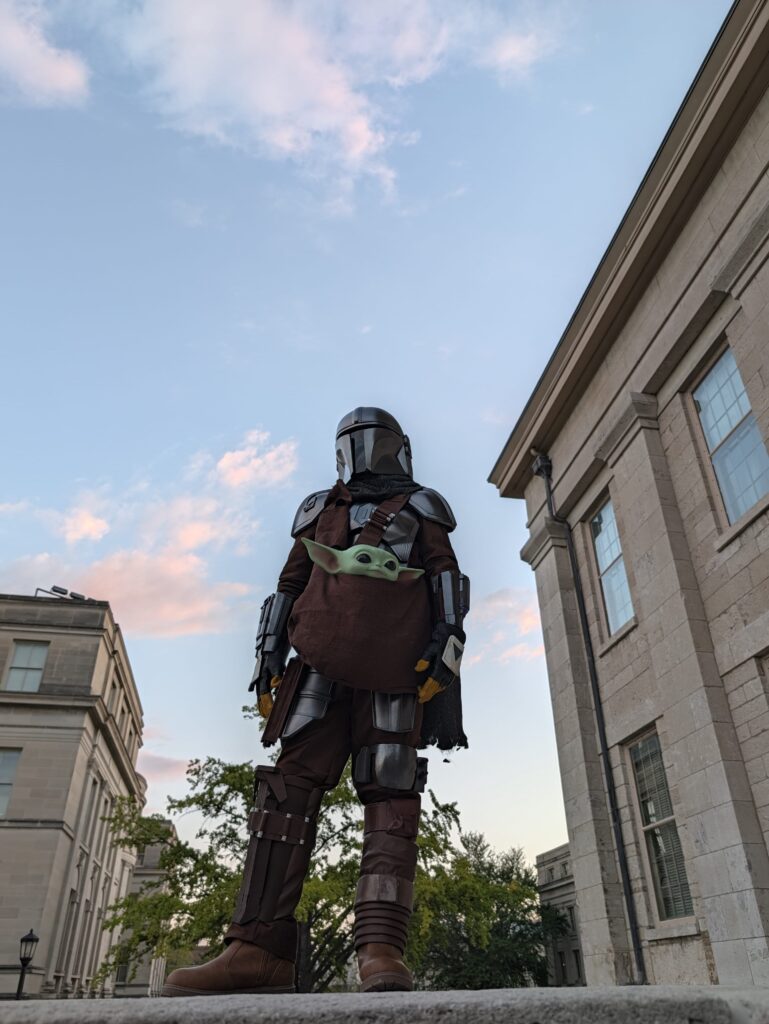
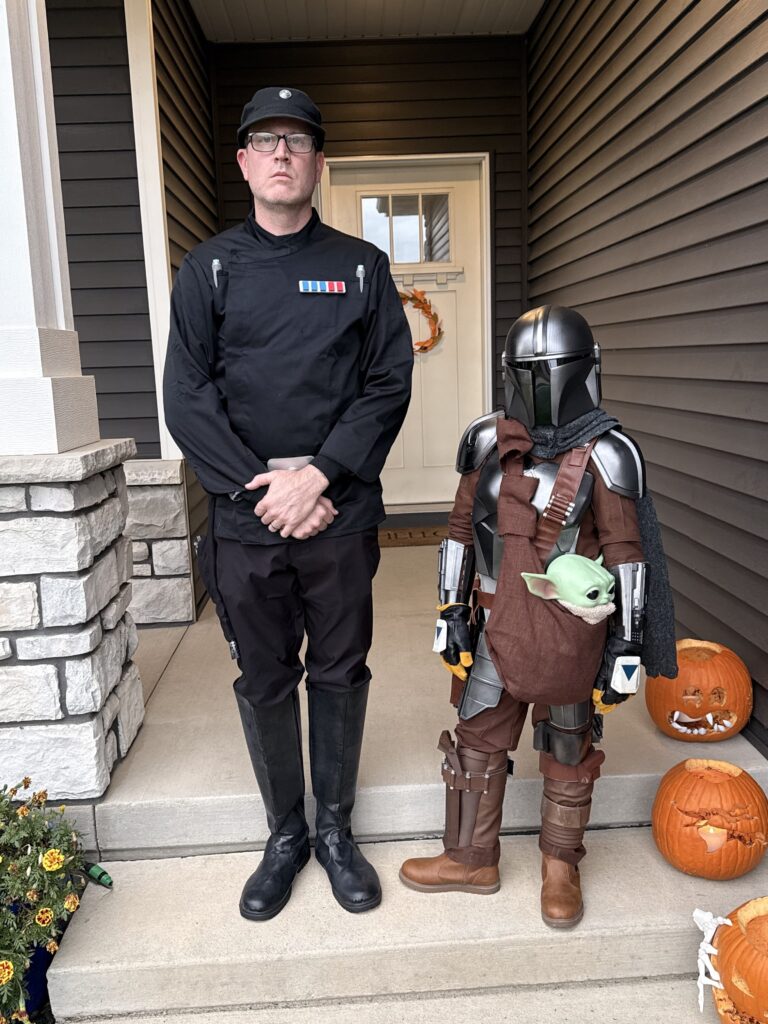
For year four, Owen set his sights on the definitive modern Star Wars icon: Din Djarin, the Mandalorian. Where the Clone Trooper was about utilitarian white plastic, the Mandalorian is all about forged metal.
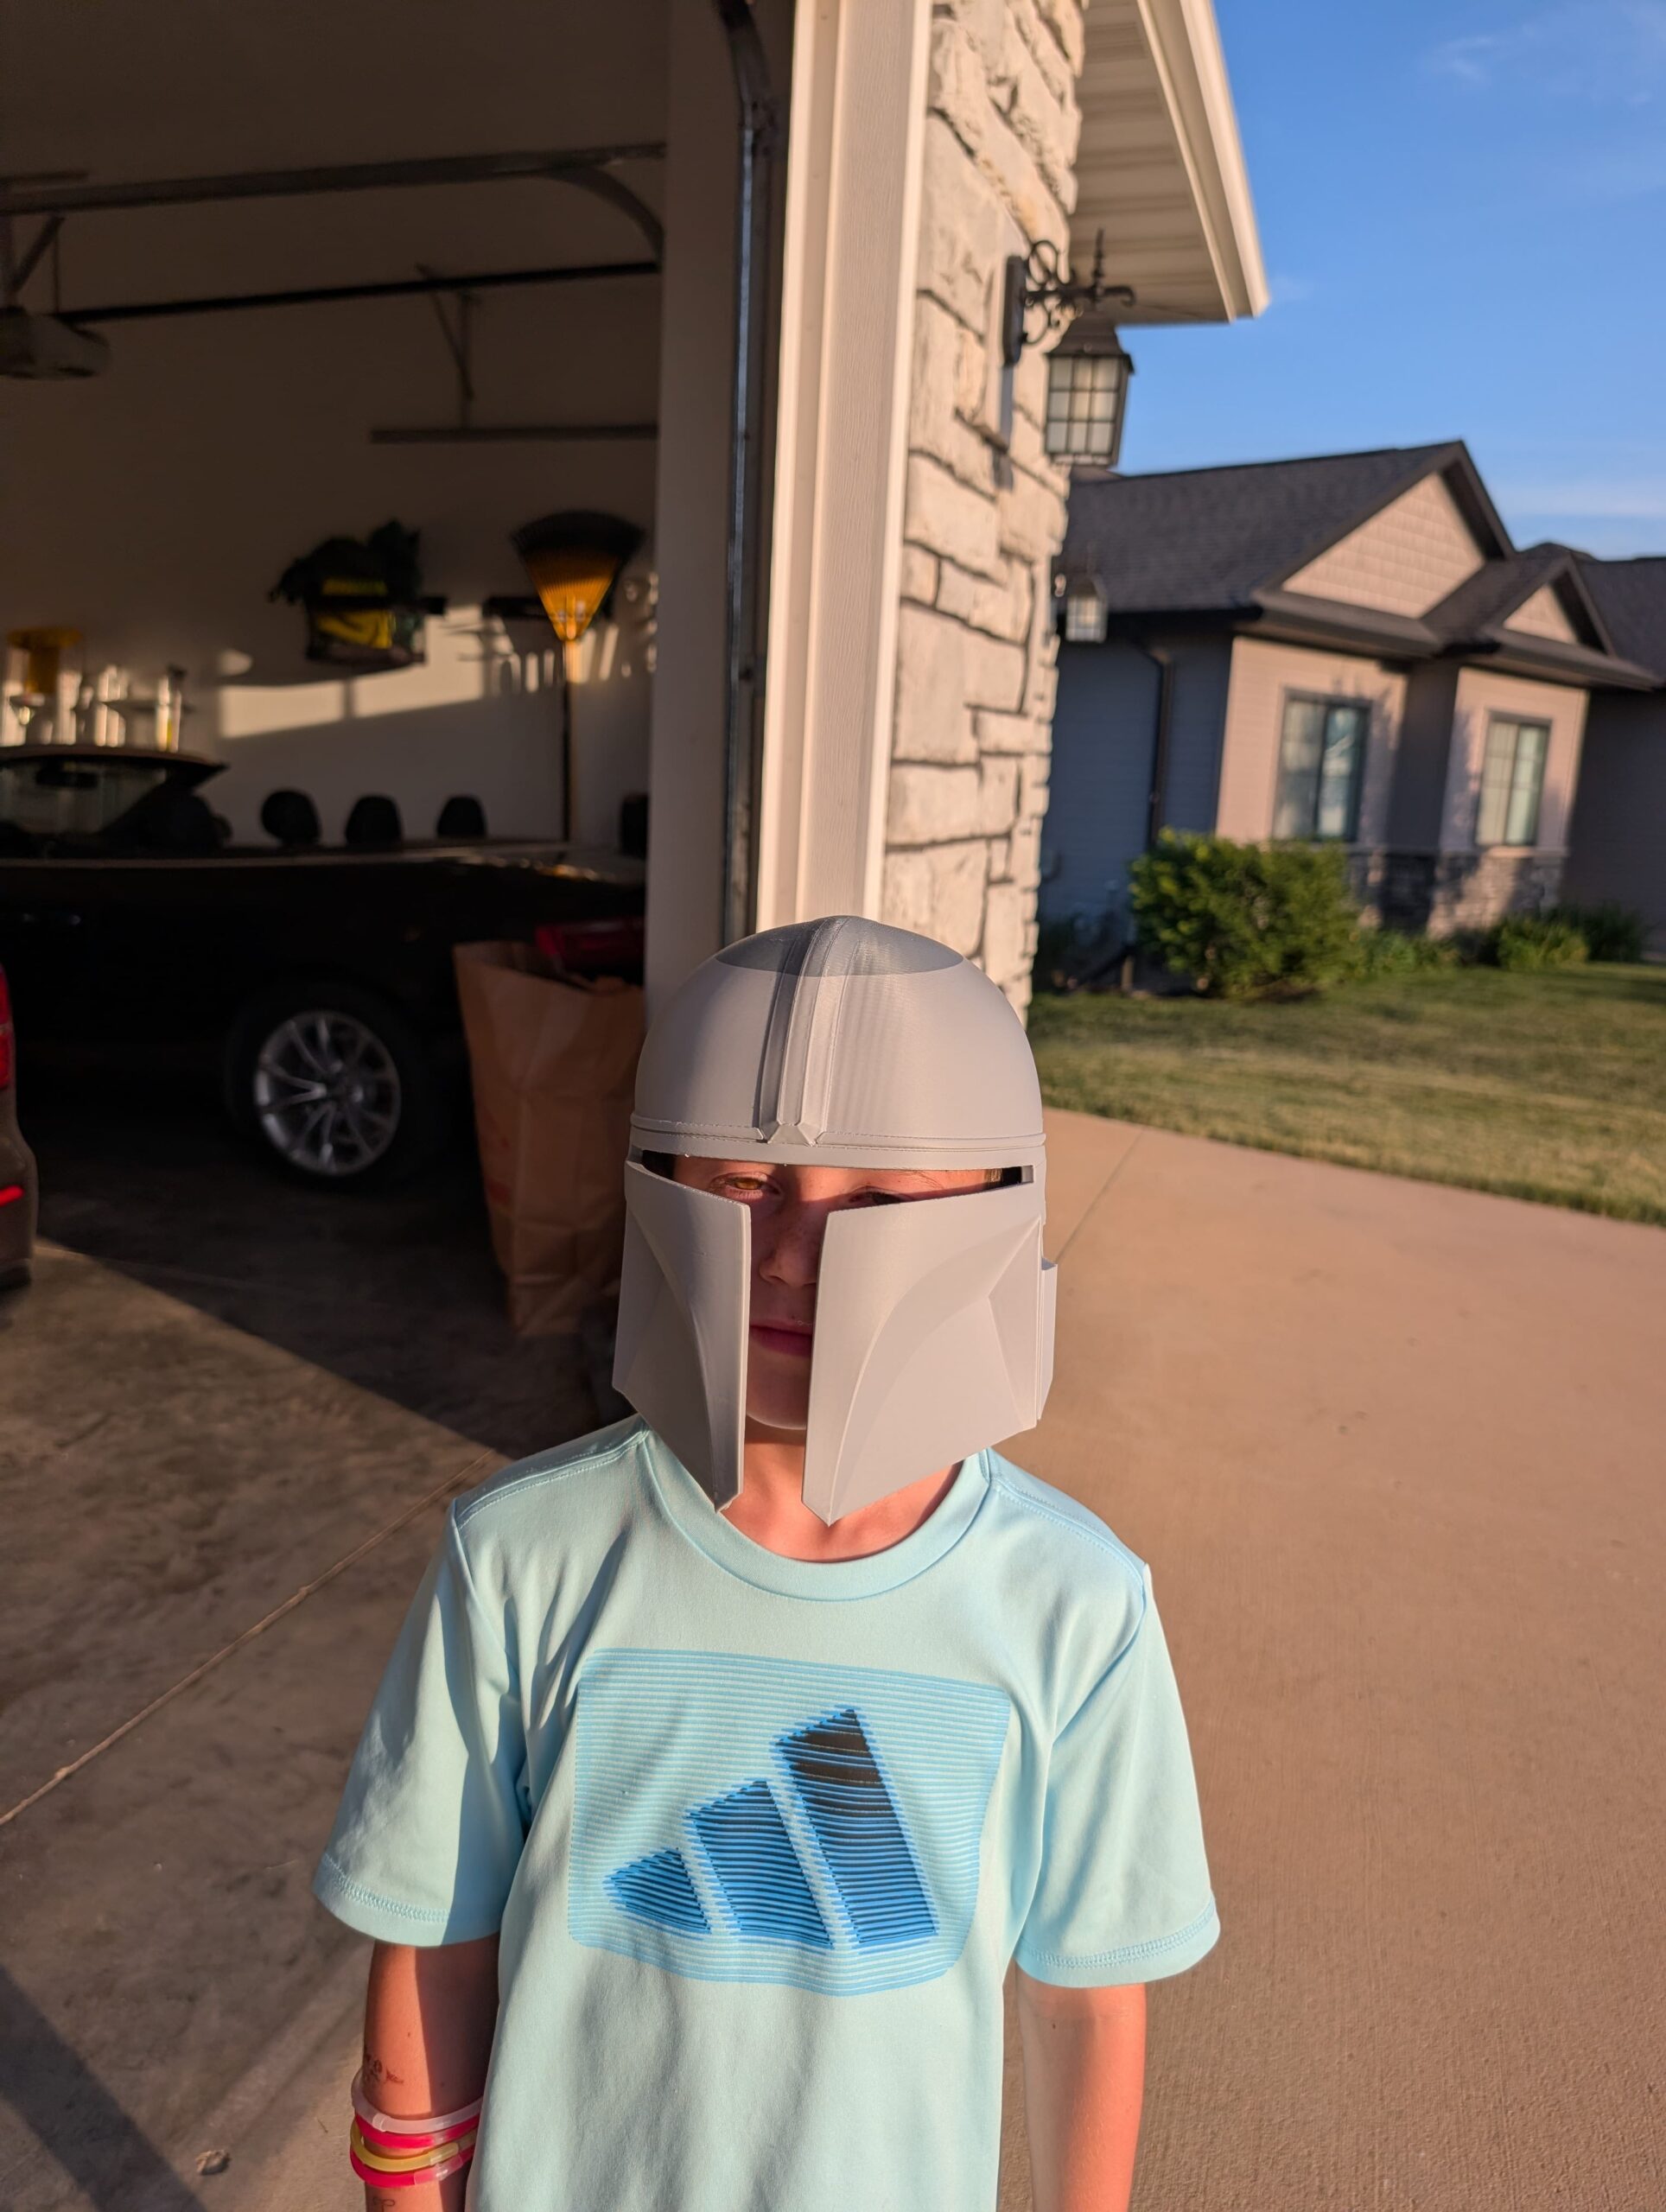
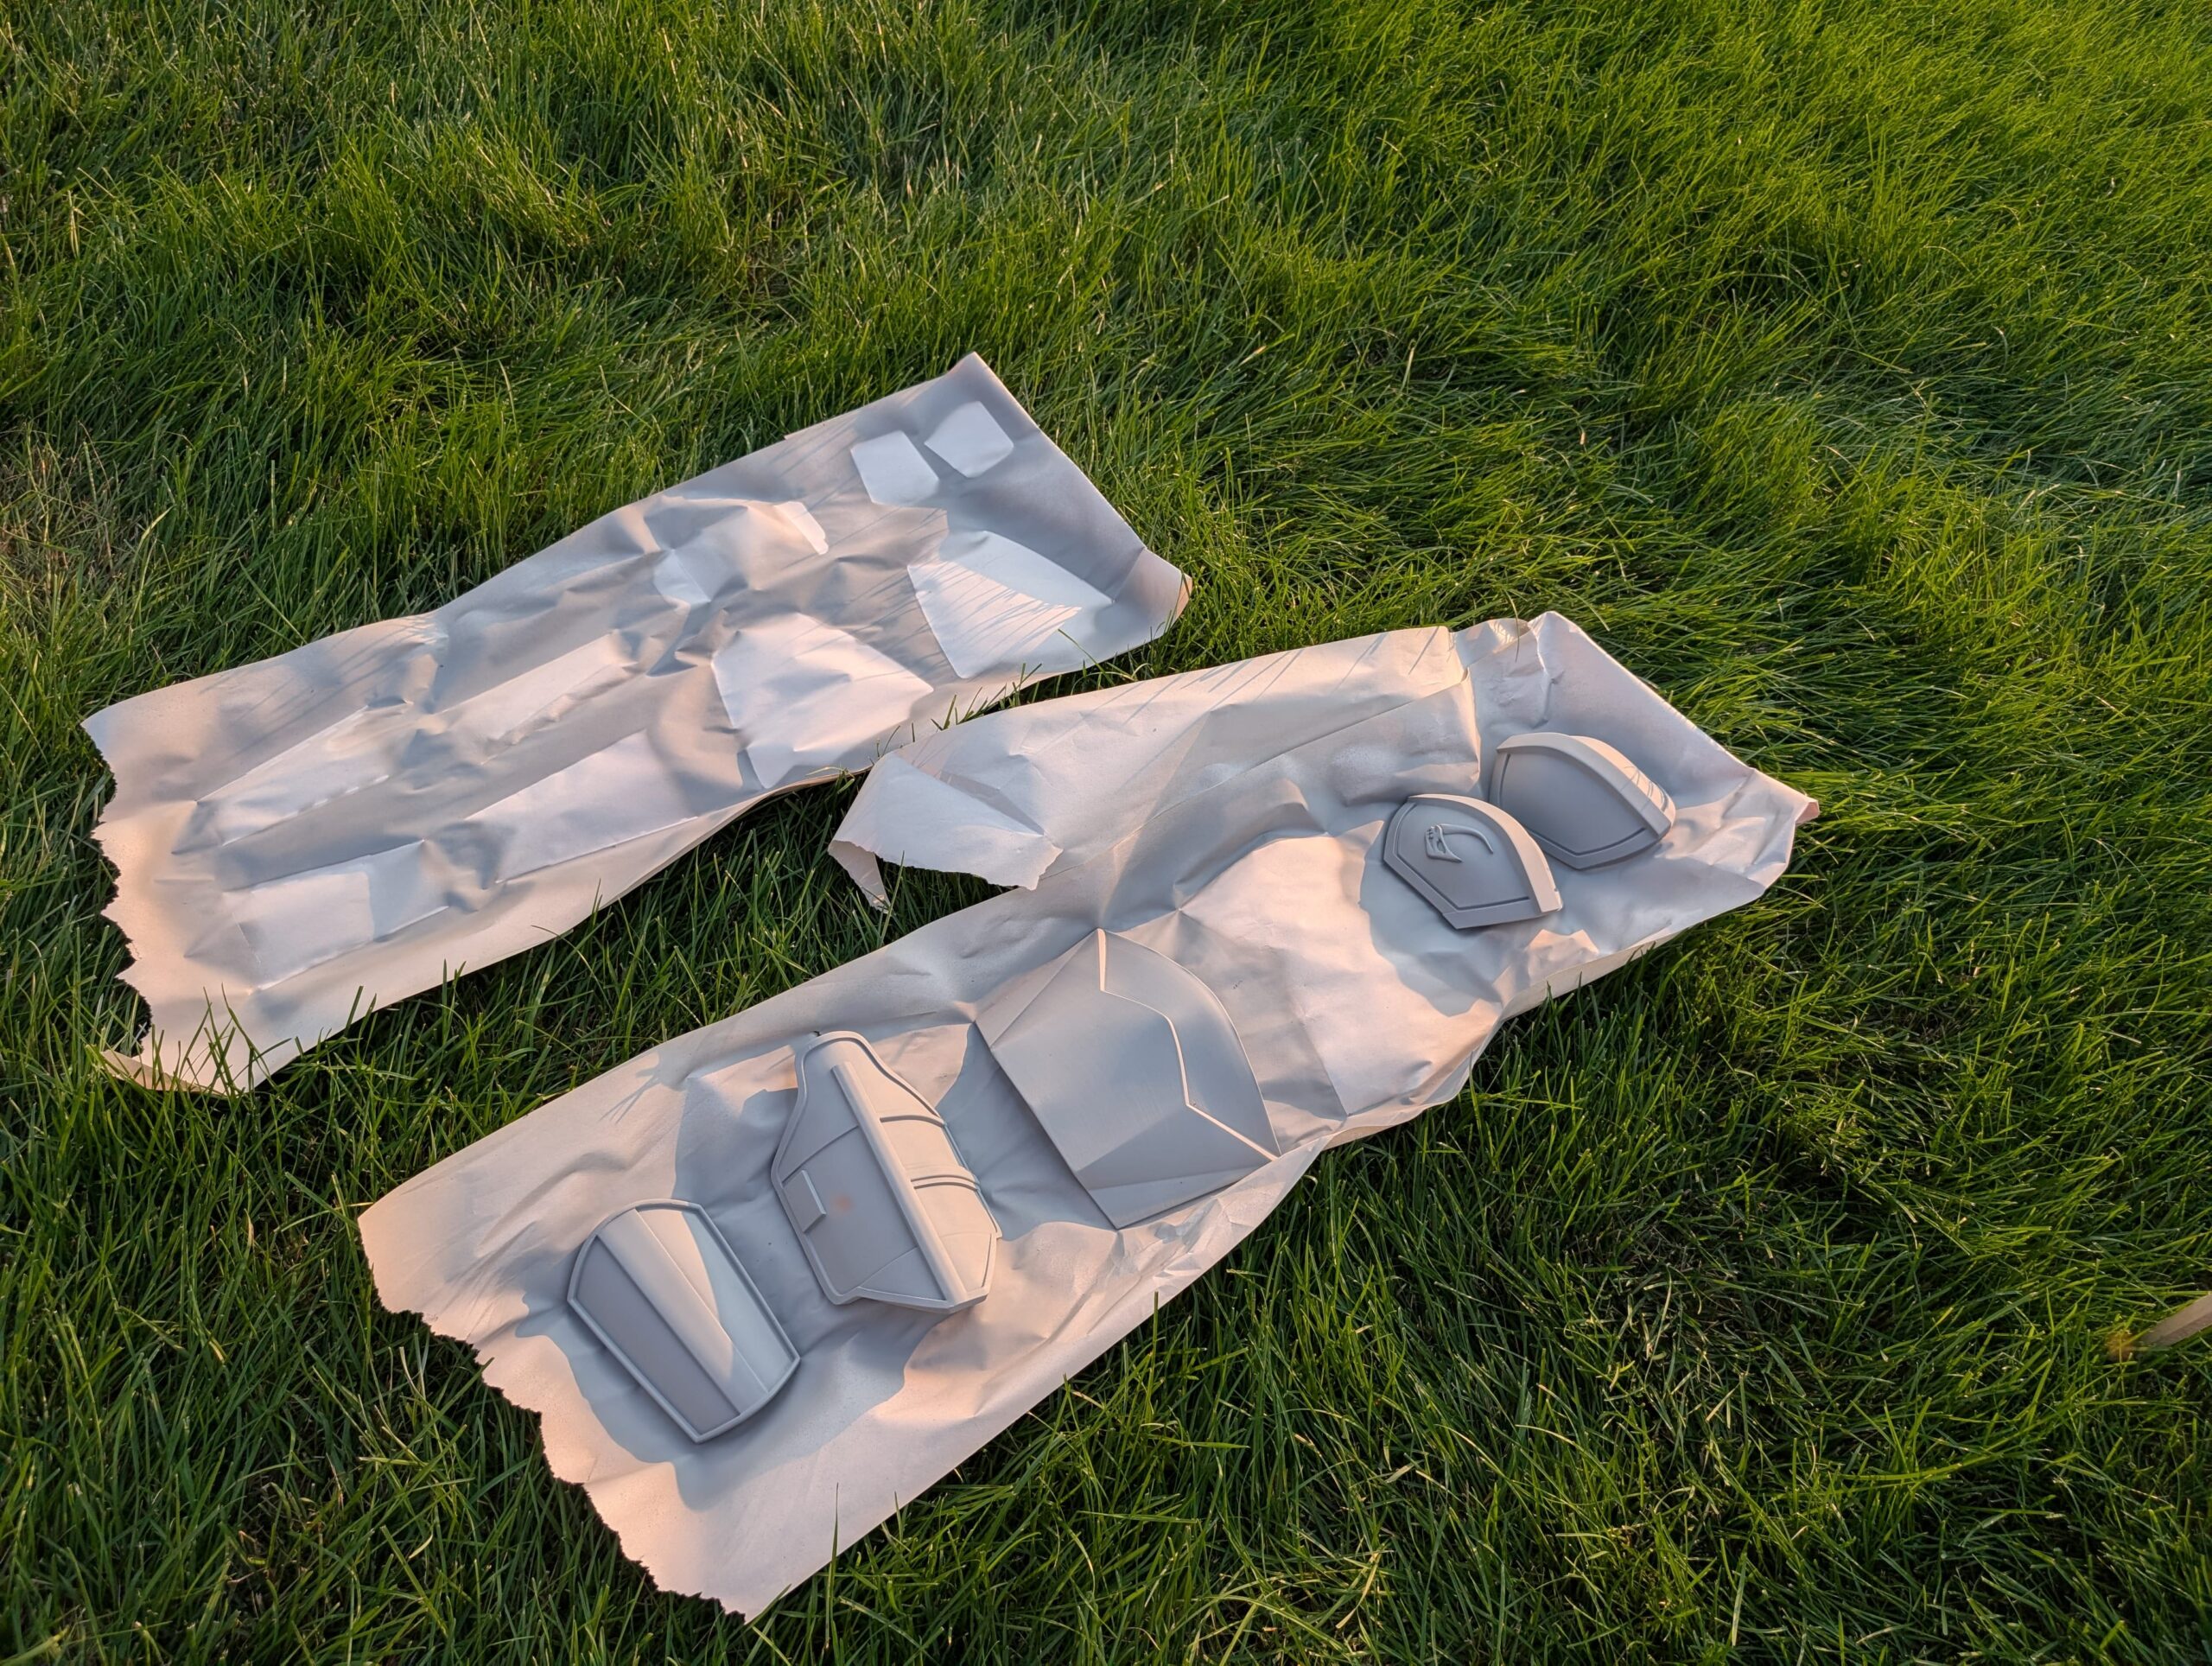
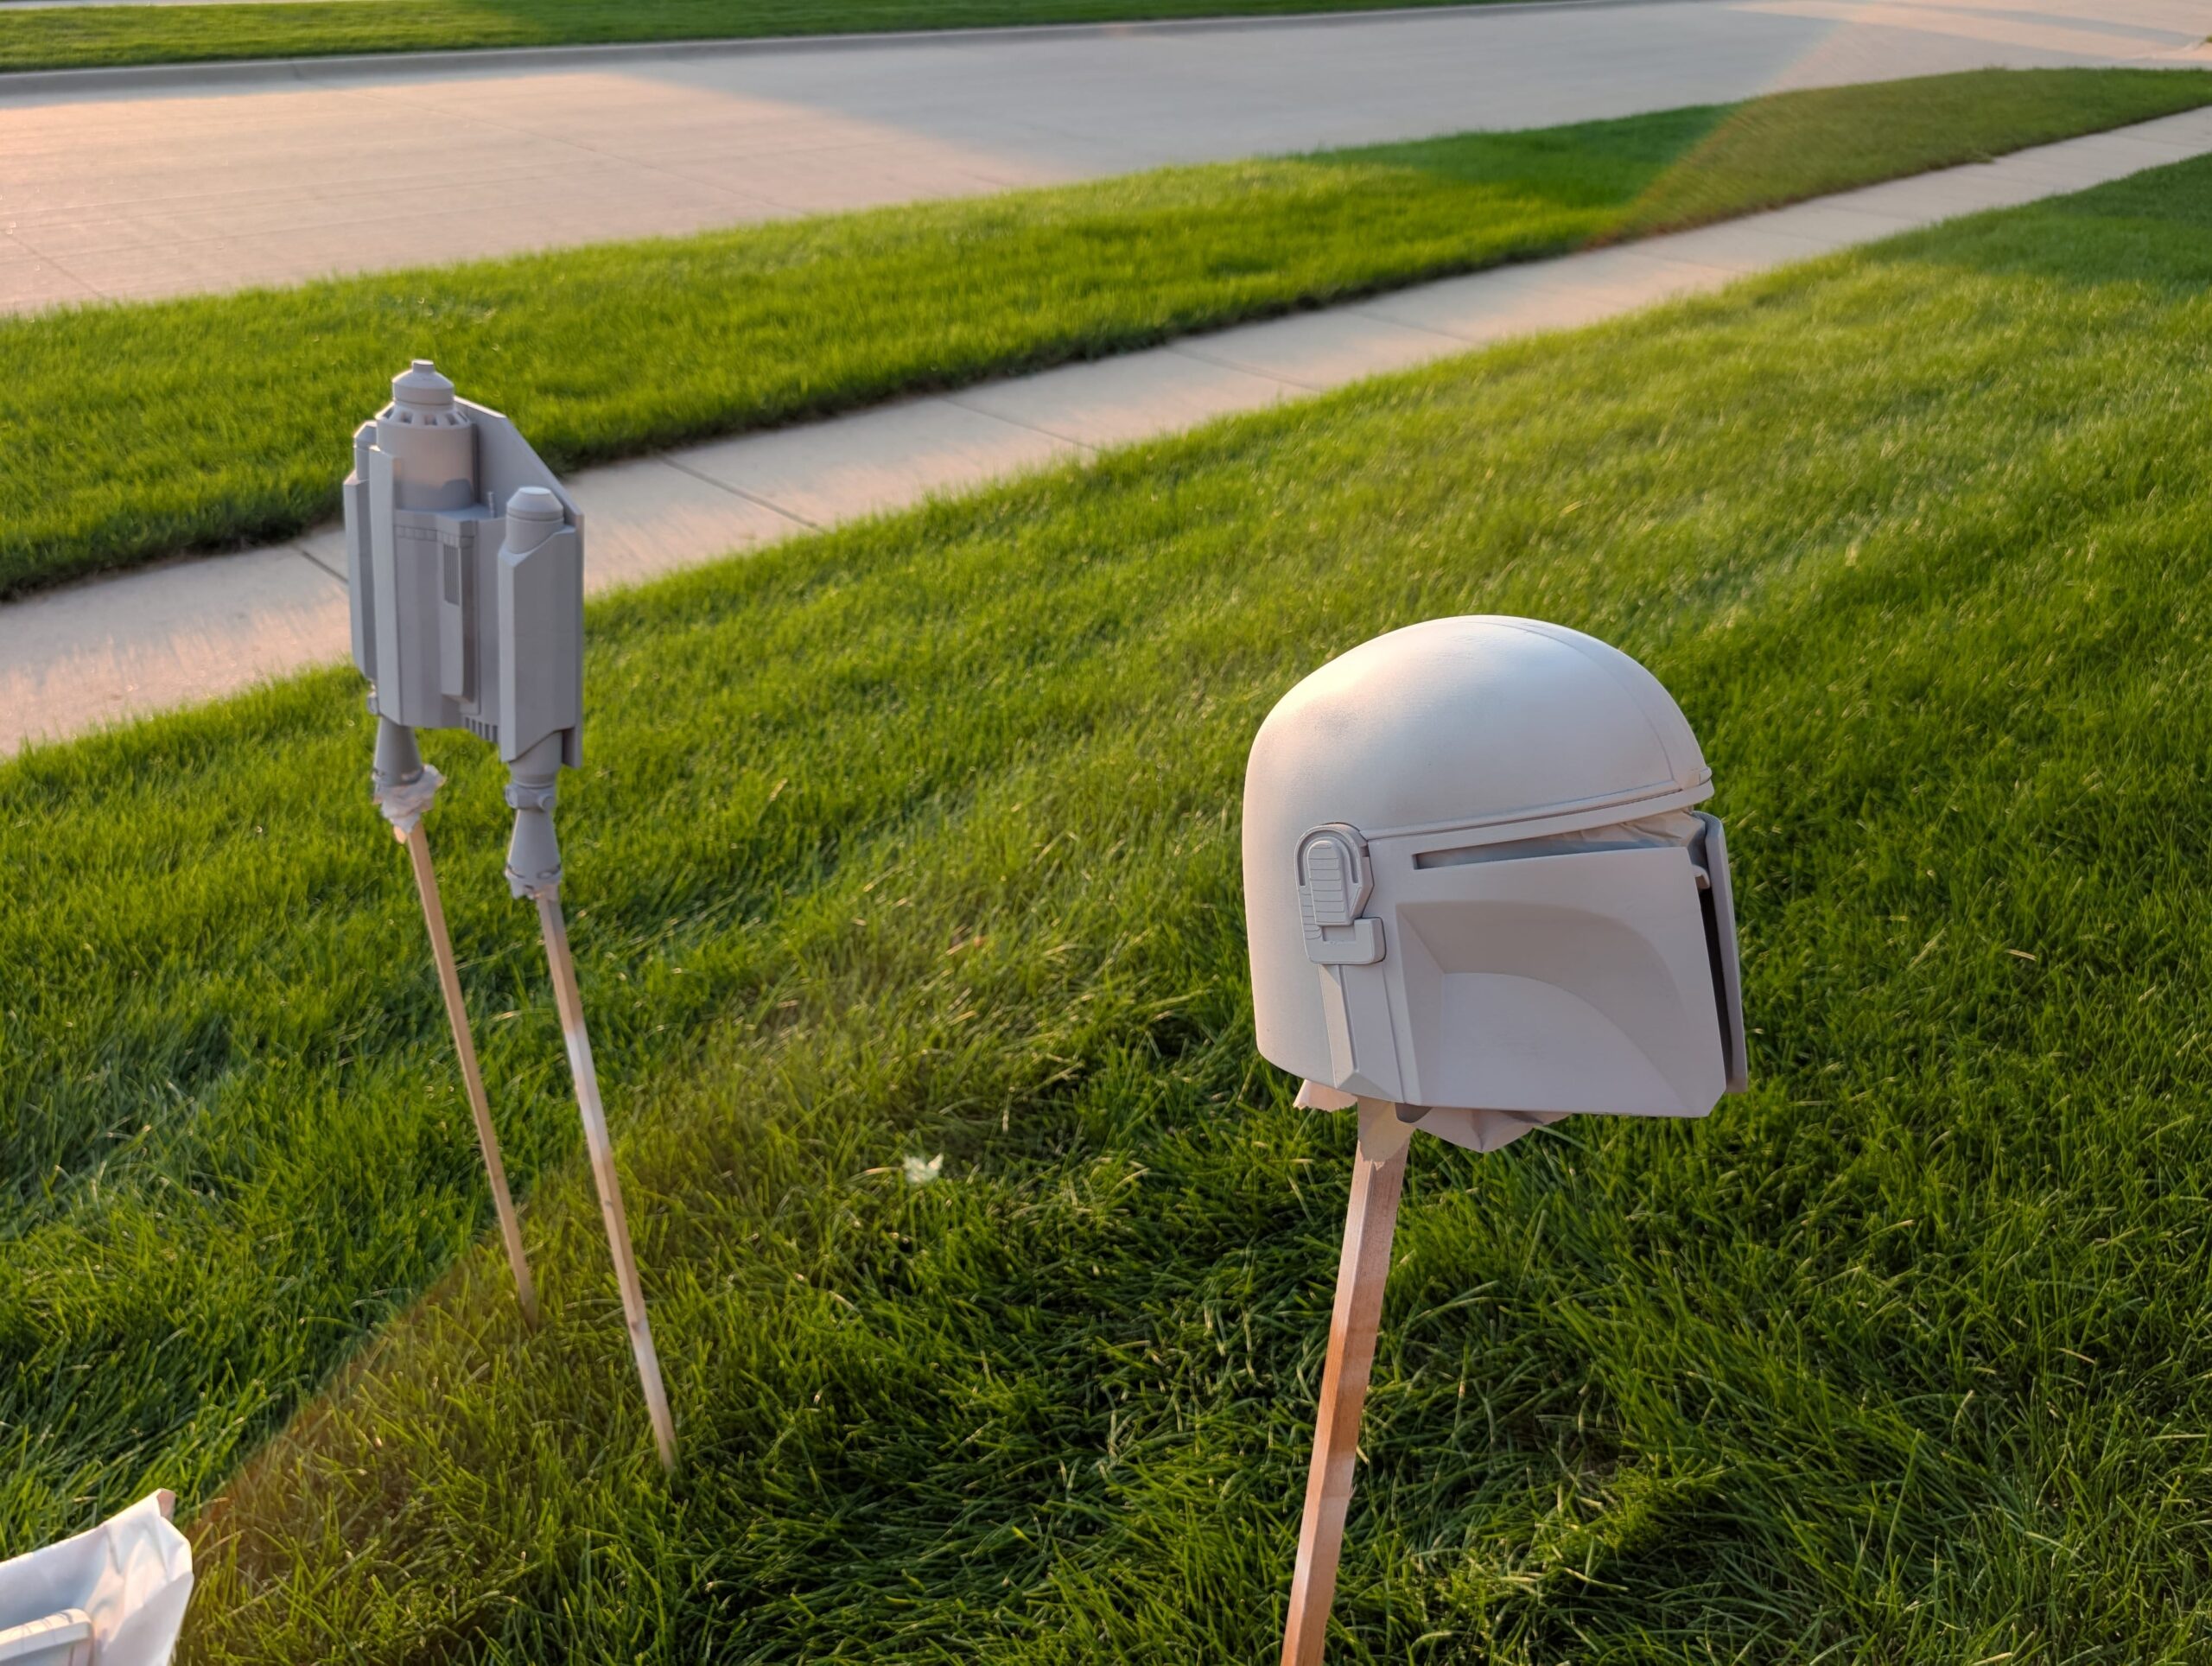
1. Printing the Bounty Hunter Arsenal
With an entire year of 3D printing experience behind us, we pushed print tolerances to the limit:
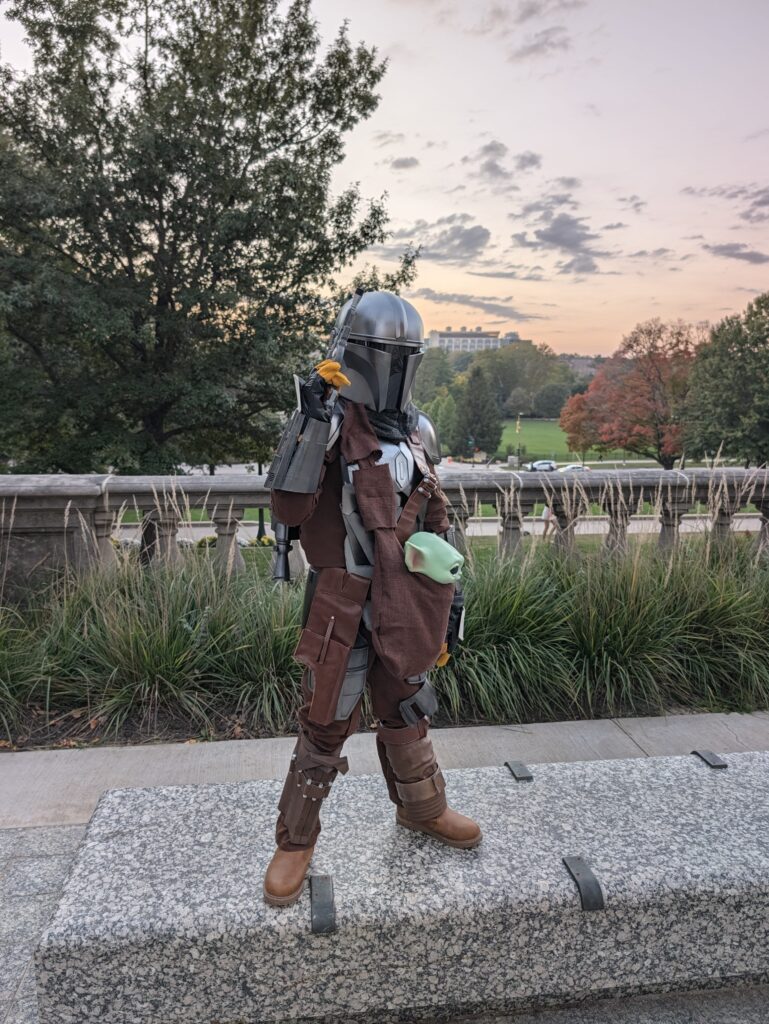
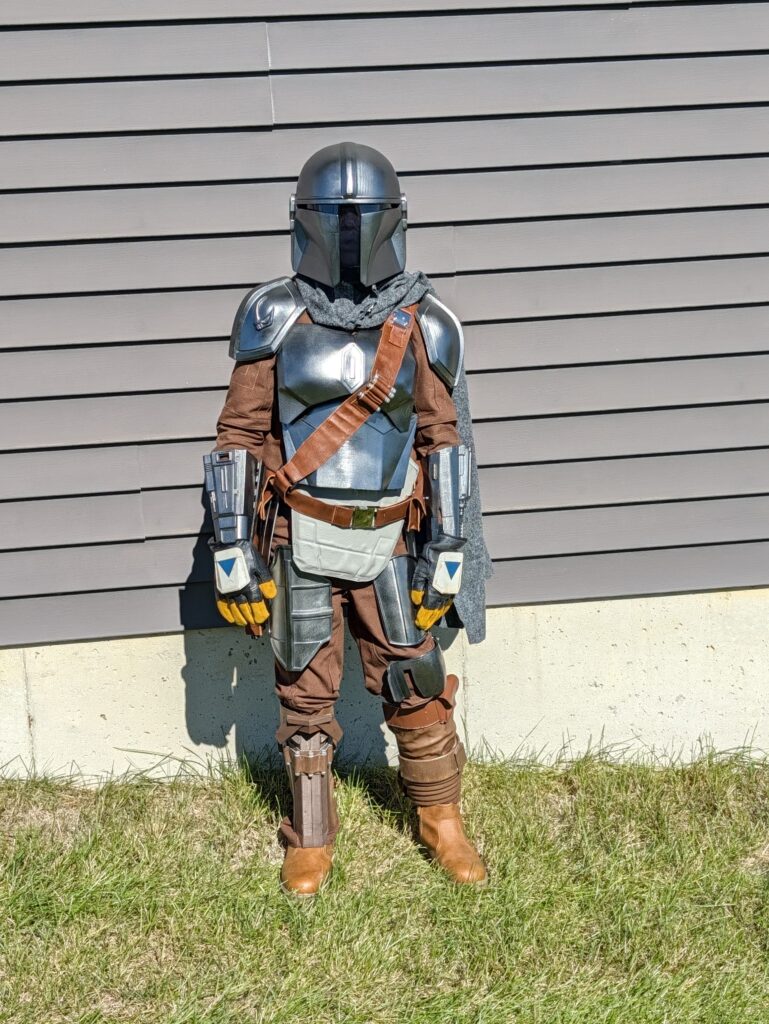
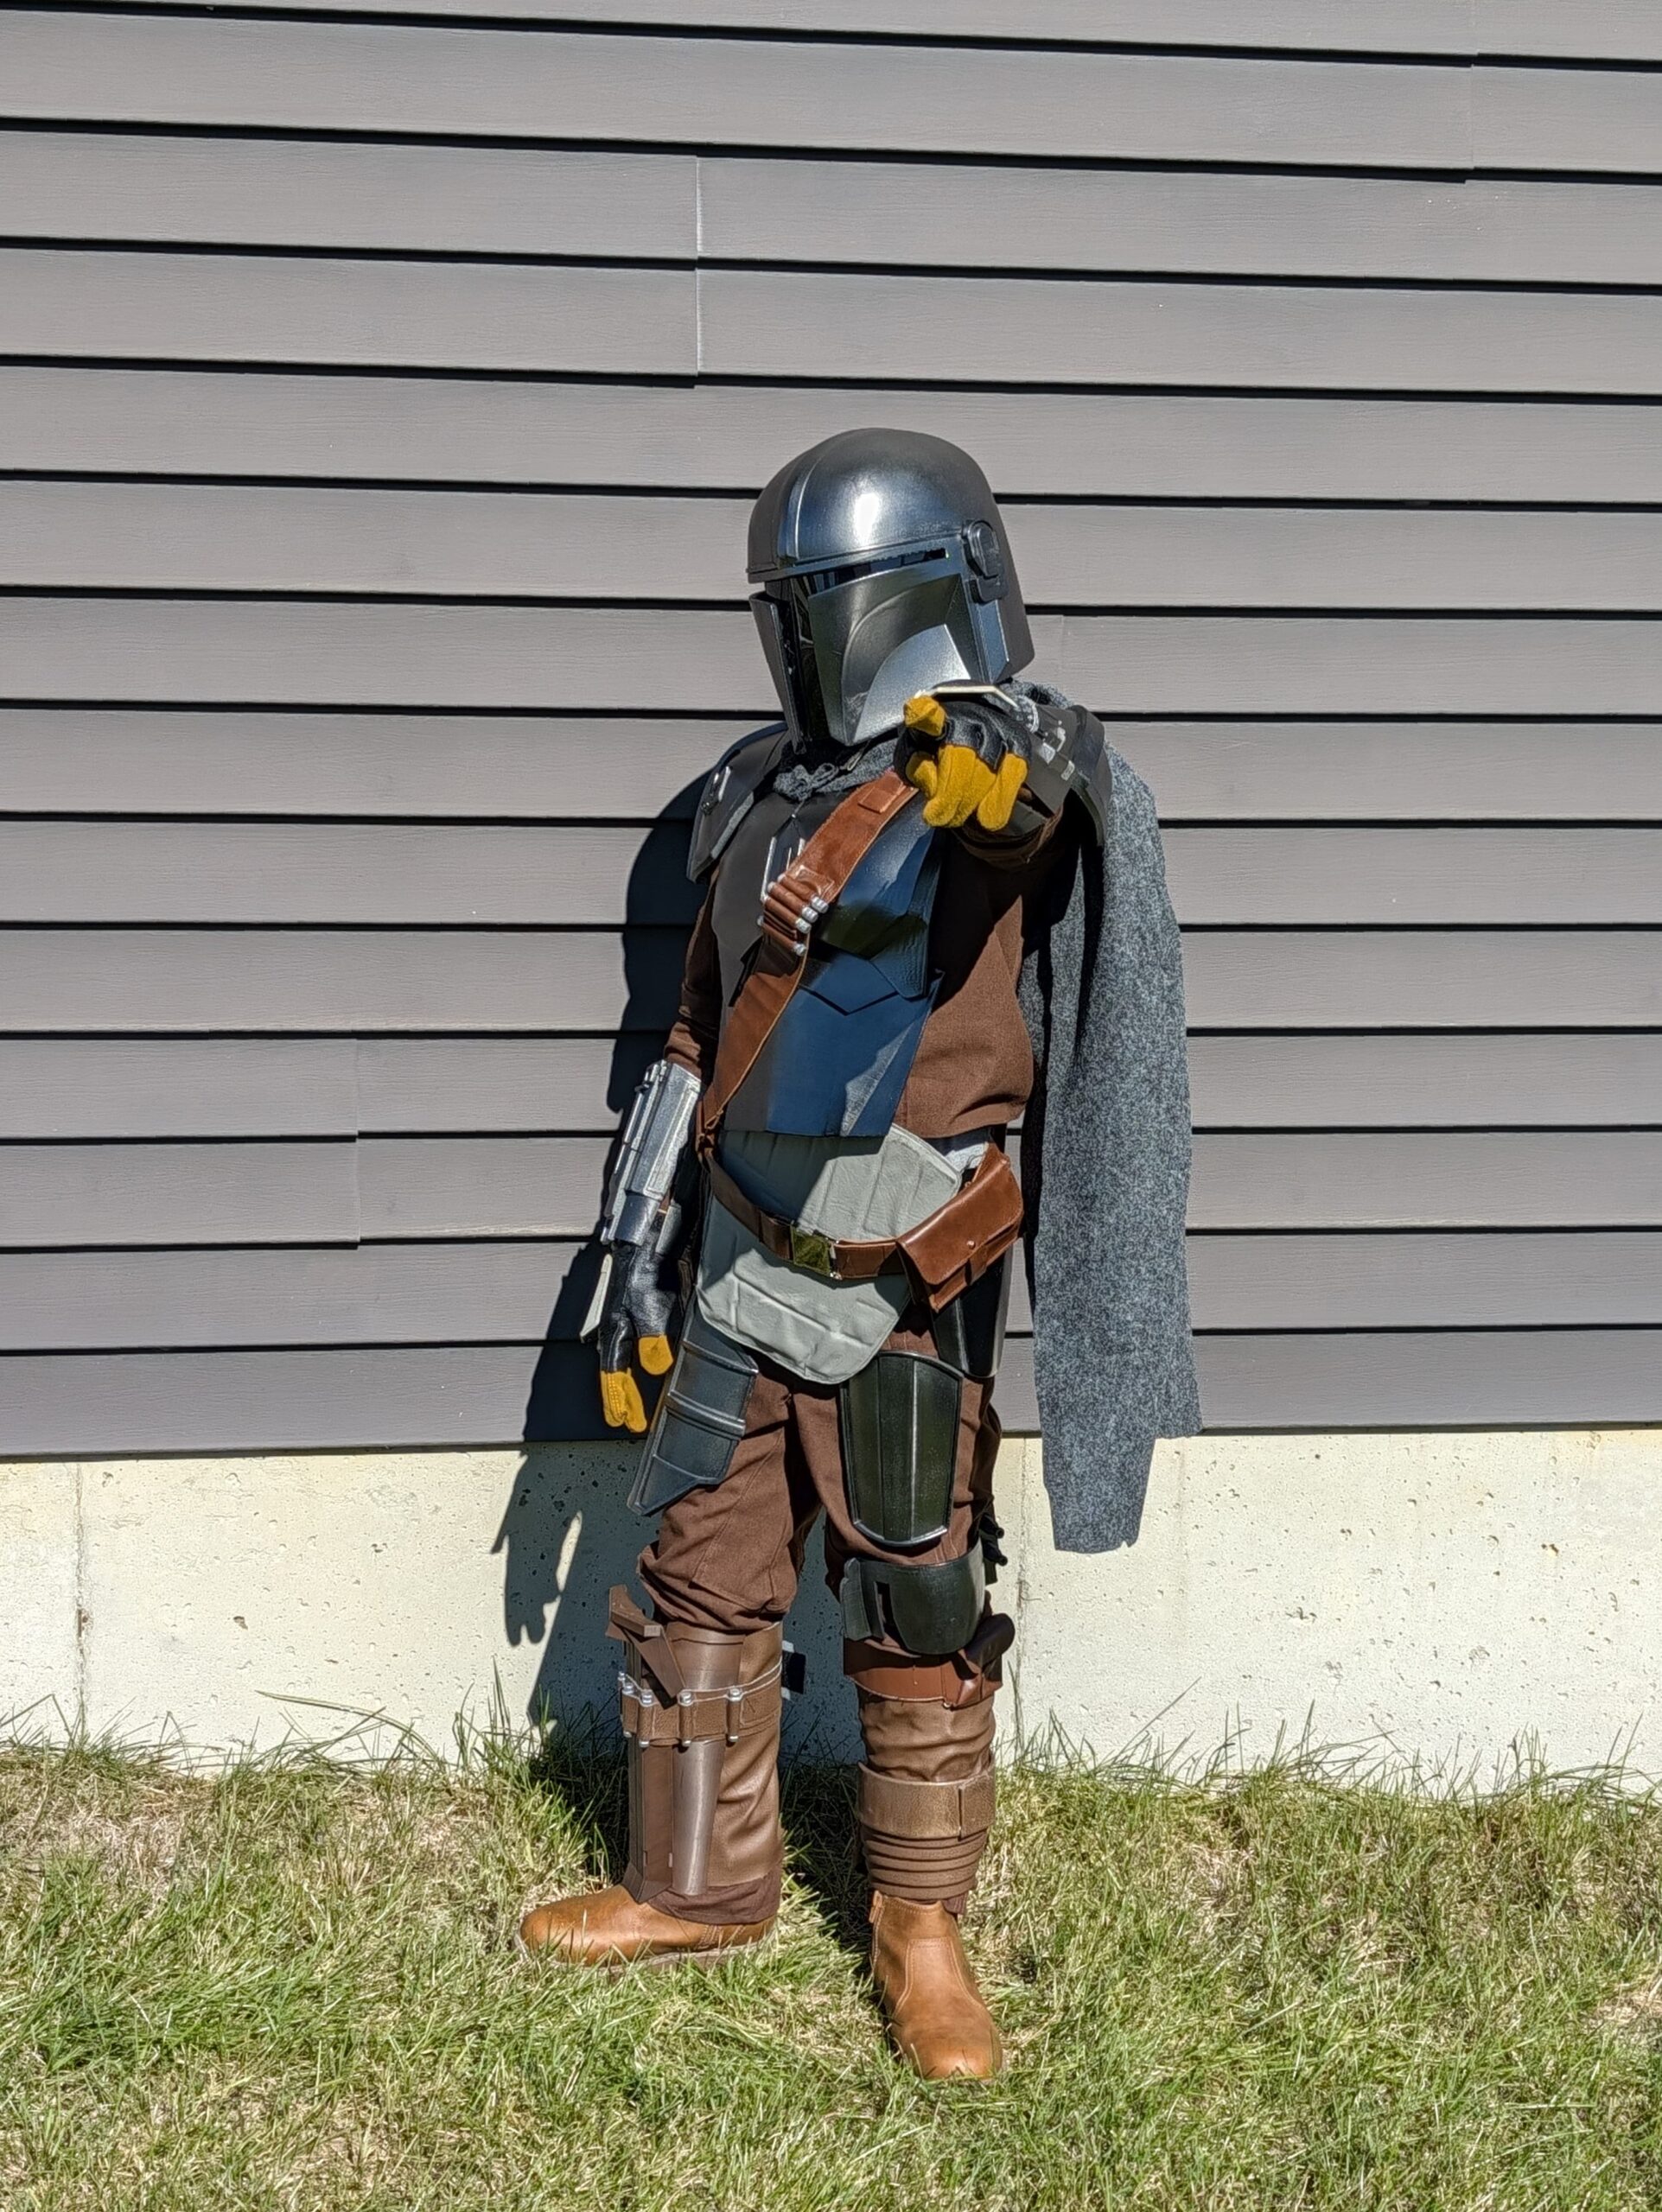
- The Full Plate Set: We printed the multi-piece chest plate, abdominal ab-plates, hand plates, shoulder pauldrons (complete with the Mudhorn signet), and right-thigh armor.
- Functional Gauntlets: Unlike flat armor plates, the gauntlets require curves, split clamshell closures, and integrated accessory slots for dart launchers and flamethrower nozzles. We even bought special lights from Etsy for the “whistling bird” missiles.
2. The Beskar Recipe: It’s All in the Base Coat
Anyone who has worked with chrome paints knows the harsh truth: metallic paint does not hide flaws; it magnifies them tenfold.
To make PLA plastic look like forged Mandalorian steel, we used a strict multi-tier finishing process:
- Automotive Filler Primer and Wet Sanding: Sanded from 220 grit progressively up to 1,000 grit until seams vanished.
- Deep Gloss Black Base: Sprayed a mirror-finish gloss black enamel base coat and let it fully cure. If the black base does not look glossy, the metallic layer will look like dull aluminum foil.
- Graphite Buffing and Metallic Lacquer: Applied ultra-fine metallic pigments buffed directly into the surface with cosmetic pads, producing that distinct Beskar shine.
- Protective Clear Coat: Lightly sealed to preserve the mirror reflectivity without dulling the metallic shine.
3. Rigging the Armor and Flight Suit
Hard armor floating over baggy clothes looks amateurish; it needs to sit tight and flush:
- Flight Suit Crafting: Pushing my sewing skills to their absolute limit, I constructed this piece using a kid’s flight suit pattern from Etsy, which was by far the most challenging build of all four costumes.
- Flak Vest and Modular Velcro: We mounted the chest and back plate directly to a tailored flak vest using industrial hook-and-loop tape, keeping the plates anchored relative to each other while moving.
- The Leather Loadout: We built the cross-body bandolier by altering one from AliExpress with 3D-printed cartridge cylinders and a hip holster (and 3D-printed blaster), giving the suit authentic tactical weight.
- The Asymmetrical Cape: The weathered grey cape was custom-draped over the right shoulder and fastened beneath the pauldron with velcro so it would not drag or catch under the holster.
4. This is the Way: Deployment
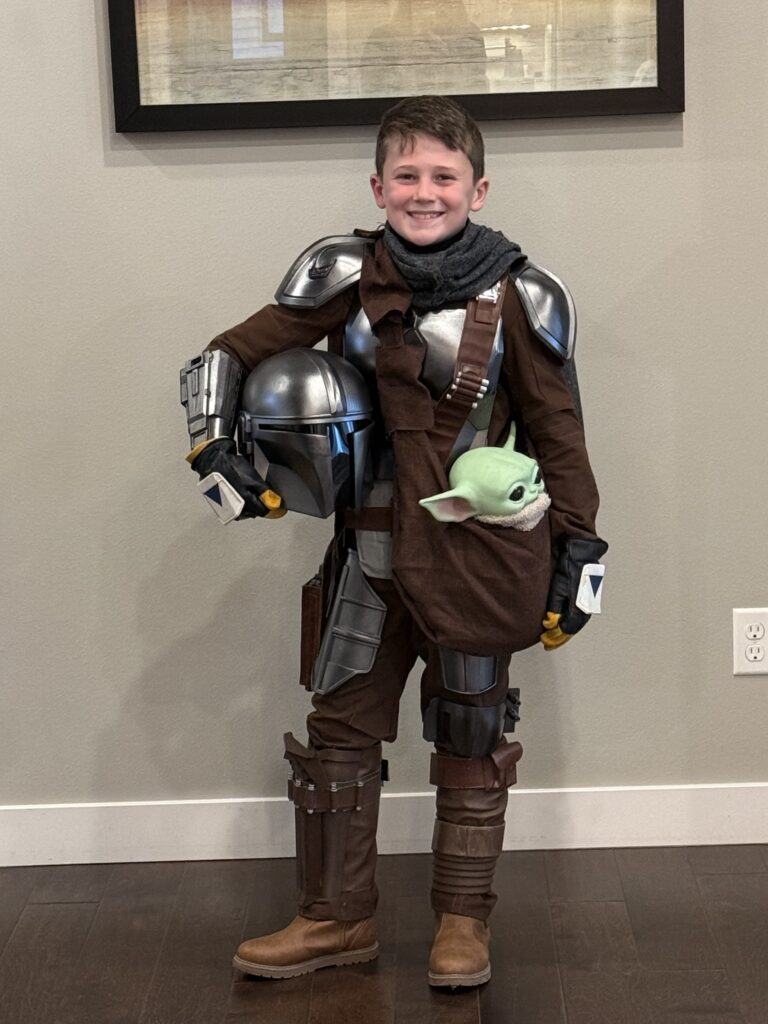
On Halloween night, Owen completed the ensemble with the ultimate sidekick: Grogu in his pouch (which doubled as a candy bag). From the metallic gleam of the helmet visor under streetlights to the weathered hem of the cape, the suit looked like it had stepped straight off Nevarro.
Looking back over the last four years, this journey has been about far more than just building costumes for Halloween night. What started as a simple project grew into a shared passion that pushed our creativity, taught us new skills, and gave us lasting memories in the workshop together—not to mention all the compliments we received while trick-or-treating. There is nothing quite like watching your child step into a character you helped bring to life together, and I can’t wait to see what galaxy we explore next.